Flexible Webhook Quickstart
This example creates a Webhook that tracks large USDC transfers (Whale Transfer) using the ERC-20 Transfer Stream on Ethereum Mainnet.
For an overview of Flexible Webhook concepts and key features, see Flexible Webhook Overview.
1. Prerequisites
1-1. Sign Up for Nodit Console
If you are new to Nodit, visit the link below to create a Nodit Console account.
1-2. Obtain a Webhook Listener Endpoint
You need a listener server to receive Webhook notifications. In a production environment you would build this yourself, but for this example you can use a third-party service.
-
Postman Mockserver: Provides a temporary URL to receive Webhook requests.
-
webhook.site: Captures and displays Webhook data in real time without a separate server. The free plan is limited to 50 received requests.
- ▶︎ webhook.site
-
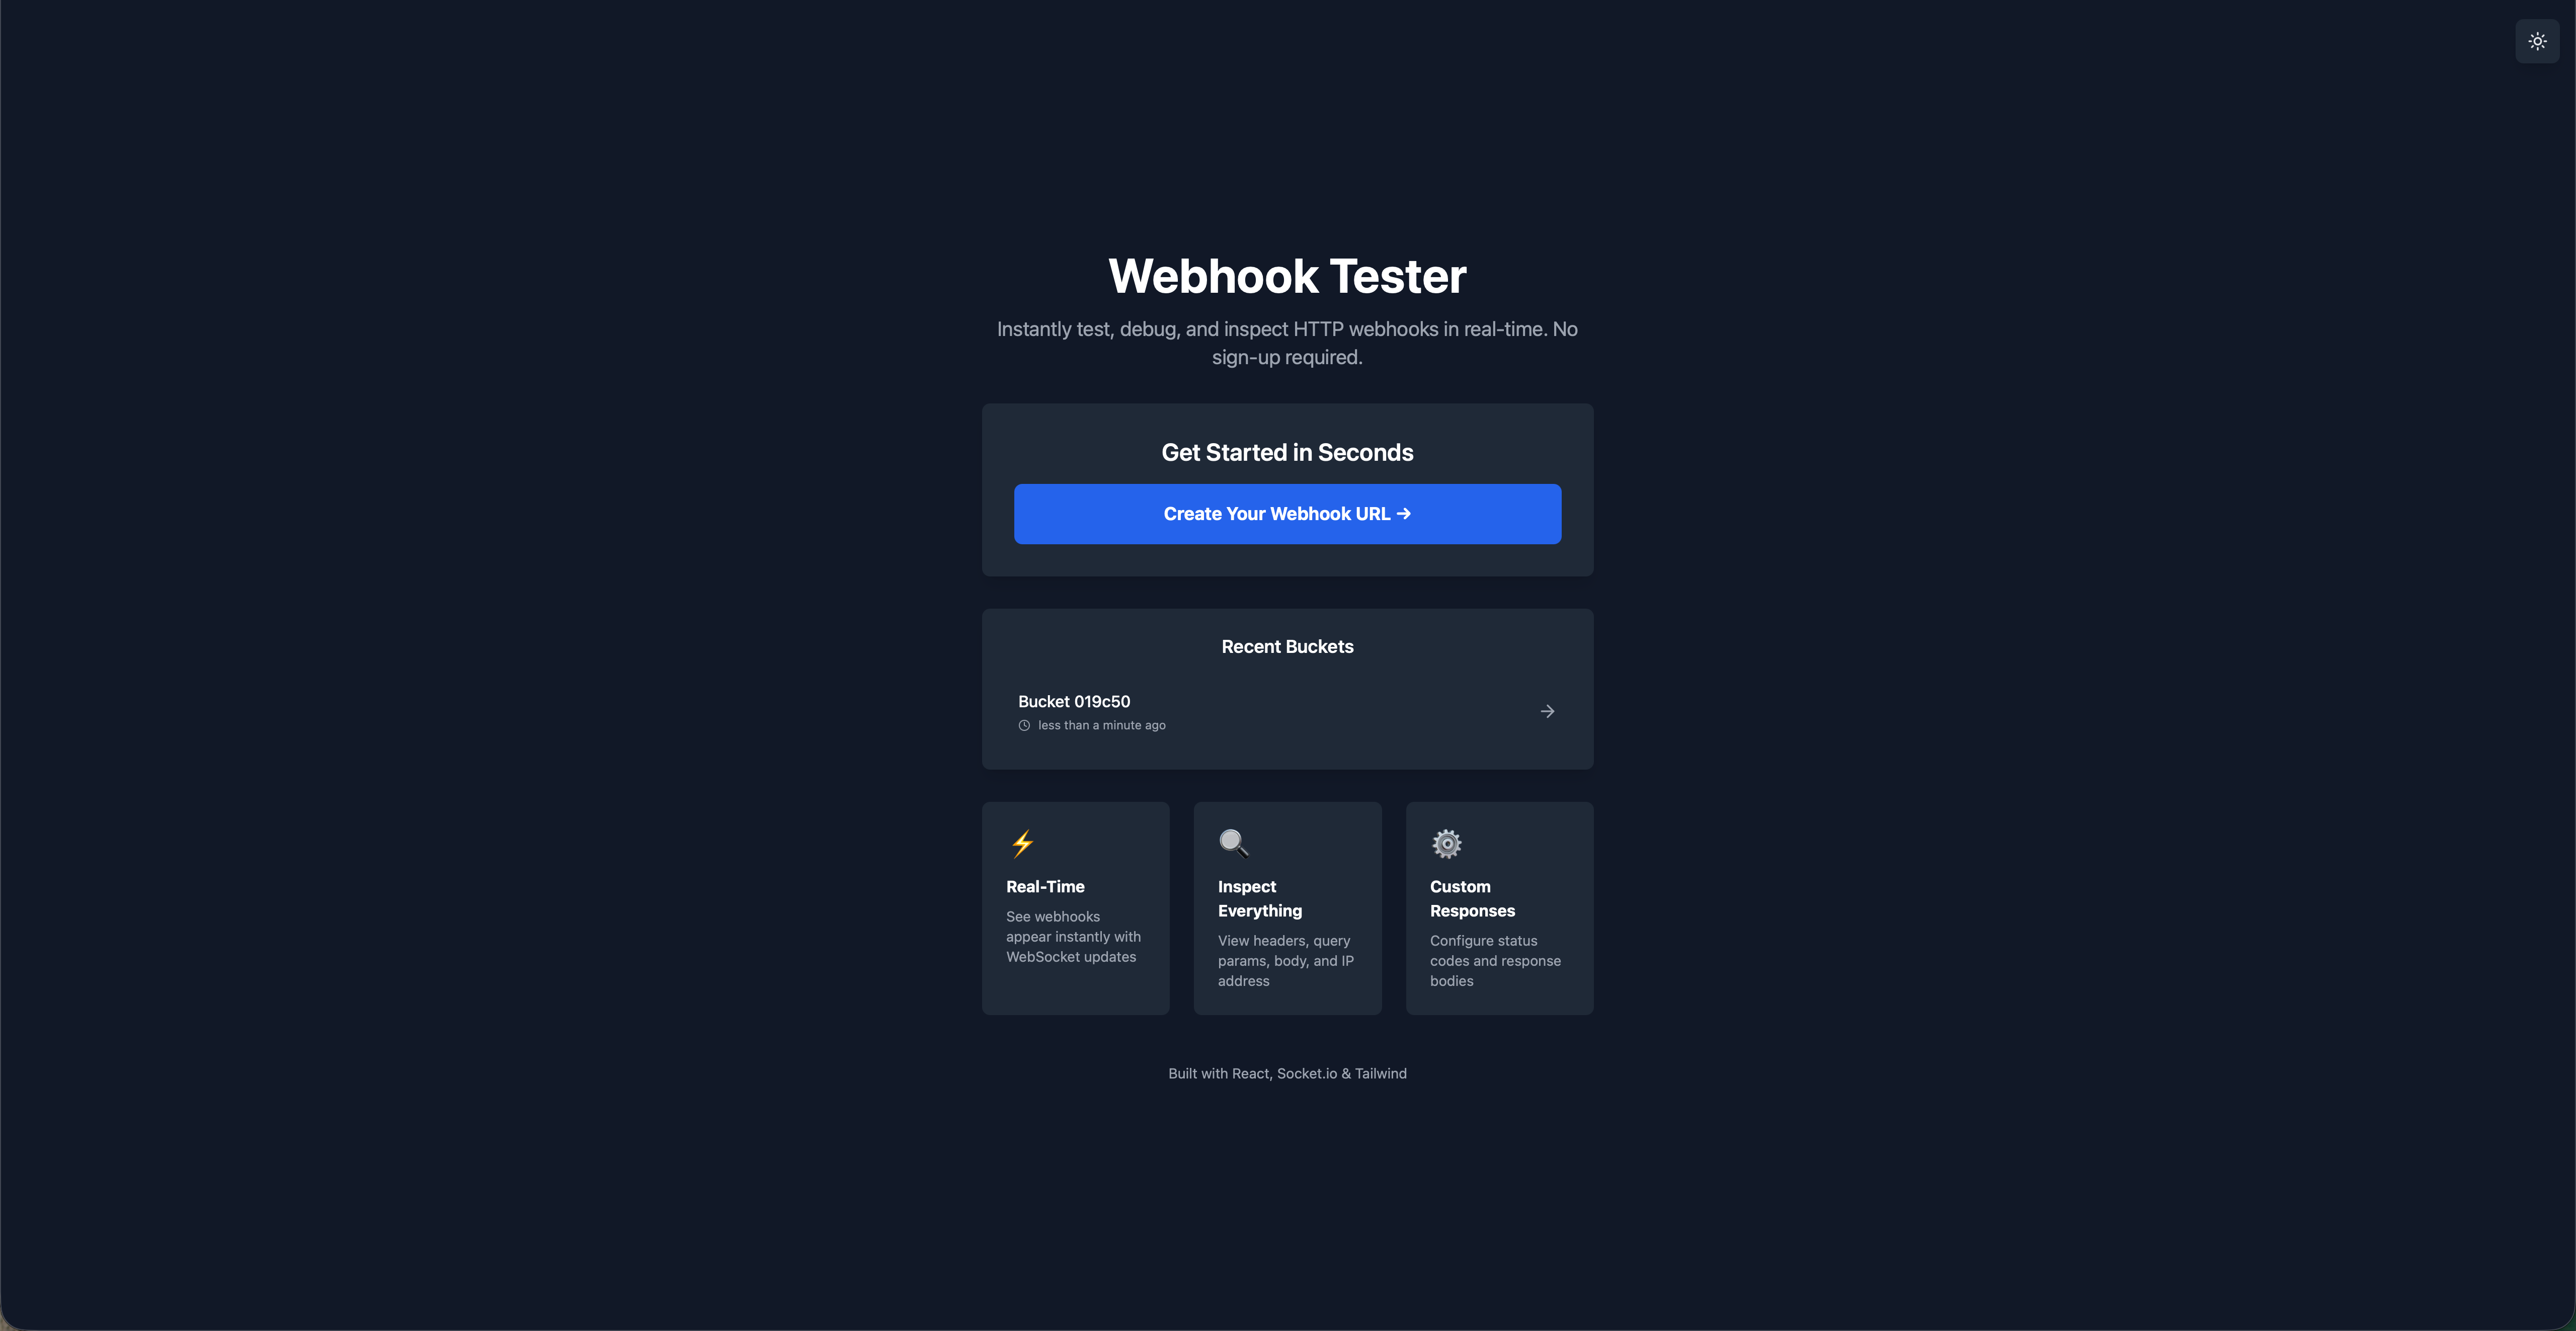
webhooktest.net: Captures and displays Webhook data without a separate server or account. No limit on received requests.
This example uses webhooktest.net. Visit webhooktest.net and copy the provided Webhook URL.
2. Creating a Flexible Webhook
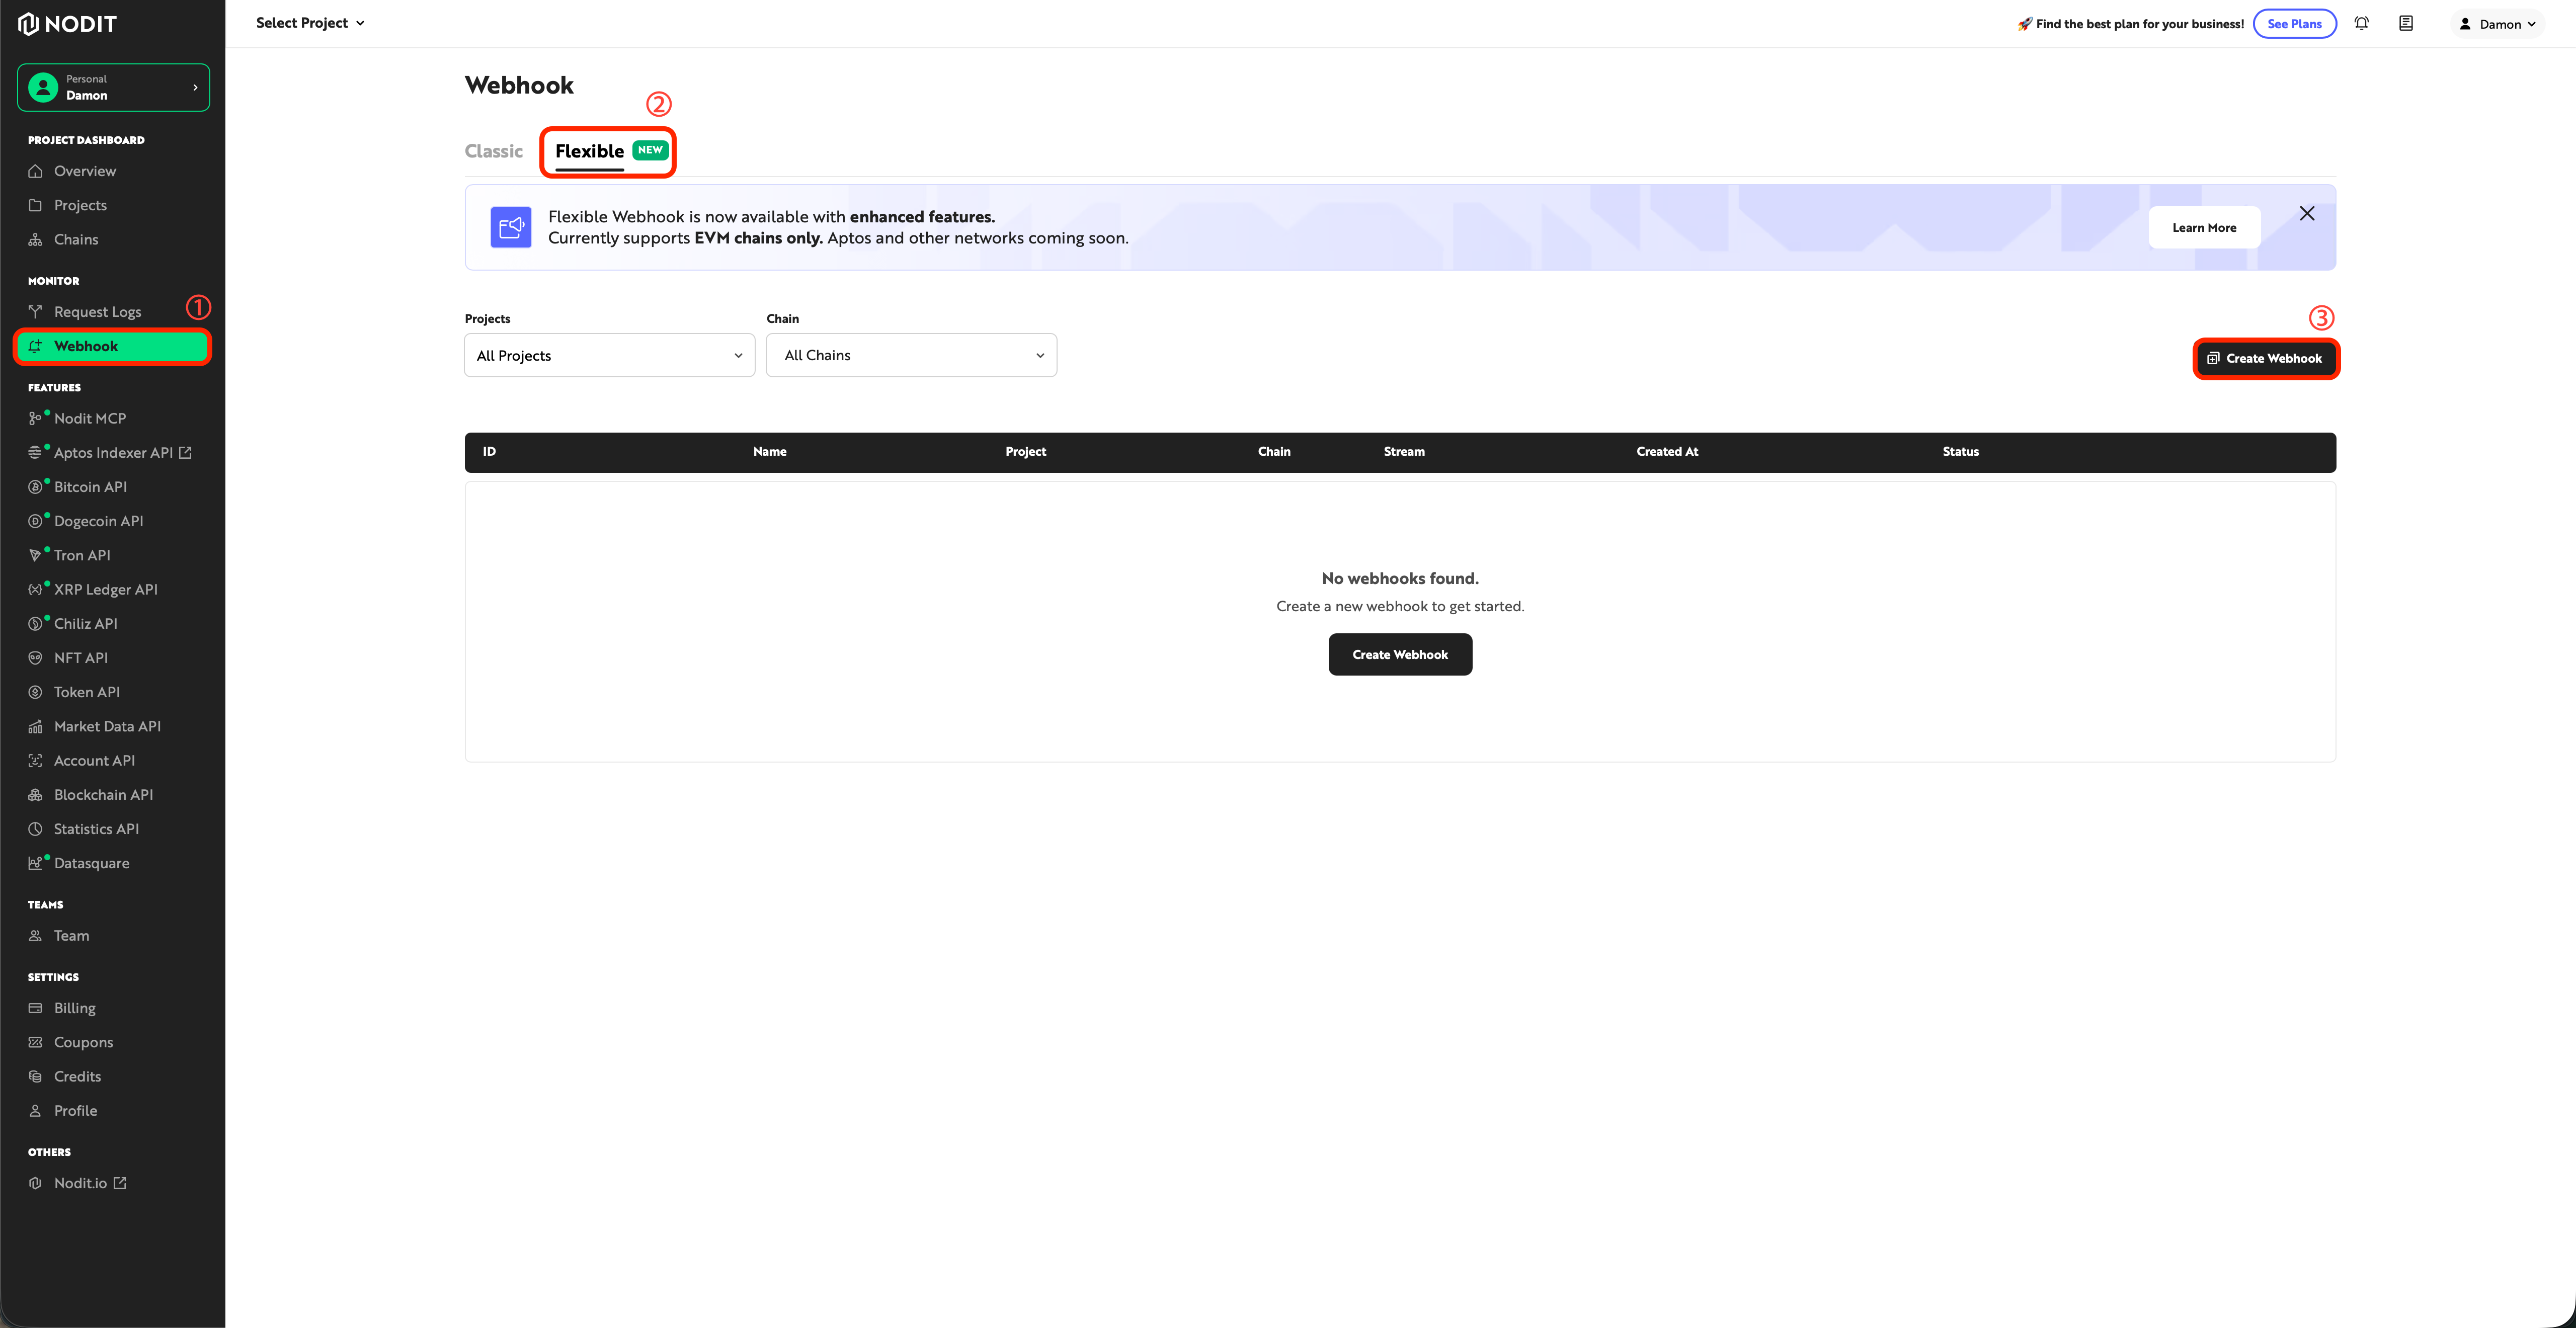
2-1. Navigate to the Webhook Menu
Log in to the Nodit Console, then click Webhook in the left menu. Click the Flexible Webhook tab at the top. On the Webhook list page, click the Create Webhook button.
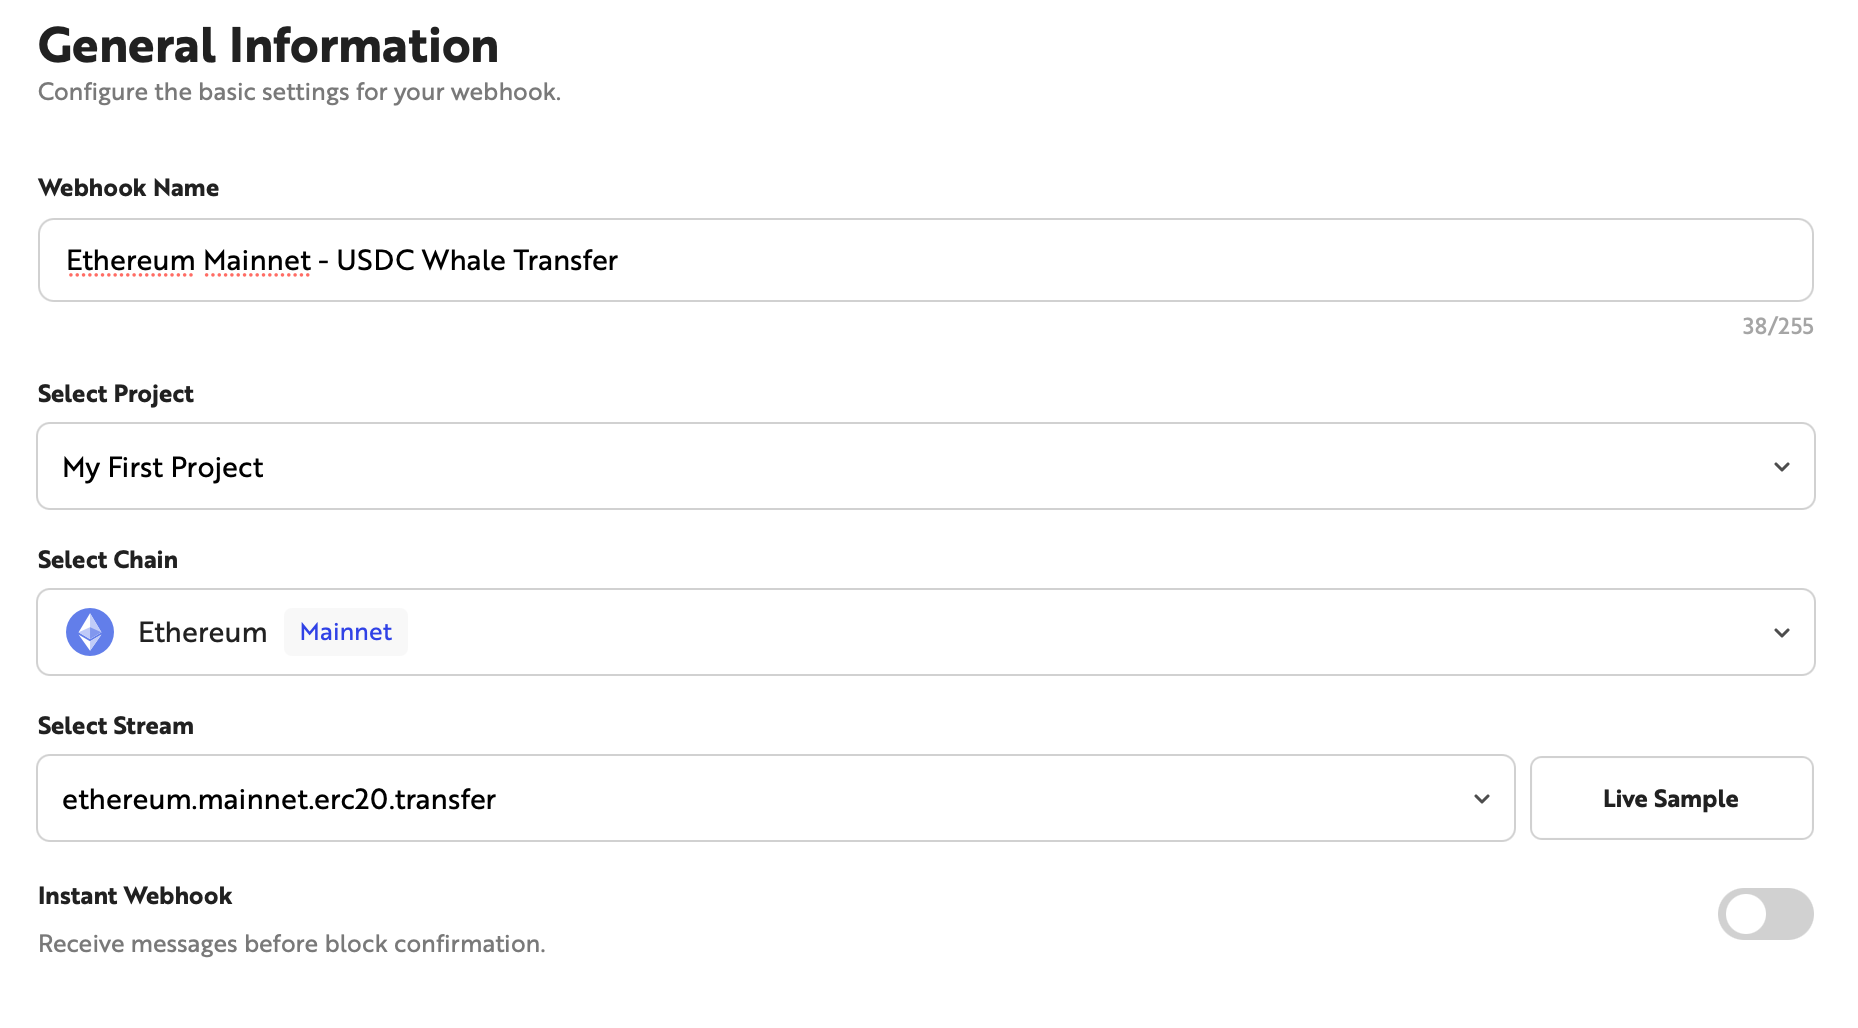
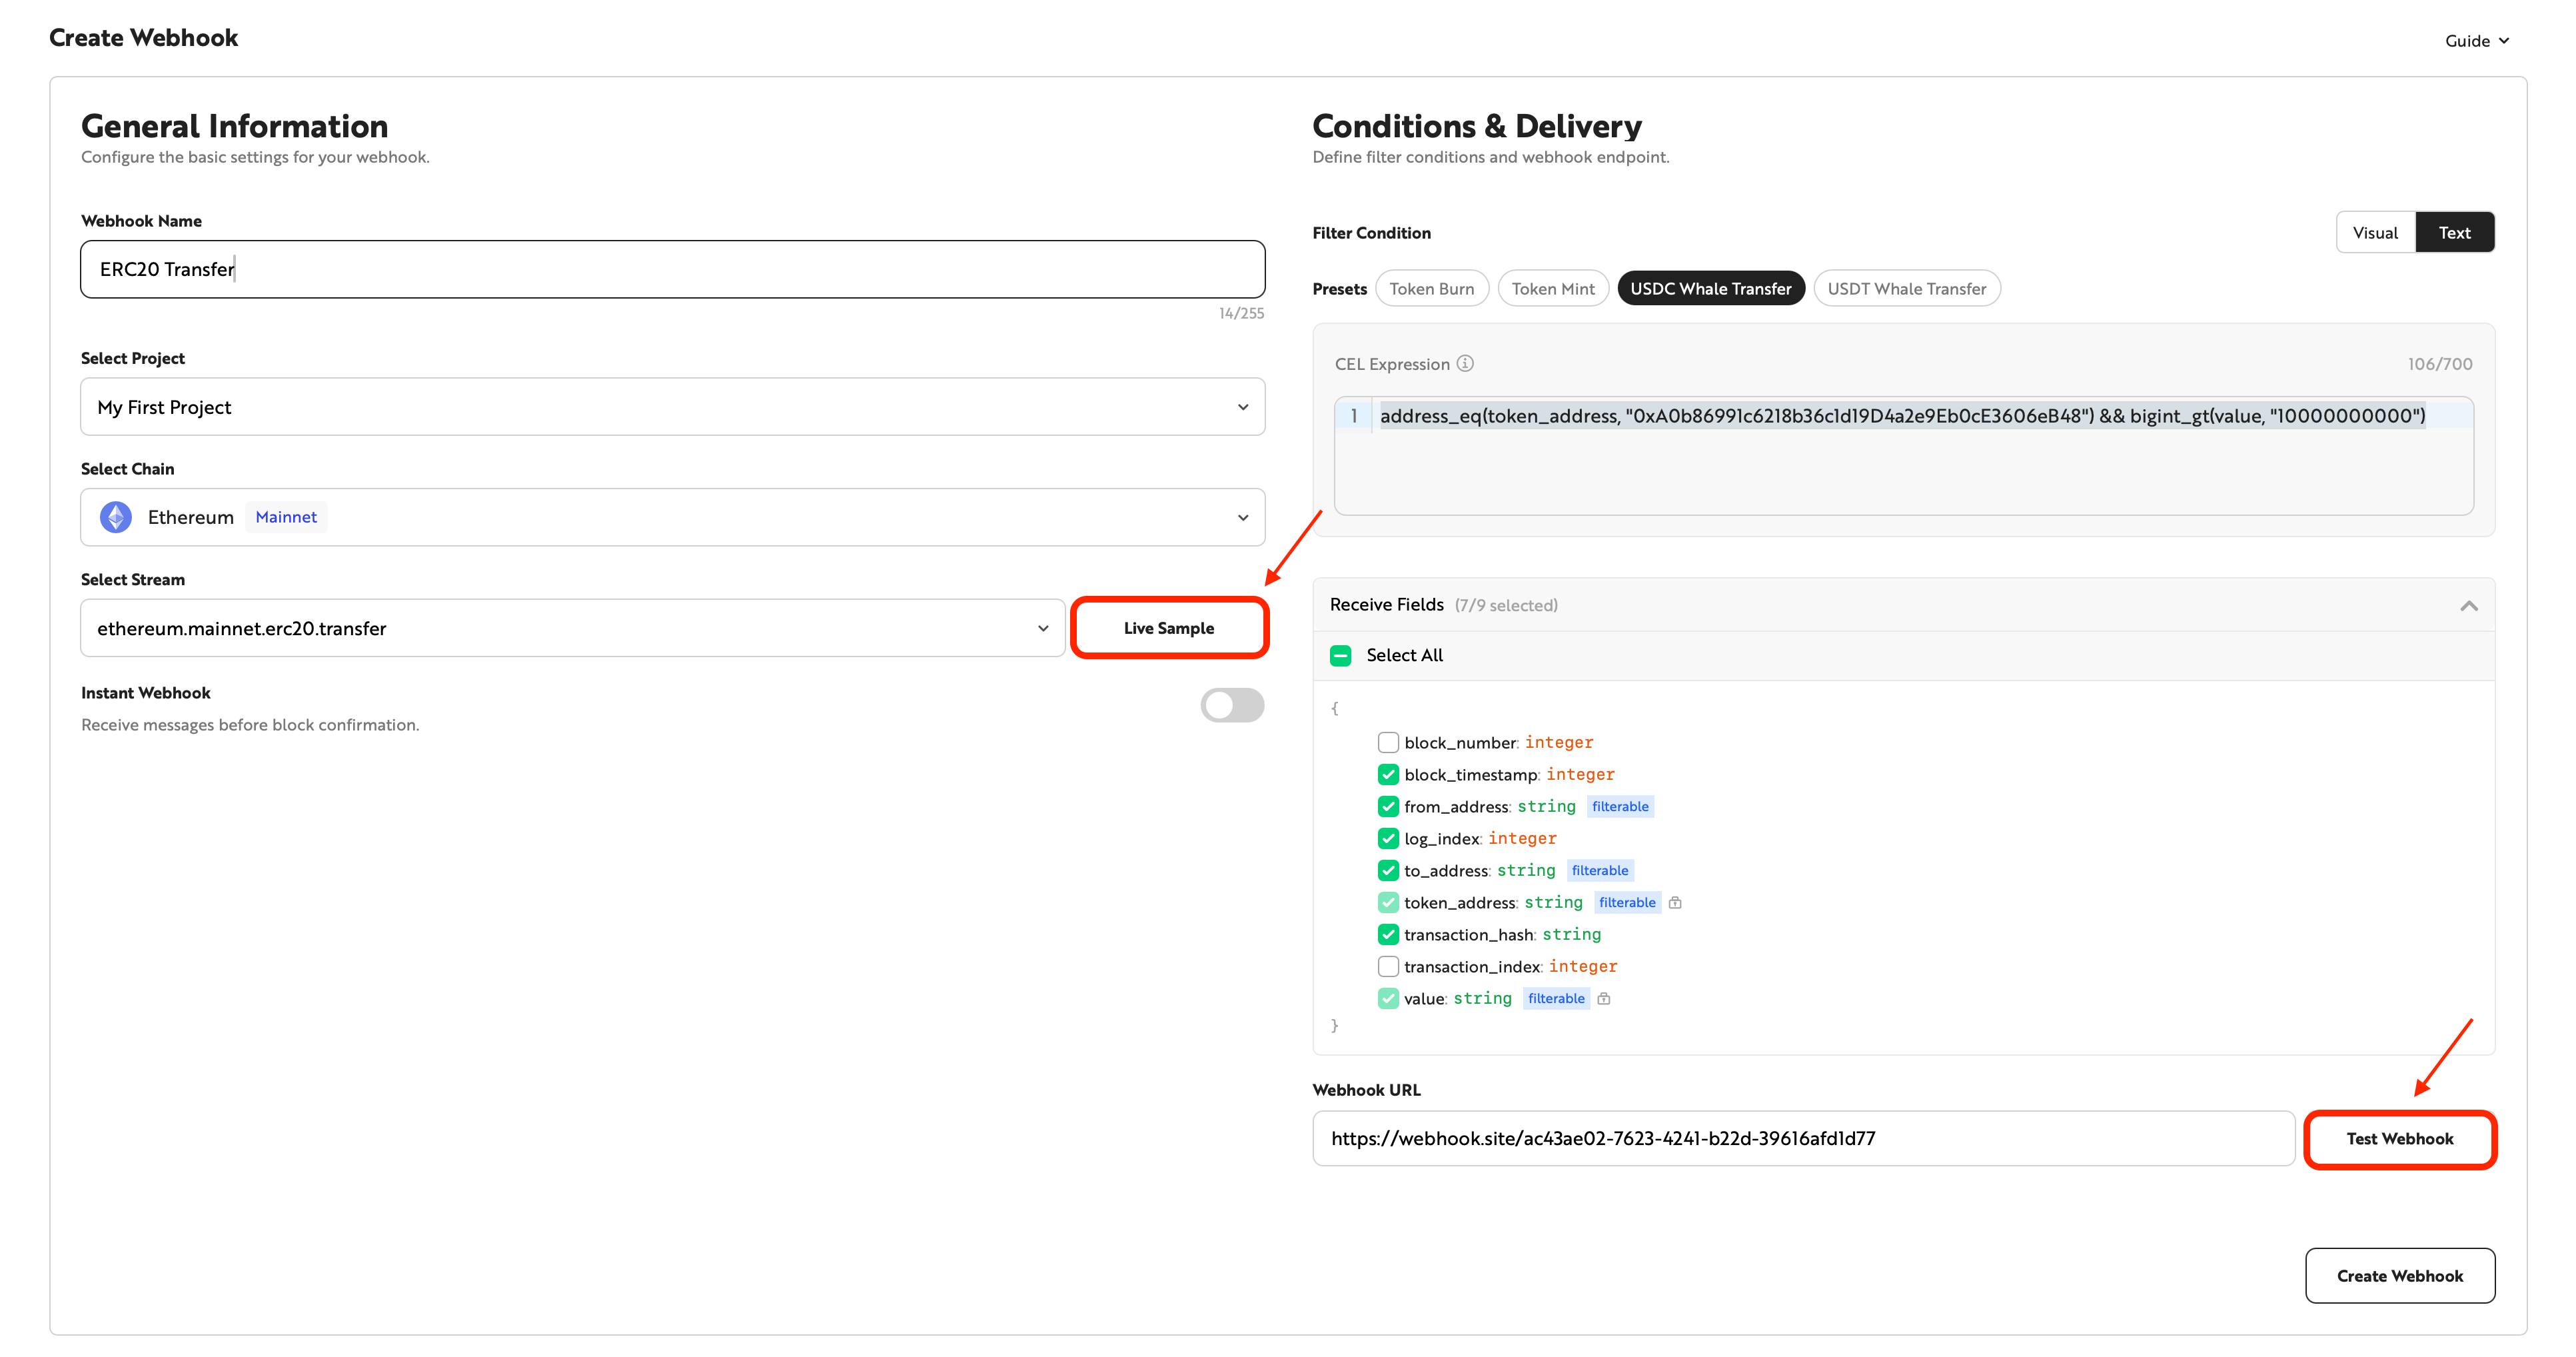
2-2. Enter General Information
- Webhook Name: Enter a name to identify the Webhook.
- Protocol: Select Ethereum.
- Network: Select Mainnet.
- Stream Type: Select
ethereum.mainnet.erc20.transfer. - Instant Webhook: Keep the default value (Off).
Enabling Instant Webhook delivers messages faster without waiting for block confirmation. However, data received may change in the event of a chain reorganization (reorg). Off is recommended when data accuracy is critical.
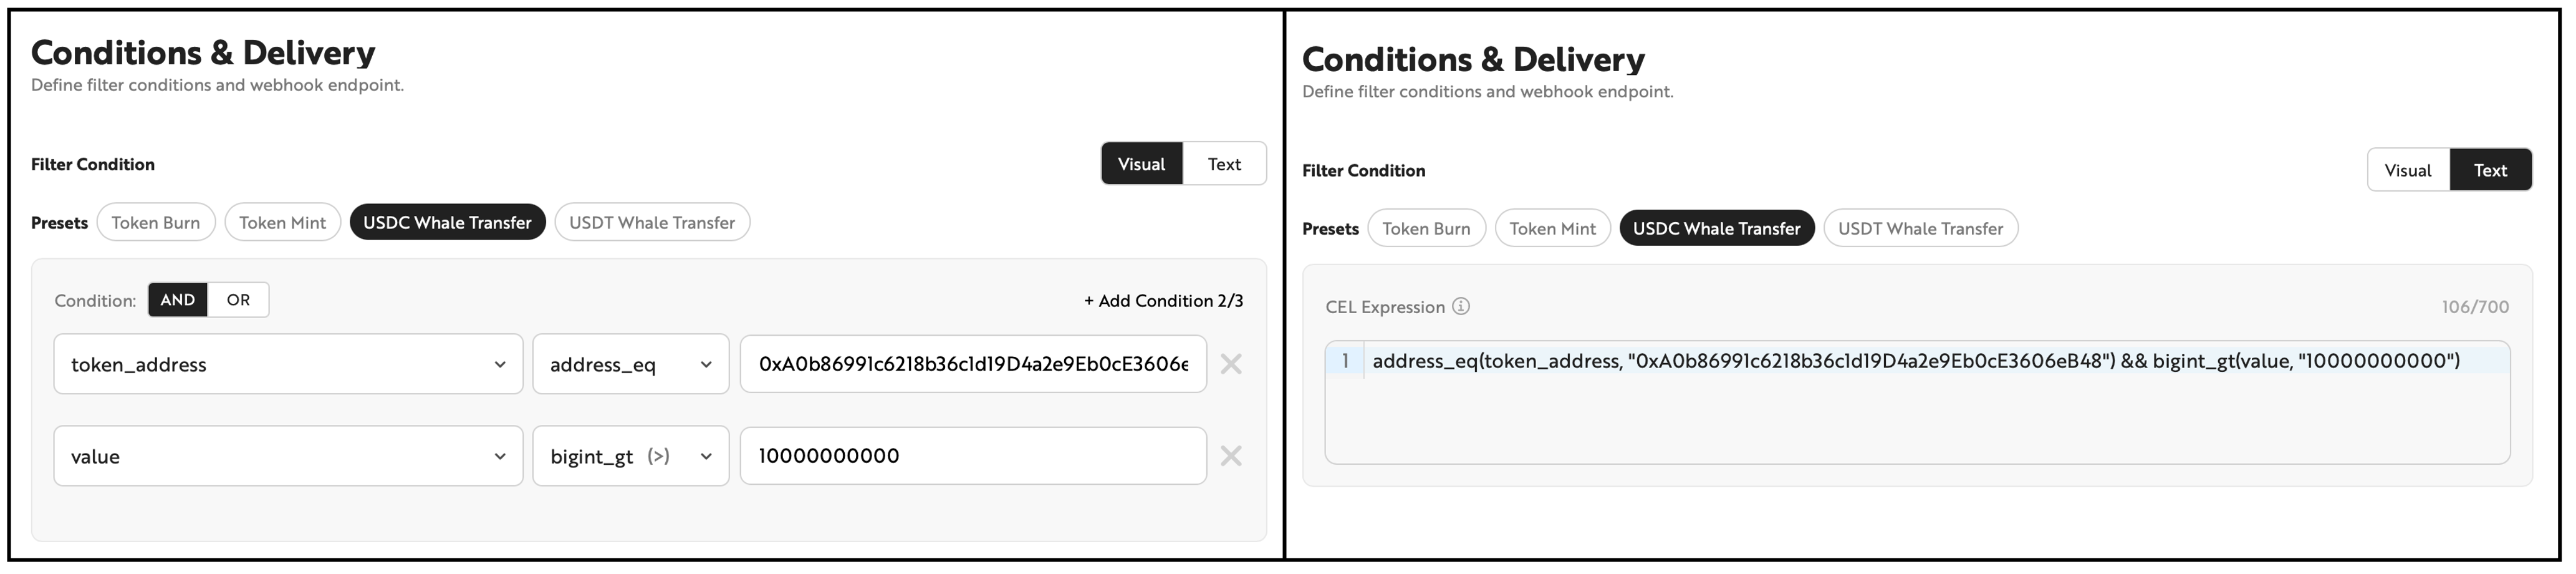
2-3. Configure Conditions
Select USDC Whale Transfer from Presets. The following conditions are automatically applied:
token_address==0xA0b86991c6218b36c1d19D4a2e9Eb0cE3606eB48(USDC contract)value>=1000000000000(1,000,000 USDC, based on decimals 6)
In Visual mode, add or modify conditions via drag-and-drop. In Text mode, edit expressions directly.
Visual mode and Text mode can be switched at any time. Changes made in one mode are automatically reflected in the other. However, if you enter an expression in text mode that does not conform to the expected format, you cannot switch back to visual mode.
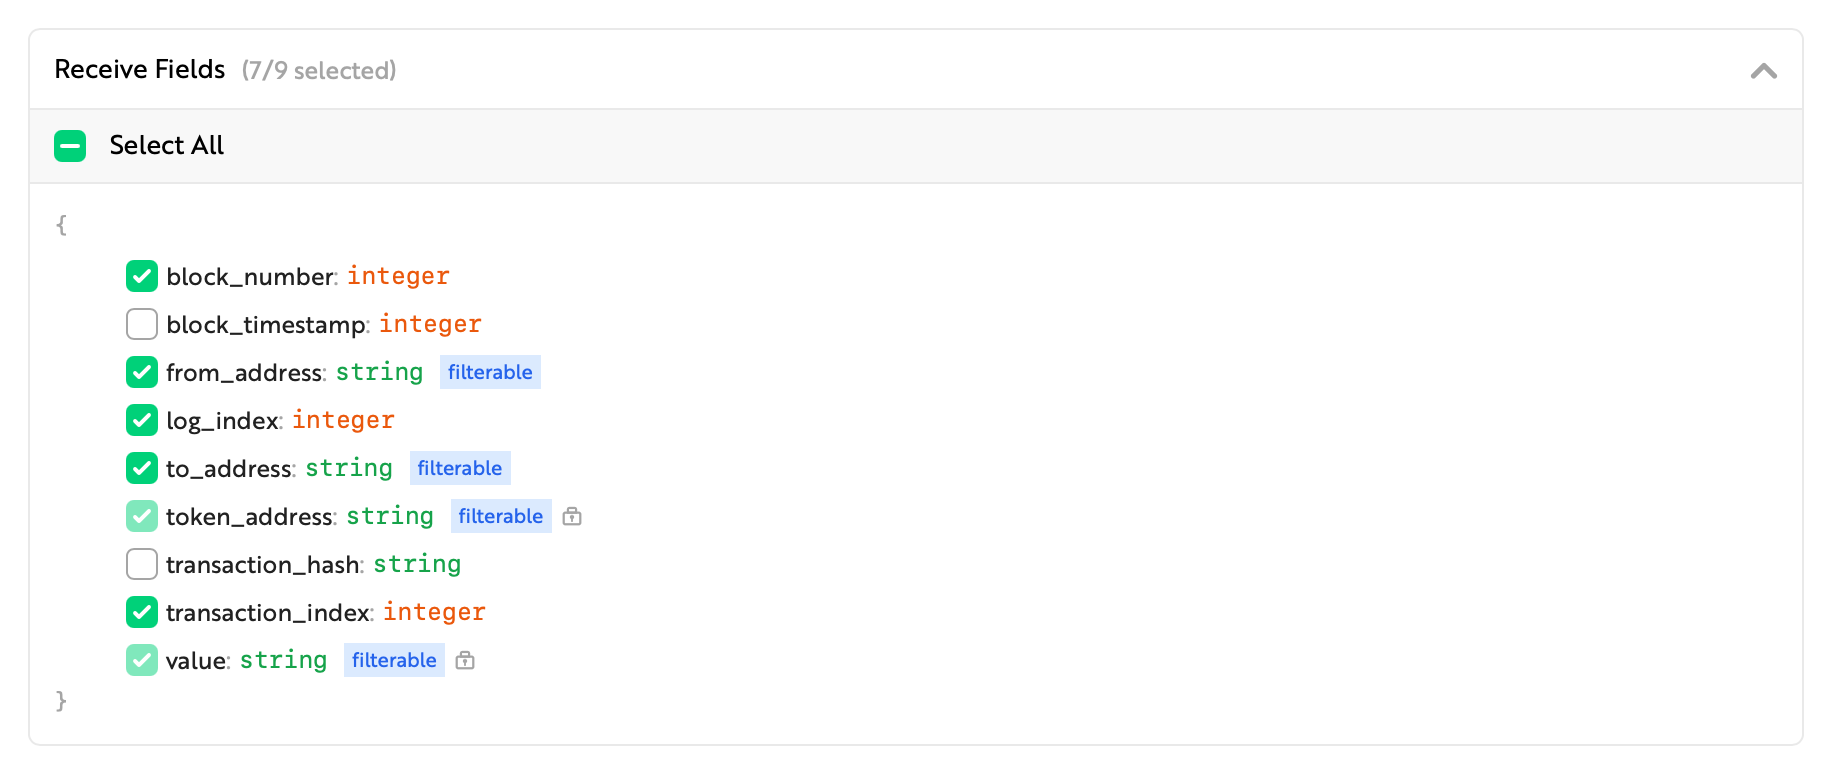
2-4. Select Output Fields
Select the fields to include in the Webhook payload. All Receive Fields are selected by default. Deselect unnecessary fields to reduce payload size.
Fields used in conditions (token_address, value) cannot be deselected.
In this example, select all fields:
2-5. Configure the Webhook URL
Paste the Webhook URL copied in step 1-2 into the Webhook URL field.
2-6. Live Testing
Validate your configuration before creating the Webhook.
- Live Sample: Preview recent real events that match the current conditions. Useful for verifying that the condition scope is not too narrow or too broad.
- Test Webhook: Send a test payload to the configured endpoint to verify delivery and check the response code.
Live Sample and Test Webhook use the latest data from the selected stream regardless of filter conditions. The data may differ from what the actual Webhook receives.
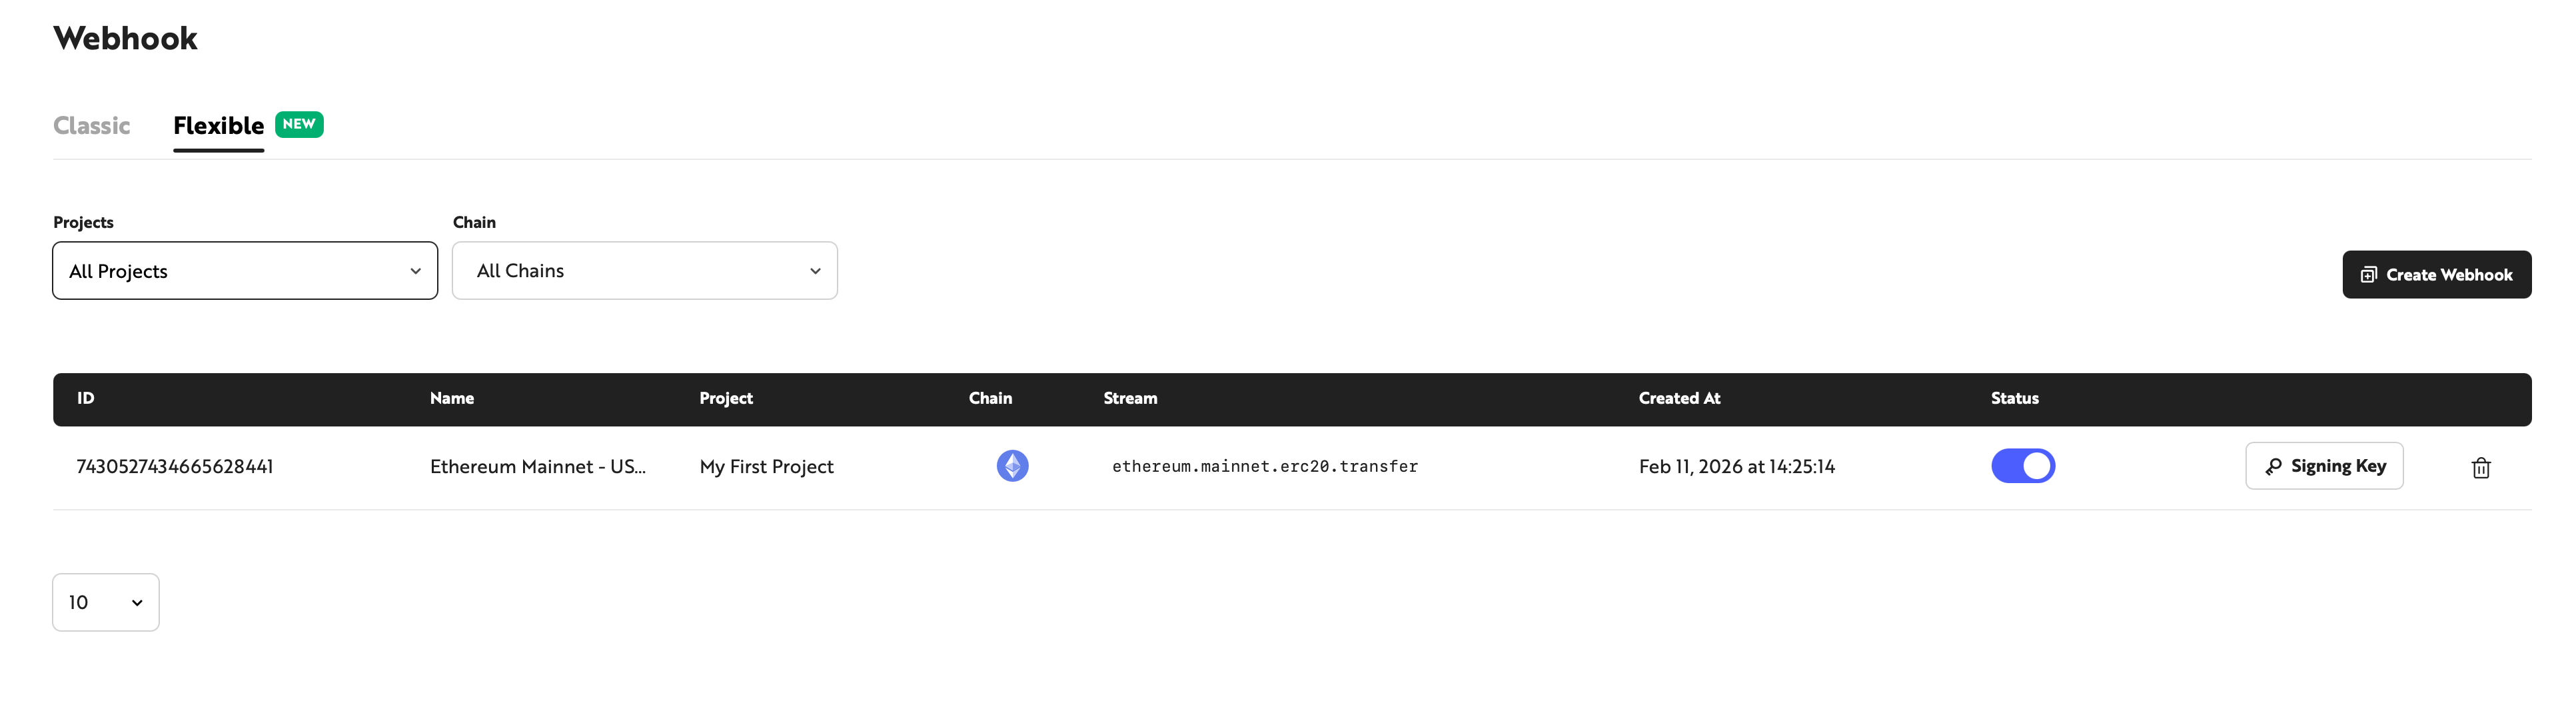
2-7. Complete Webhook Creation
Review all settings, then click the Create button to create the Webhook. The created Webhook appears on the list page and is activated immediately.
3. Verifying Webhook Delivery
When an on-chain event matching the conditions occurs, a message is sent to the endpoint. Check the received message in webhooktest.net.
Payload Structure
All Flexible Webhook messages share the same envelope structure.
{
  "subscriptionId": "1234567890123456789",
  "sequenceNumber": 46,
  "streamId": "77",
  "streamSlug": "ethereum.mainnet.erc20.transfer",
  "data": {
    ...
  }
}
Field | Type | Description |
|---|---|---|
subscriptionId | string | Unique ID of the Webhook subscription |
sequenceNumber | integer | Message sequence number. Increments sequentially within the same subscription |
streamId | string | Unique ID of the stream |
streamSlug | string | Stream identifier in `{protocol}.{network}.{streamType}` format |
data | object | Event data that varies based on the stream type and selected fields |
Sample Received Message
The following is an example message matching the USDC Whale Transfer conditions.
{
  "subscriptionId": "1234567890123456789",
  "sequenceNumber": 46,
  "streamId": "77",
  "streamSlug": "ethereum.mainnet.erc20.transfer",
  "data": {
    "block_number": 19758850,
    "block_timestamp": 1714368119,
    "from_address": "0x28c6c06298d514db089934071355e5743bf21d60",
    "to_address": "0x21a31ee1afc51d94c2efccaa2043afc4c2a23017",
    "token_address": "0xa0b86991c6218b36c1d19d4a2e9eb0ce3606eb48",
    "value": "5000000000000",
    "transaction_hash": "0xef99067235b9d30831f5161cdfb9cd1a1b24f04fc9a694b120ef8e568bd70234"
  }
}
The fields under data vary depending on the stream type and output field configuration. Fields deselected during Webhook creation are not included.
4. Modifying and Managing the Webhook
The created Webhook can be modified and managed in the Console.
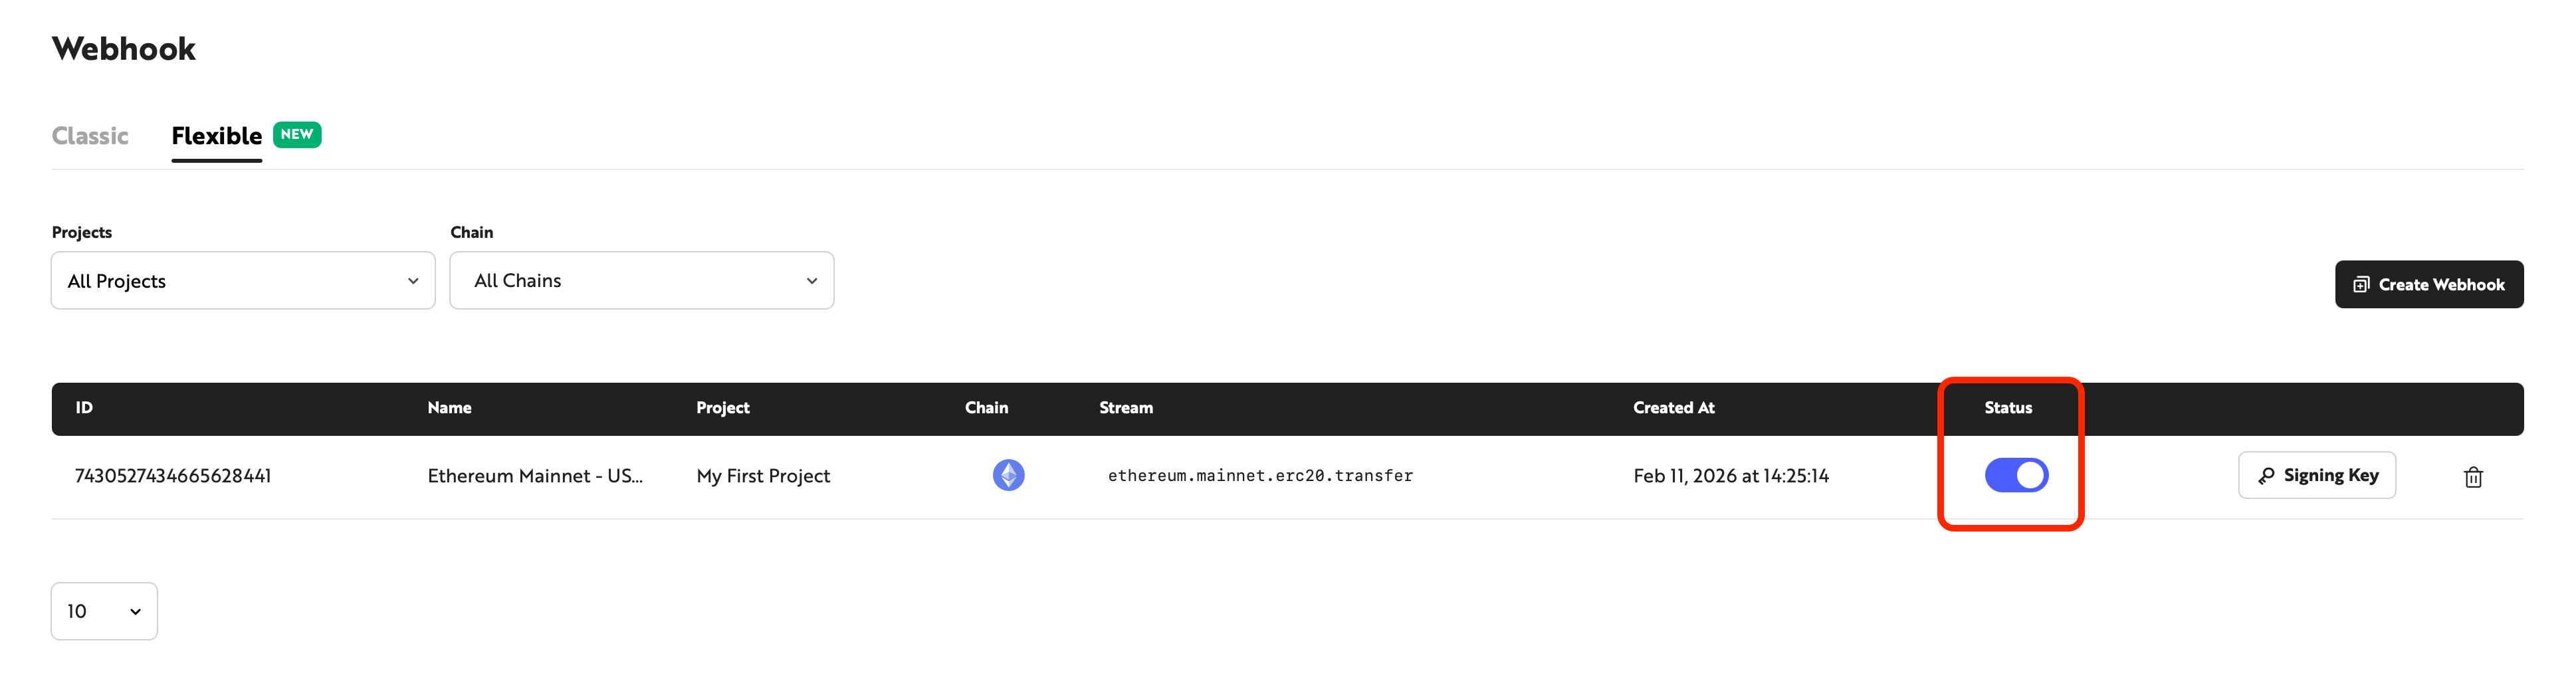
4-1. Pause / Resume
Click the Status toggle button to pause notifications. Click the toggle button again to reactivate.
4-2. Modifying Conditions and Fields
Conditions and fields cannot be changed after a Webhook is created. If changes are needed, create a new Webhook.
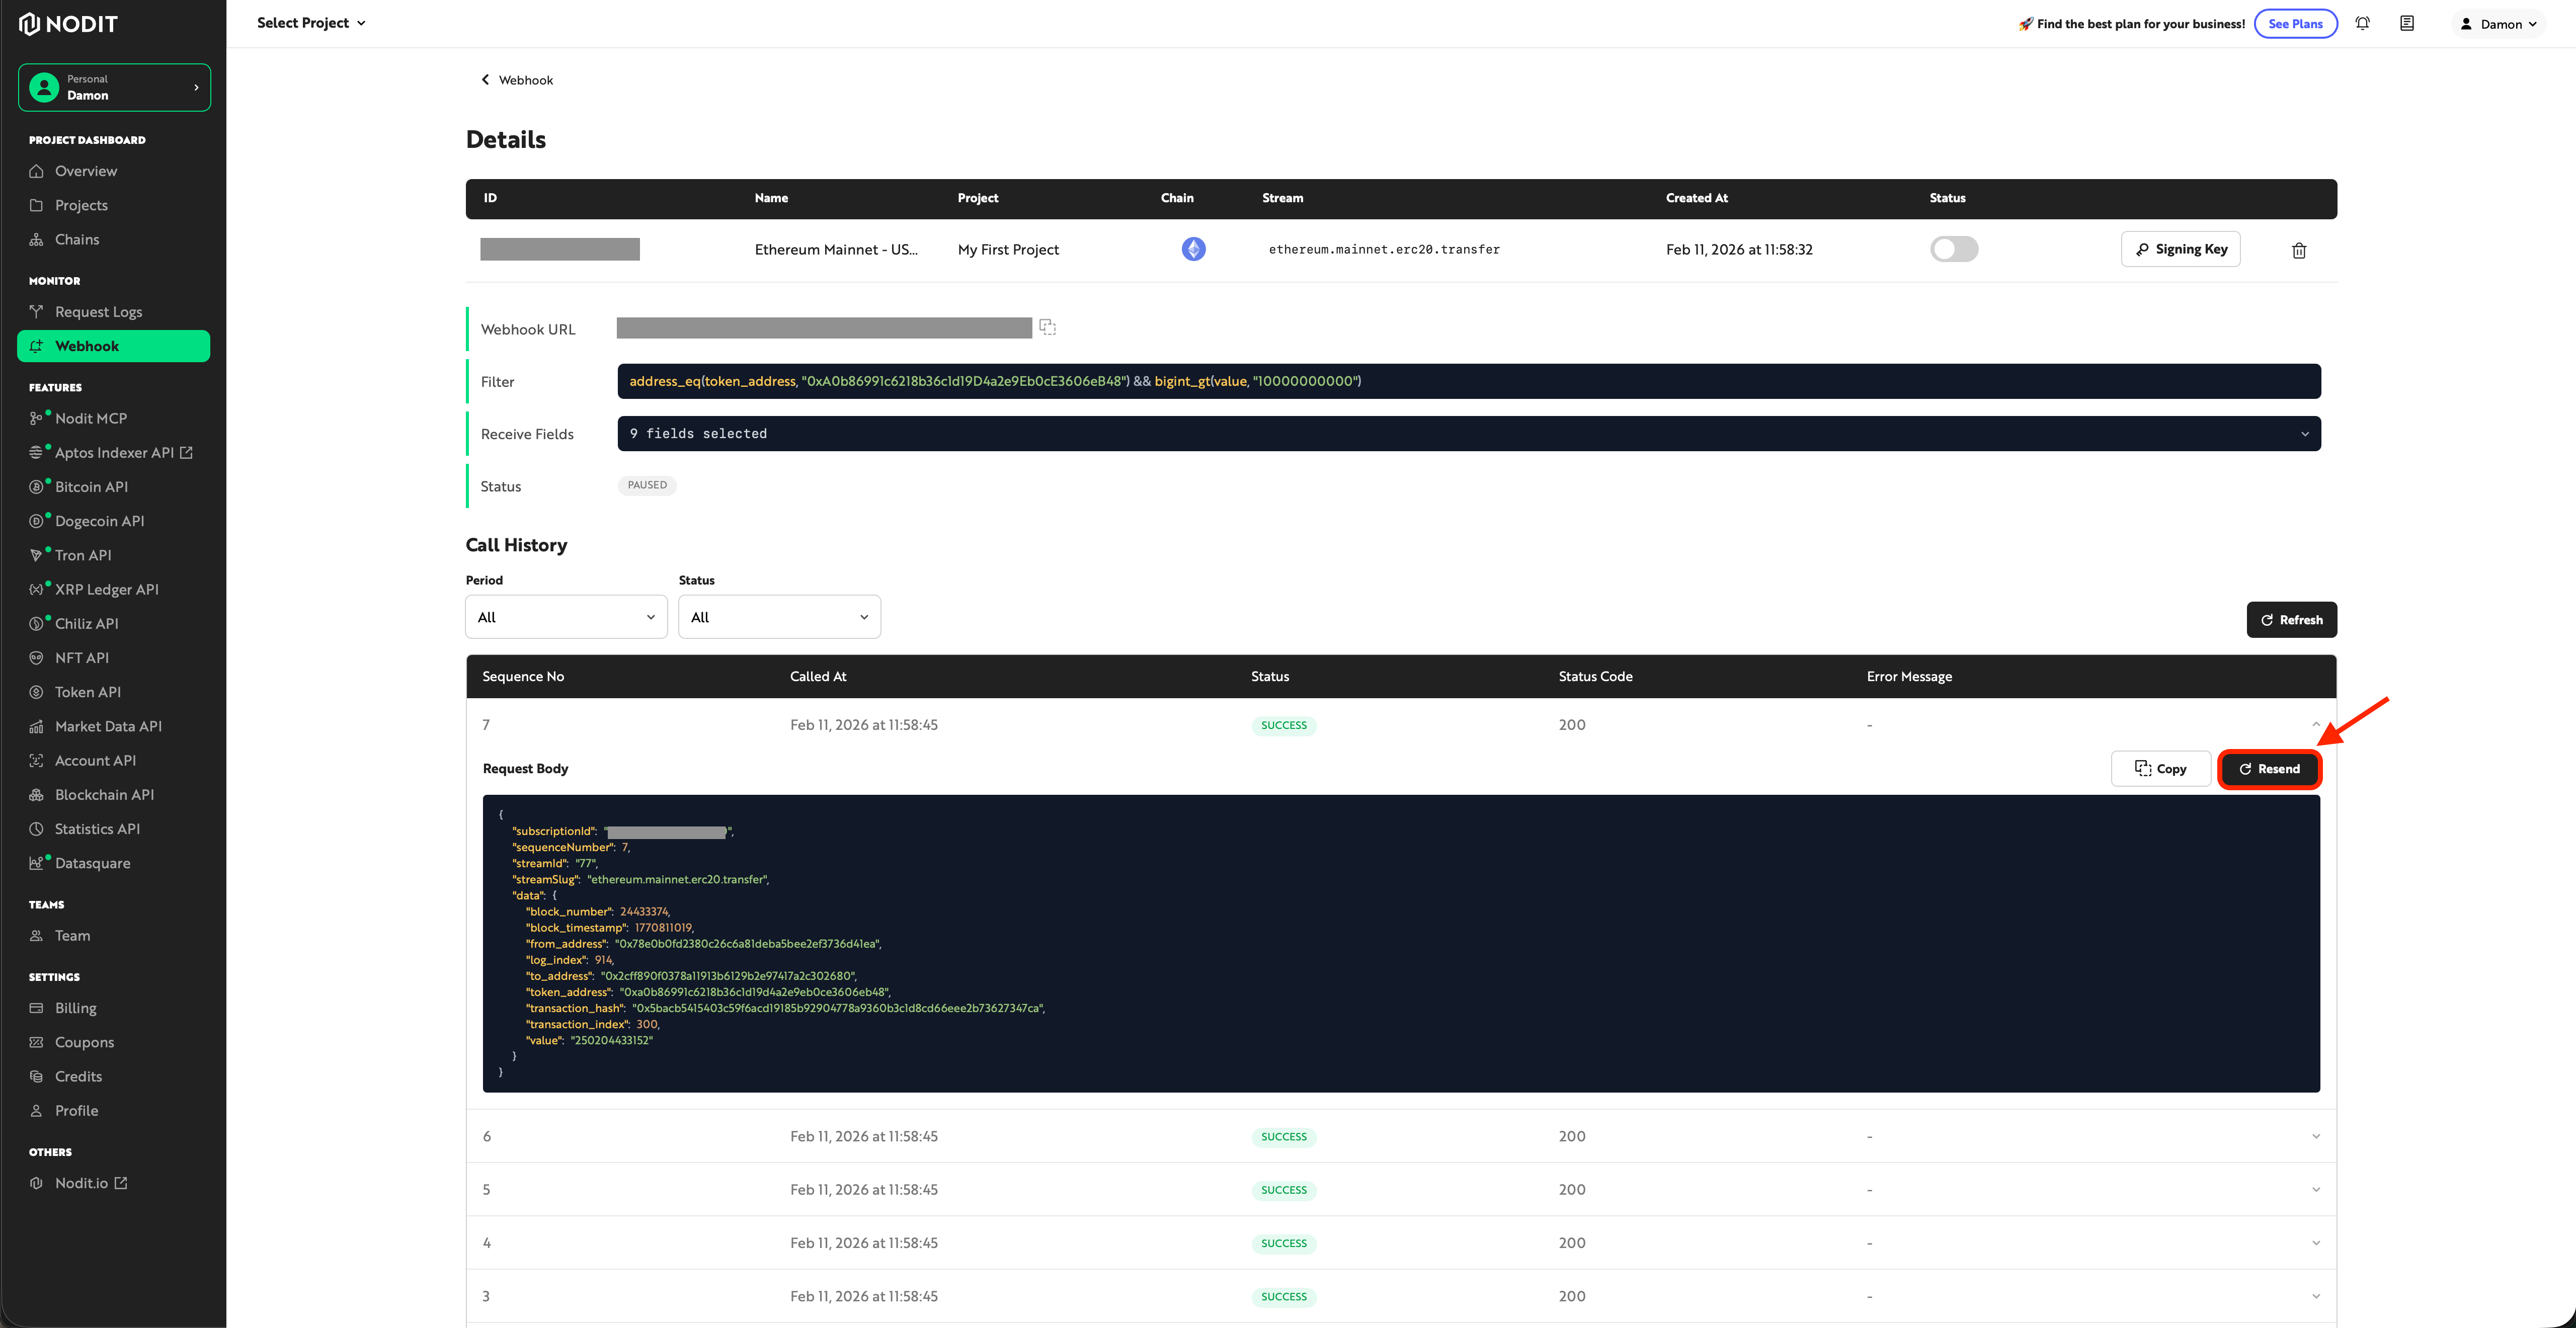
4-3. Resend Failed Messages with Easy Resend
Select a FAILED message in the delivery history and click Resend to resend it. For details, see Flexible Webhook Security & Reliability .
5. Deleting the Webhook
Click the Delete button (trash icon) on the Webhook detail page or in the list to delete the Webhook.
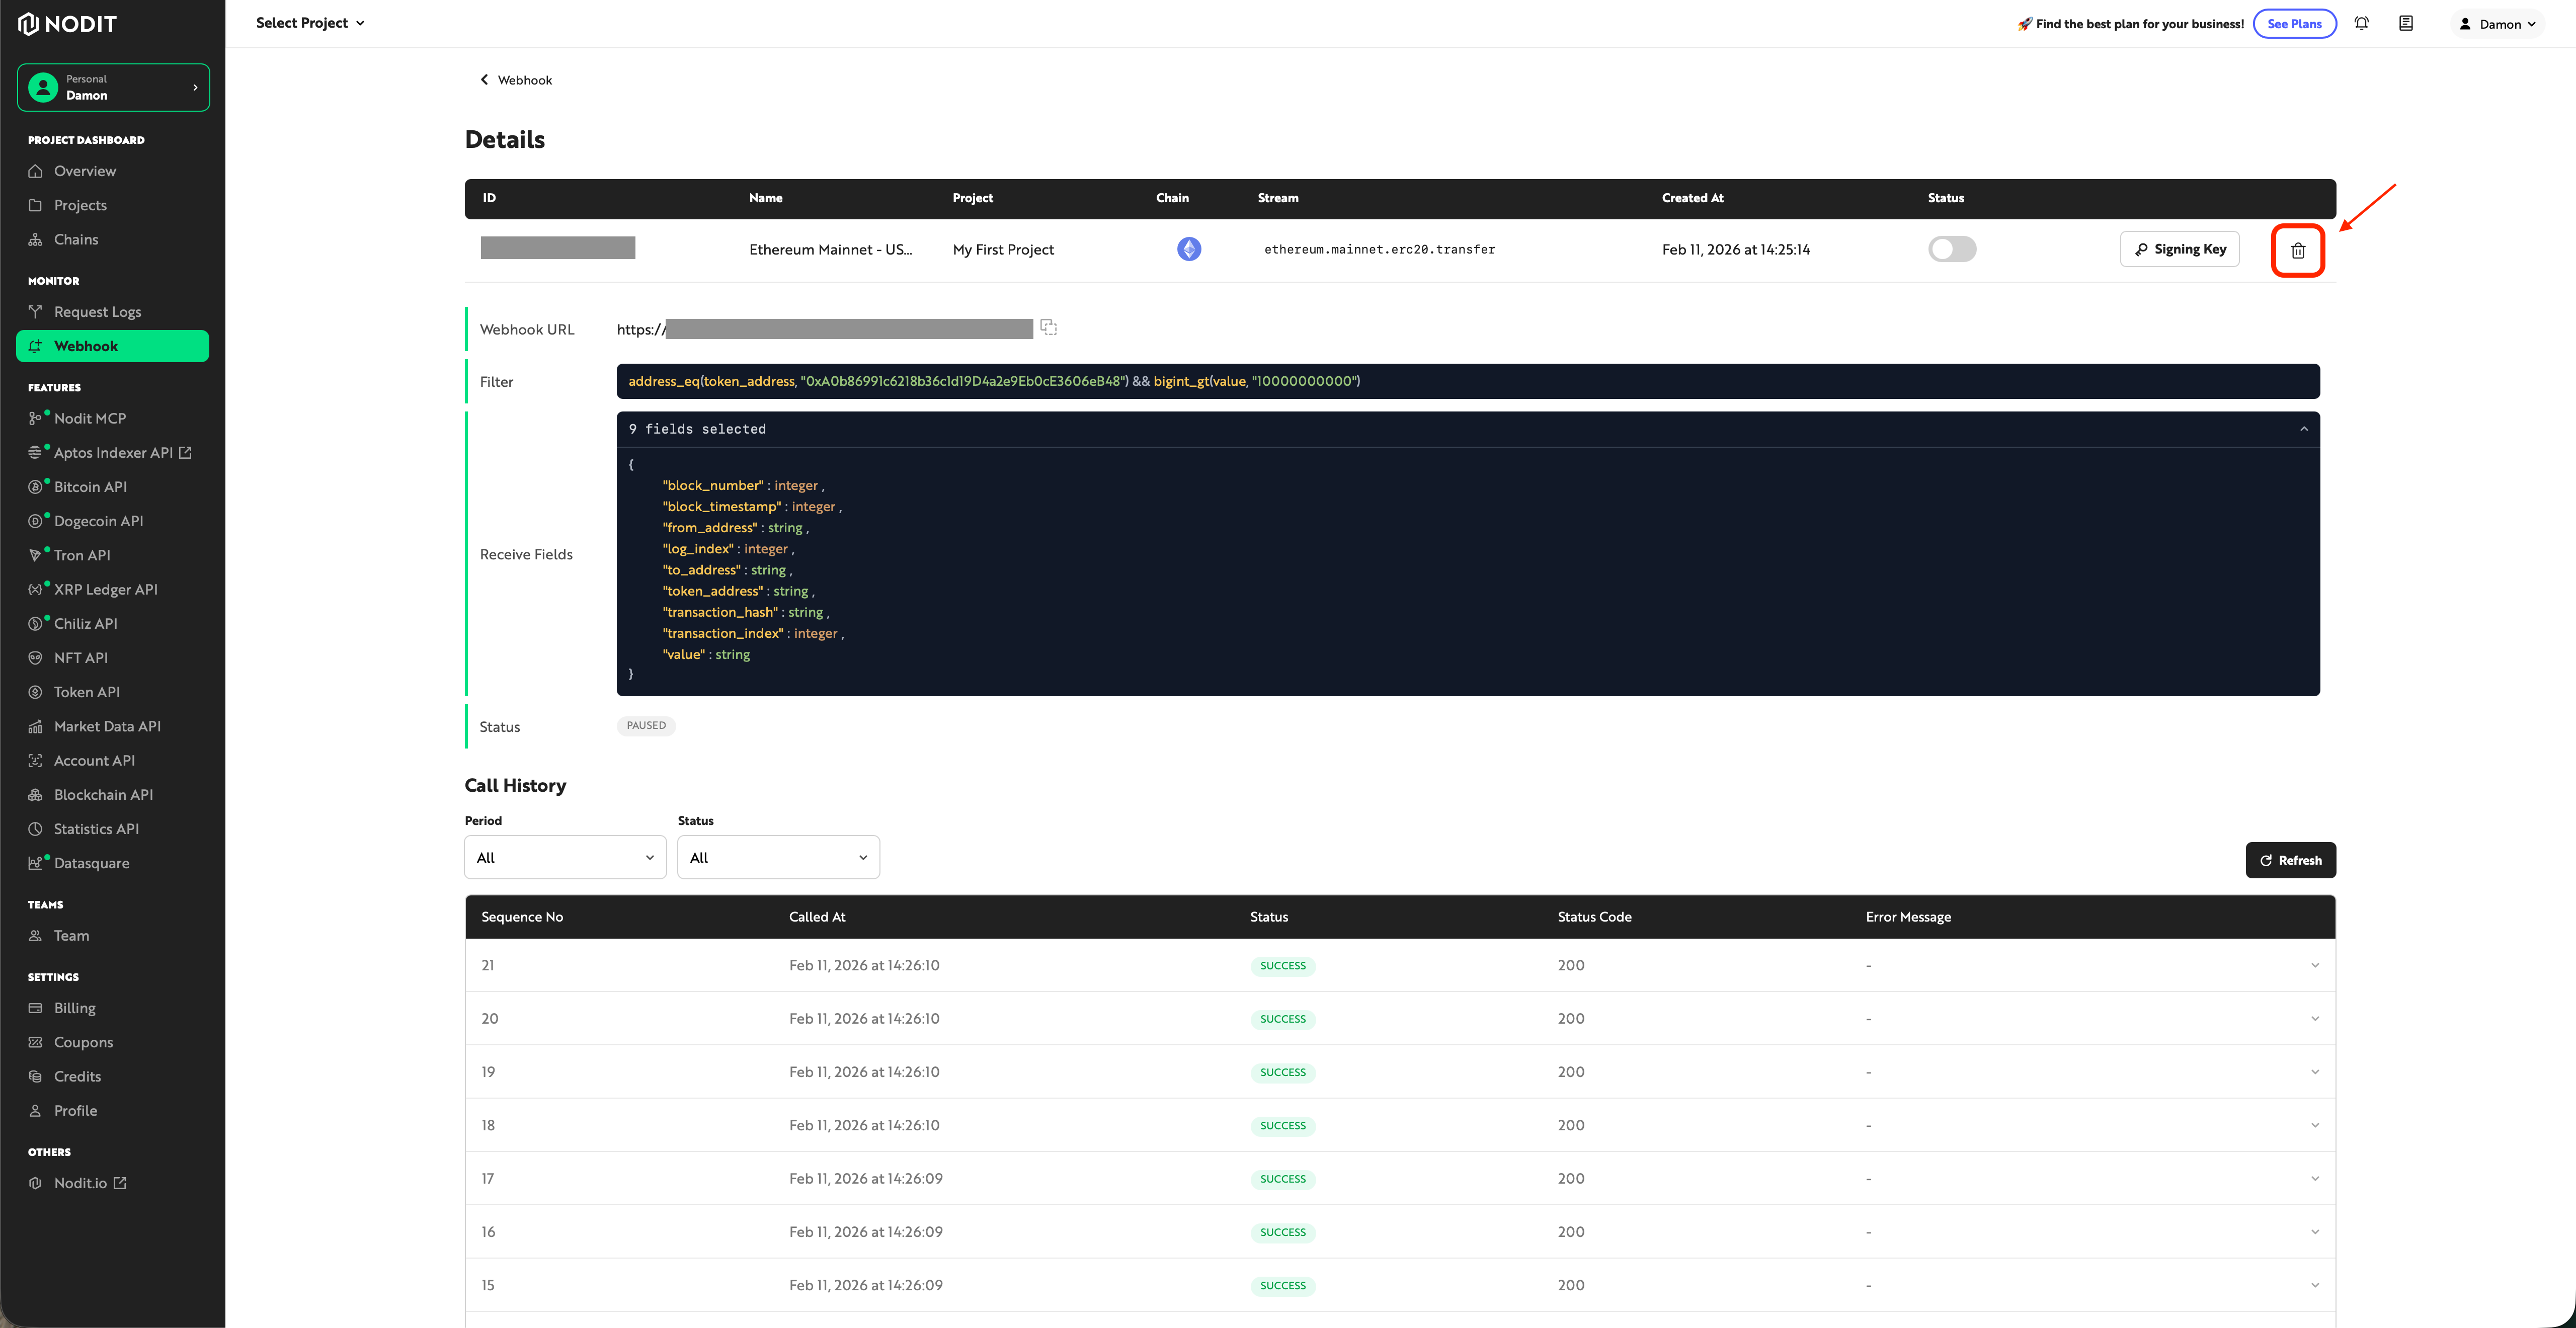
A deleted Webhook cannot be recovered. All settings and delivery history are permanently removed. To temporarily stop the Webhook, use Pause instead.