Stream Quickstart
What is Nodit Stream?
Nodit Stream is a service that lets you subscribe to on-chain events from multiple networks through a bidirectional stream channel and receive them in real time. It uses the same event types as Nodit Webhook, allowing you to filter the data you need. Unlike Webhook, however, Stream delivers events over a synchronized WebSocket channel rather than an asynchronous channel.
Nodit Stream Endpoint
The WebSocket endpoint for Nodit Stream is as follows.
- wss://web3.nodit.io/v1/websocket
Q. Is the wss feature provided by Stream different from the one provided by the Node service?
A. Yes. The WSS Endpoint shown on each network card in the Nodit Console is used for the Node client's built-in WebSocket communication. The Stream service, like the Web3 Data API, subscribes to curated data through a separate WebSocket server built by the Nodit team. Regardless of the target network, you can use Stream through a single endpoint.
Stream Tutorials
1. Environment Setup
This example uses JavaScript to implement a WebSocket connection. Complete the following prerequisites before running the example.
1-1. Install Node.js
Node.js is a JavaScript runtime that supports running various JS applications. Click the link below to install Node.js. Multiple versions are available, but the latest LTS version is recommended for stability.
1-2. Install socket.io-client
socket.io-client is a library for real-time WebSocket-based communication on the client side. Use it to connect to a server and send/receive real-time data and events. If Node.js is installed, you can install it easily using the terminal. Run the command below in the terminal at the root directory where you want to implement the WebSocket.
npm install socket.io-client
1-3. Sign Up for Nodit Console
Nodit provides a Node service for connecting to various blockchain networks. Click the link below to access the Nodit Console and create an account.
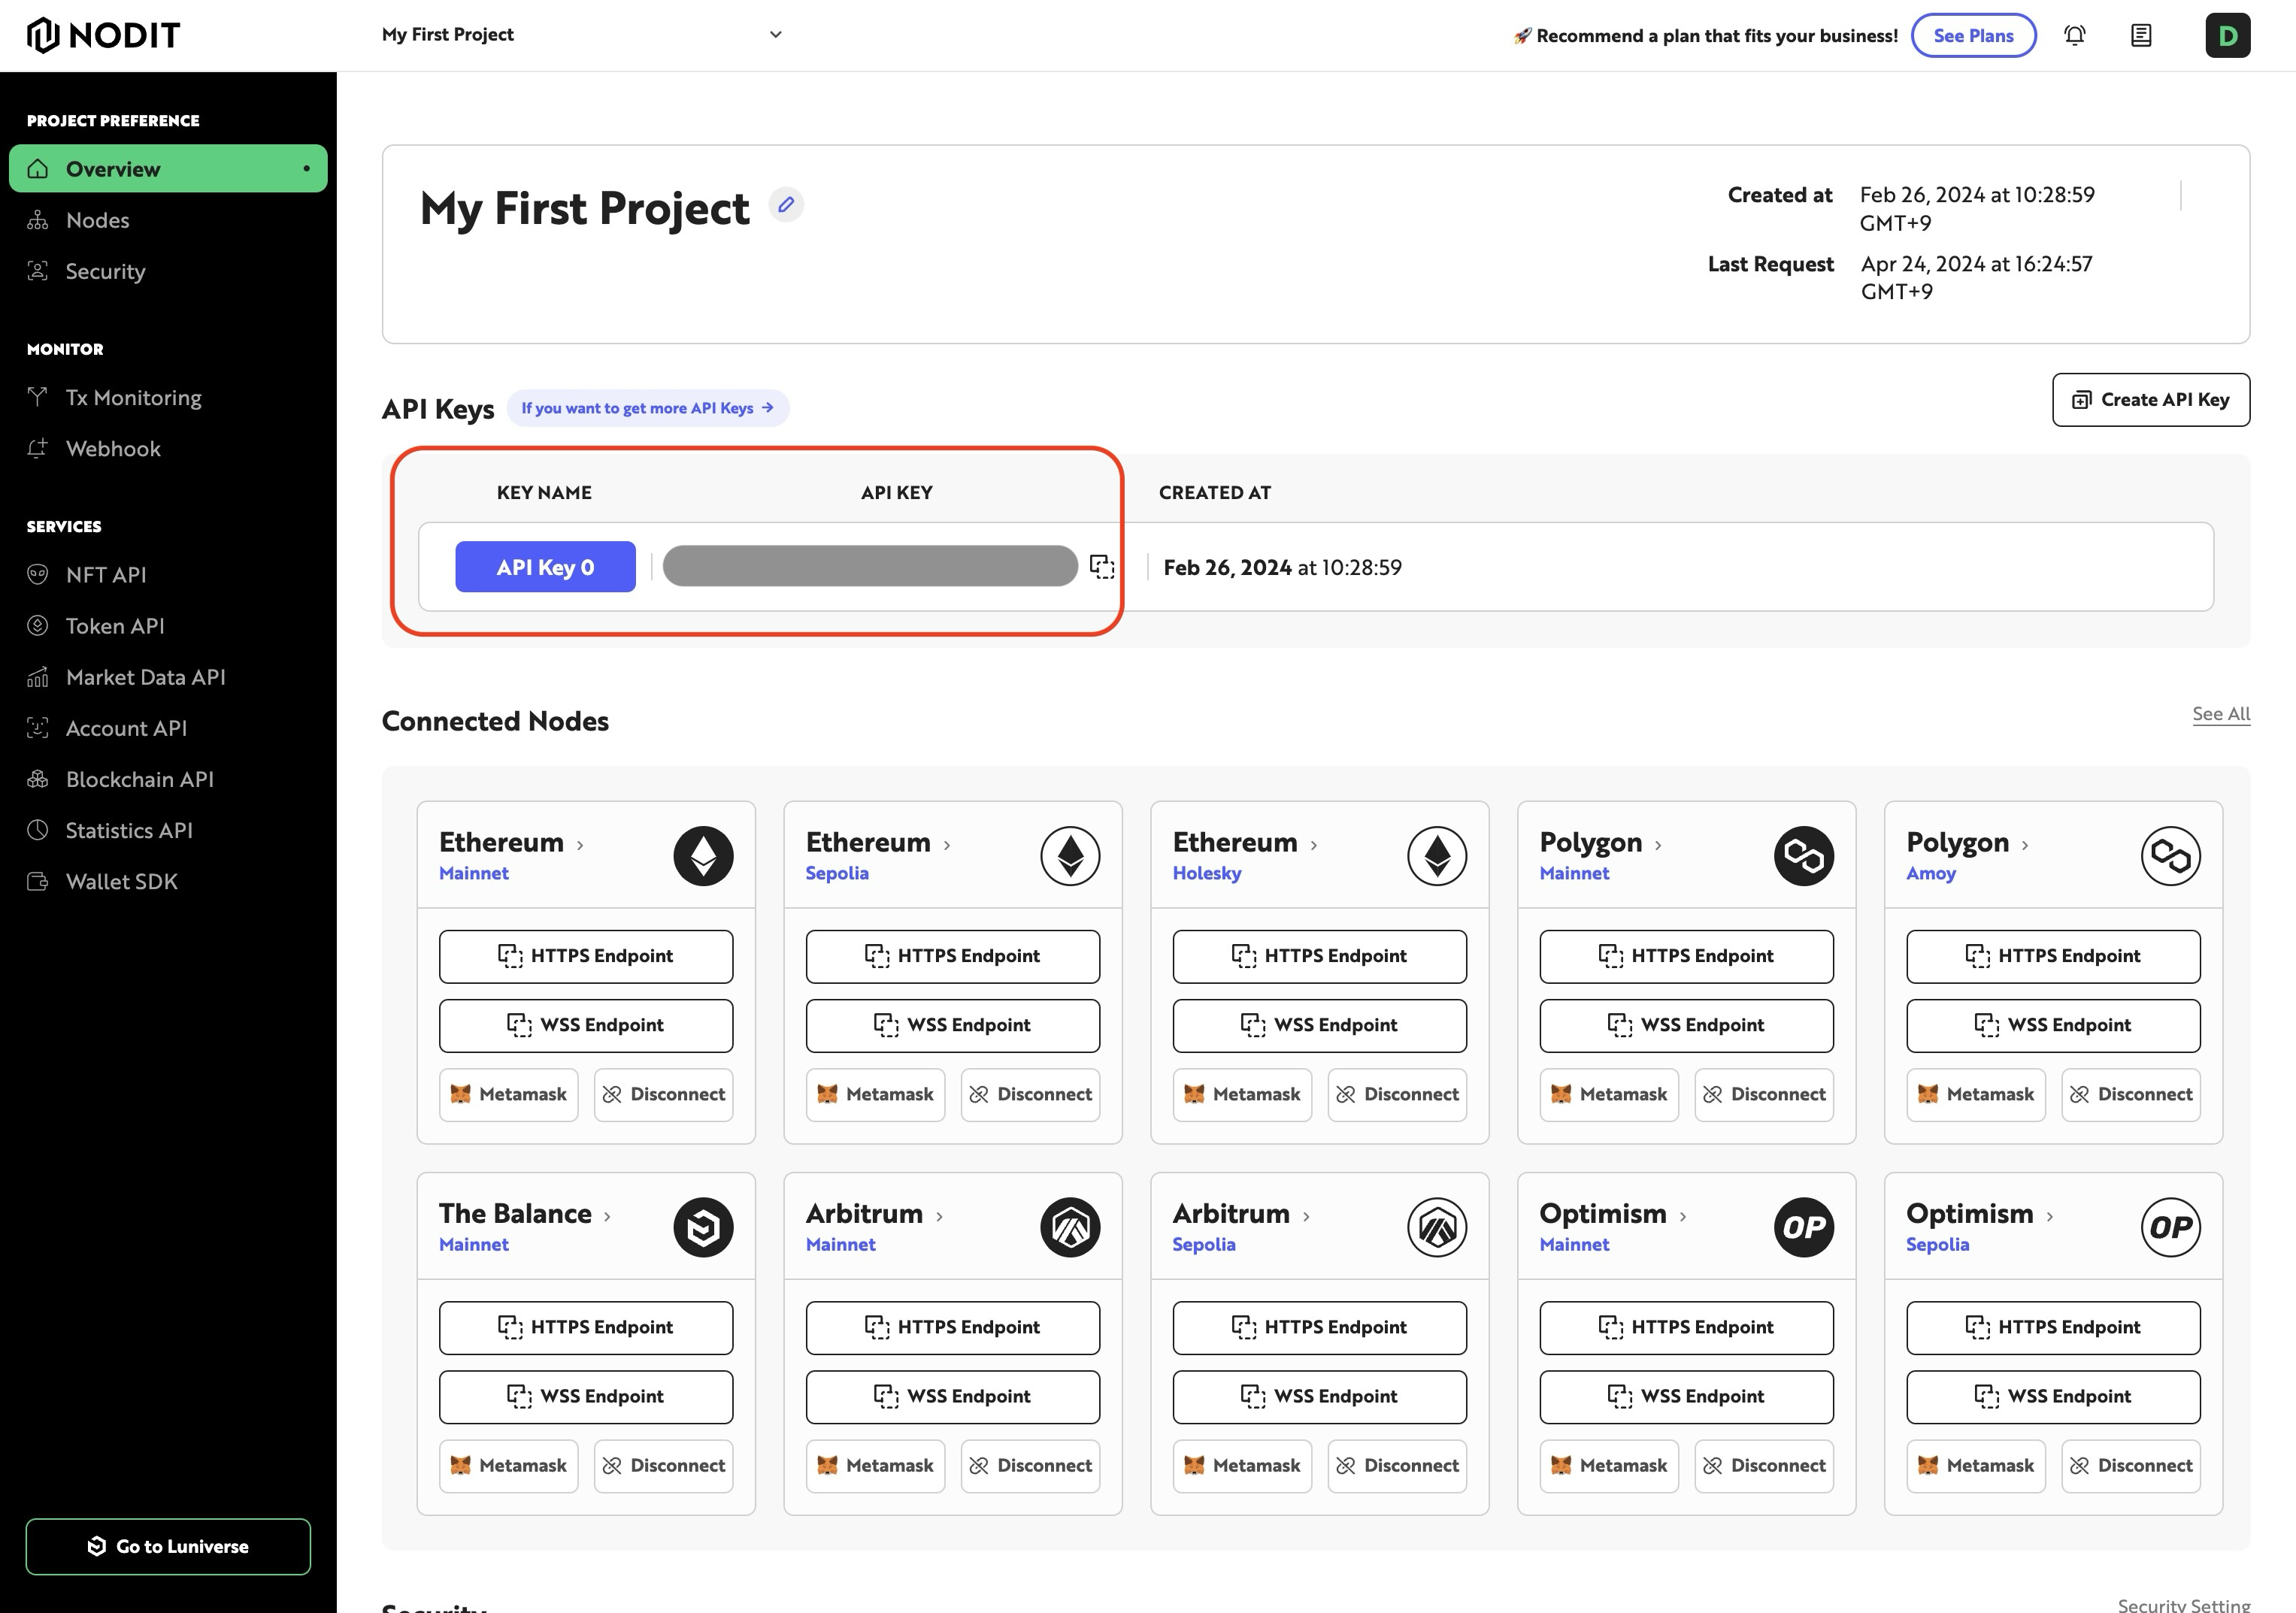
1-4. API Key
Copy the API key generated on the project Overview page and store it in a safe location.
2. Writing the Code
In this example, you will write code that subscribes to the ADDRESS_ACTIVITY event using a WebSocket and receives a notification each time activity occurs on the specified addresses. Enter the required values for a few variables in the sample code below. These variables play an important role in configuring the WebSocket code to operate correctly and securely. Replace the placeholder values with the appropriate data for your environment.
messageId: A unique identifier for the WebSocket message. Replace this with an actual ID relevant to your application. The message ID is used to distinguish specific messages or events between the server and client.description: A brief description of the purpose of the WebSocket connection. Replace this with a description that reflects the actual use of the connection. This description helps identify the connection easily during service logging, monitoring, or troubleshooting.apiKey: Replace this with the actual API key provided in the Nodit Console. The API key is essential for secure access to the service and for verifying user authentication.protocol: Represents the blockchain protocol you are interacting with. Replace this with a specific protocol name such as "Ethereum" or "Arbitrum". The protocol defines which blockchain technology the WebSocket connection interacts with.network: Specifies the target network. Replace this with a specific network such as "mainnet", "testnet", or "sepolia". The network designates the specific environment within the protocol where actual data is transmitted.
import io from "socket.io-client";

// {Your websocket message ID} - This is a unique identifier for your WebSocket message. You need to replace this placeholder with an actual ID that is relevant to your application.
const messageId = "{Your websocket message ID}";

// eventType specifies the type of event you want to subscribe to on the blockchain. For example, "ADDRESS_ACTIVITY" is used to receive events related to activity on specific addresses.
const eventType = "ADDRESS_ACTIVITY";

// The WebSocket URL to connect to. You need to use the appropriate URL provided by your blockchain service provider.
const url = "wss://web3.nodit.io/v1/websocket";

// Parameters for configuring the subscription. You should replace the placeholder in 'description' with a brief description of your WebSocket connection's purpose.
const params = {
  description: "{description about your websocket}",
  condition: {
    addresses: ["0xdAC17F958D2ee523a2206206994597C13D831ec7"] // Replace this with the addresses you want to monitor.
  }
};

// Options for the WebSocket connection. These include security settings and additional parameters required by the server.
const options = {
  rejectUnauthorized: false, // This should be true in production for better security unless your server uses a self-signed certificate.
  transports: ["websocket"],
  path: "/v1/websocket/",
  auth: {
      apiKey: "{Your Api Key}", // Replace this with your actual API key provided by the service.
  },
  query: {
      protocol: "{protocol}", // Replace this with the blockchain protocol you are interacting with, e.g., "ethereum", "arbitrum", etc.
      network: "{network}", // Replace this with the specific network you are targeting, e.g., "mainnet", "testnet".
  },
};

// This function establishes a connection to the server and handles various WebSocket events.
function connectToServer() {
  return new Promise((resolve, reject) => {
    const socket = io(url, options);

    socket.on("connect", () => {
      socket.on("subscription_registered", (message) => {
        console.log("registered", message);
      });

      socket.on("subscription_connected", (message) => {
        console.log("subscription_connected", message);

        // Emit a subscription message with your specific messageId, eventType, and parameters.
        socket.emit("subscription", messageId, eventType, JSON.stringify(params));
      });

      socket.on("subscription_error", (message) => {
        console.error(`nodit_subscription_error: ${message}`);
      });

      socket.on("subscription_event", (message) => {
        console.log("subscription Event : ", message);
      });

      socket.on("disconnect", (message) => {
        console.warn(`disconnect`, message);
      });

      resolve(socket);
    });

    socket.on("connect_error", (error) => {
      console.error(`Socket connection error to : `, error);
      reject(error);
    });
  });
}

connectToServer();
3. Running and Verifying the Response
Once the code is written as shown above, run the file using the terminal and Node.js.
node your_file_name.js
After running the code, if the WebSocket successfully connects to the Ethereum network, you will receive events like the following each time activity occurs on the specified addresses.
subscriptionId: 8924
subscription Event :
  eventType: "ADDRESS_ACTIVITY",
  event: {
    "targetAddresses":["0xdac17f958d2ee523a2206206994597c13d831ec7"],
    "messages":[
      {
        "type":"transaction",
        "block_hash":"0xd33ed0b5e89ecf1c80e82e0bc461d397422b2e85593fdf2fa15f4057af7c8505",
        "block_number":25980964,
        "block_timestamp":1789452407,
        "hash":"0xe3a836f0edda1484d1d631af16b0e88a56d875521a9c71c739846576a782d50f",
        "from_address":"0xbbcaf012a11f69c7ec705ed1bebc0eaa36a5039b",
        "to_address":"0xdac17f958d2ee523a2206206994597c13d831ec7",
        "value":"0x0",
        "input":"0xa9059cbb000000000000000000000000ec31ea8685652bccade0832c5abd76a8b3a8d5fa0000000000000000000000000000000000000000000000000000000001c9c380",
        "nonce":627,
        "gas":96064,
        "gas_price":1065378912,
        "max_fee_per_gas":1074319530,
        "max_priority_fee_per_gas":1000000000,
        "transaction_index":49,
        "transaction_type":2,
        "receipt_status":1,
        "receipt_gas_used":63209,
        "receipt_cumulative_gas_used":3106930,
        "receipt_effective_gas_price":1065378912,
        "receipt_contract_address":null
      }
    ]
  }
The Nodit Developer Portal provides Recipes with more detailed WebSocket call code examples. Click the link below to explore them.