Quickstart
Key Features
On-chain data collected by Nodit's proven indexer and data pipeline is normalized and modeled into domain data suited for specific use cases.
Extract Nodit's on-chain data and load it into your own storage. Integration with AWS S3, Google Cloud Storage, and Cloudflare R2 is supported.
Covers a wide range of data, from basic raw data such as block queries to Uniswap trading data.
Overview
Nodit Datashare is a data delivery service that provides normalized on-chain data in dataset units, ready for large-scale analysis and data pipelines.
For institutions and enterprises that need to use on-chain data for analysis, auditing, reporting, model training, or data warehouse ingestion, a dedicated ETL pipeline must be built to select, collect, normalize, and store the relevant data from the full on-chain dataset. Building and operating such a data pipeline in-house can require significant time and cost.
Nodit Datashare provides data collected and normalized from the Genesis Block to the current block across multiple chains, covering the chain, dataset, and time range of your choice — including Uniswap and SunSwap trading data and token OHLCV data not supported through the Nodit API.
This allows you to quickly obtain the data you need for service development, on-chain analysis, audit and reporting, data warehouse construction, and machine learning model training — without having to build node operations, indexing, normalization, or large-scale data ingestion pipelines yourself.
Use Cases
Collecting Data for Regulatory Reporting
Collect on-chain transaction history or token-specific records needed for auditing and regulatory compliance. Historical data can be precisely extracted using various filters such as specific time ranges and addresses, and used directly as reporting data.
Enterprise BI System Integration
Integrate normalized blockchain data into your business intelligence platform without building a separate internal data pipeline. With Datashare, you can extract on-chain data into your environment and combine it with your existing analytics infrastructure.
Building Model Training Datasets
Build an on-chain data warehouse for various algorithmic modeling use cases — such as anomaly transaction detection, wallet behavior analysis, and token activity prediction — based on on-chain data collected from the Genesis block to the current block.
Getting Started
Console Guide
Dashboard
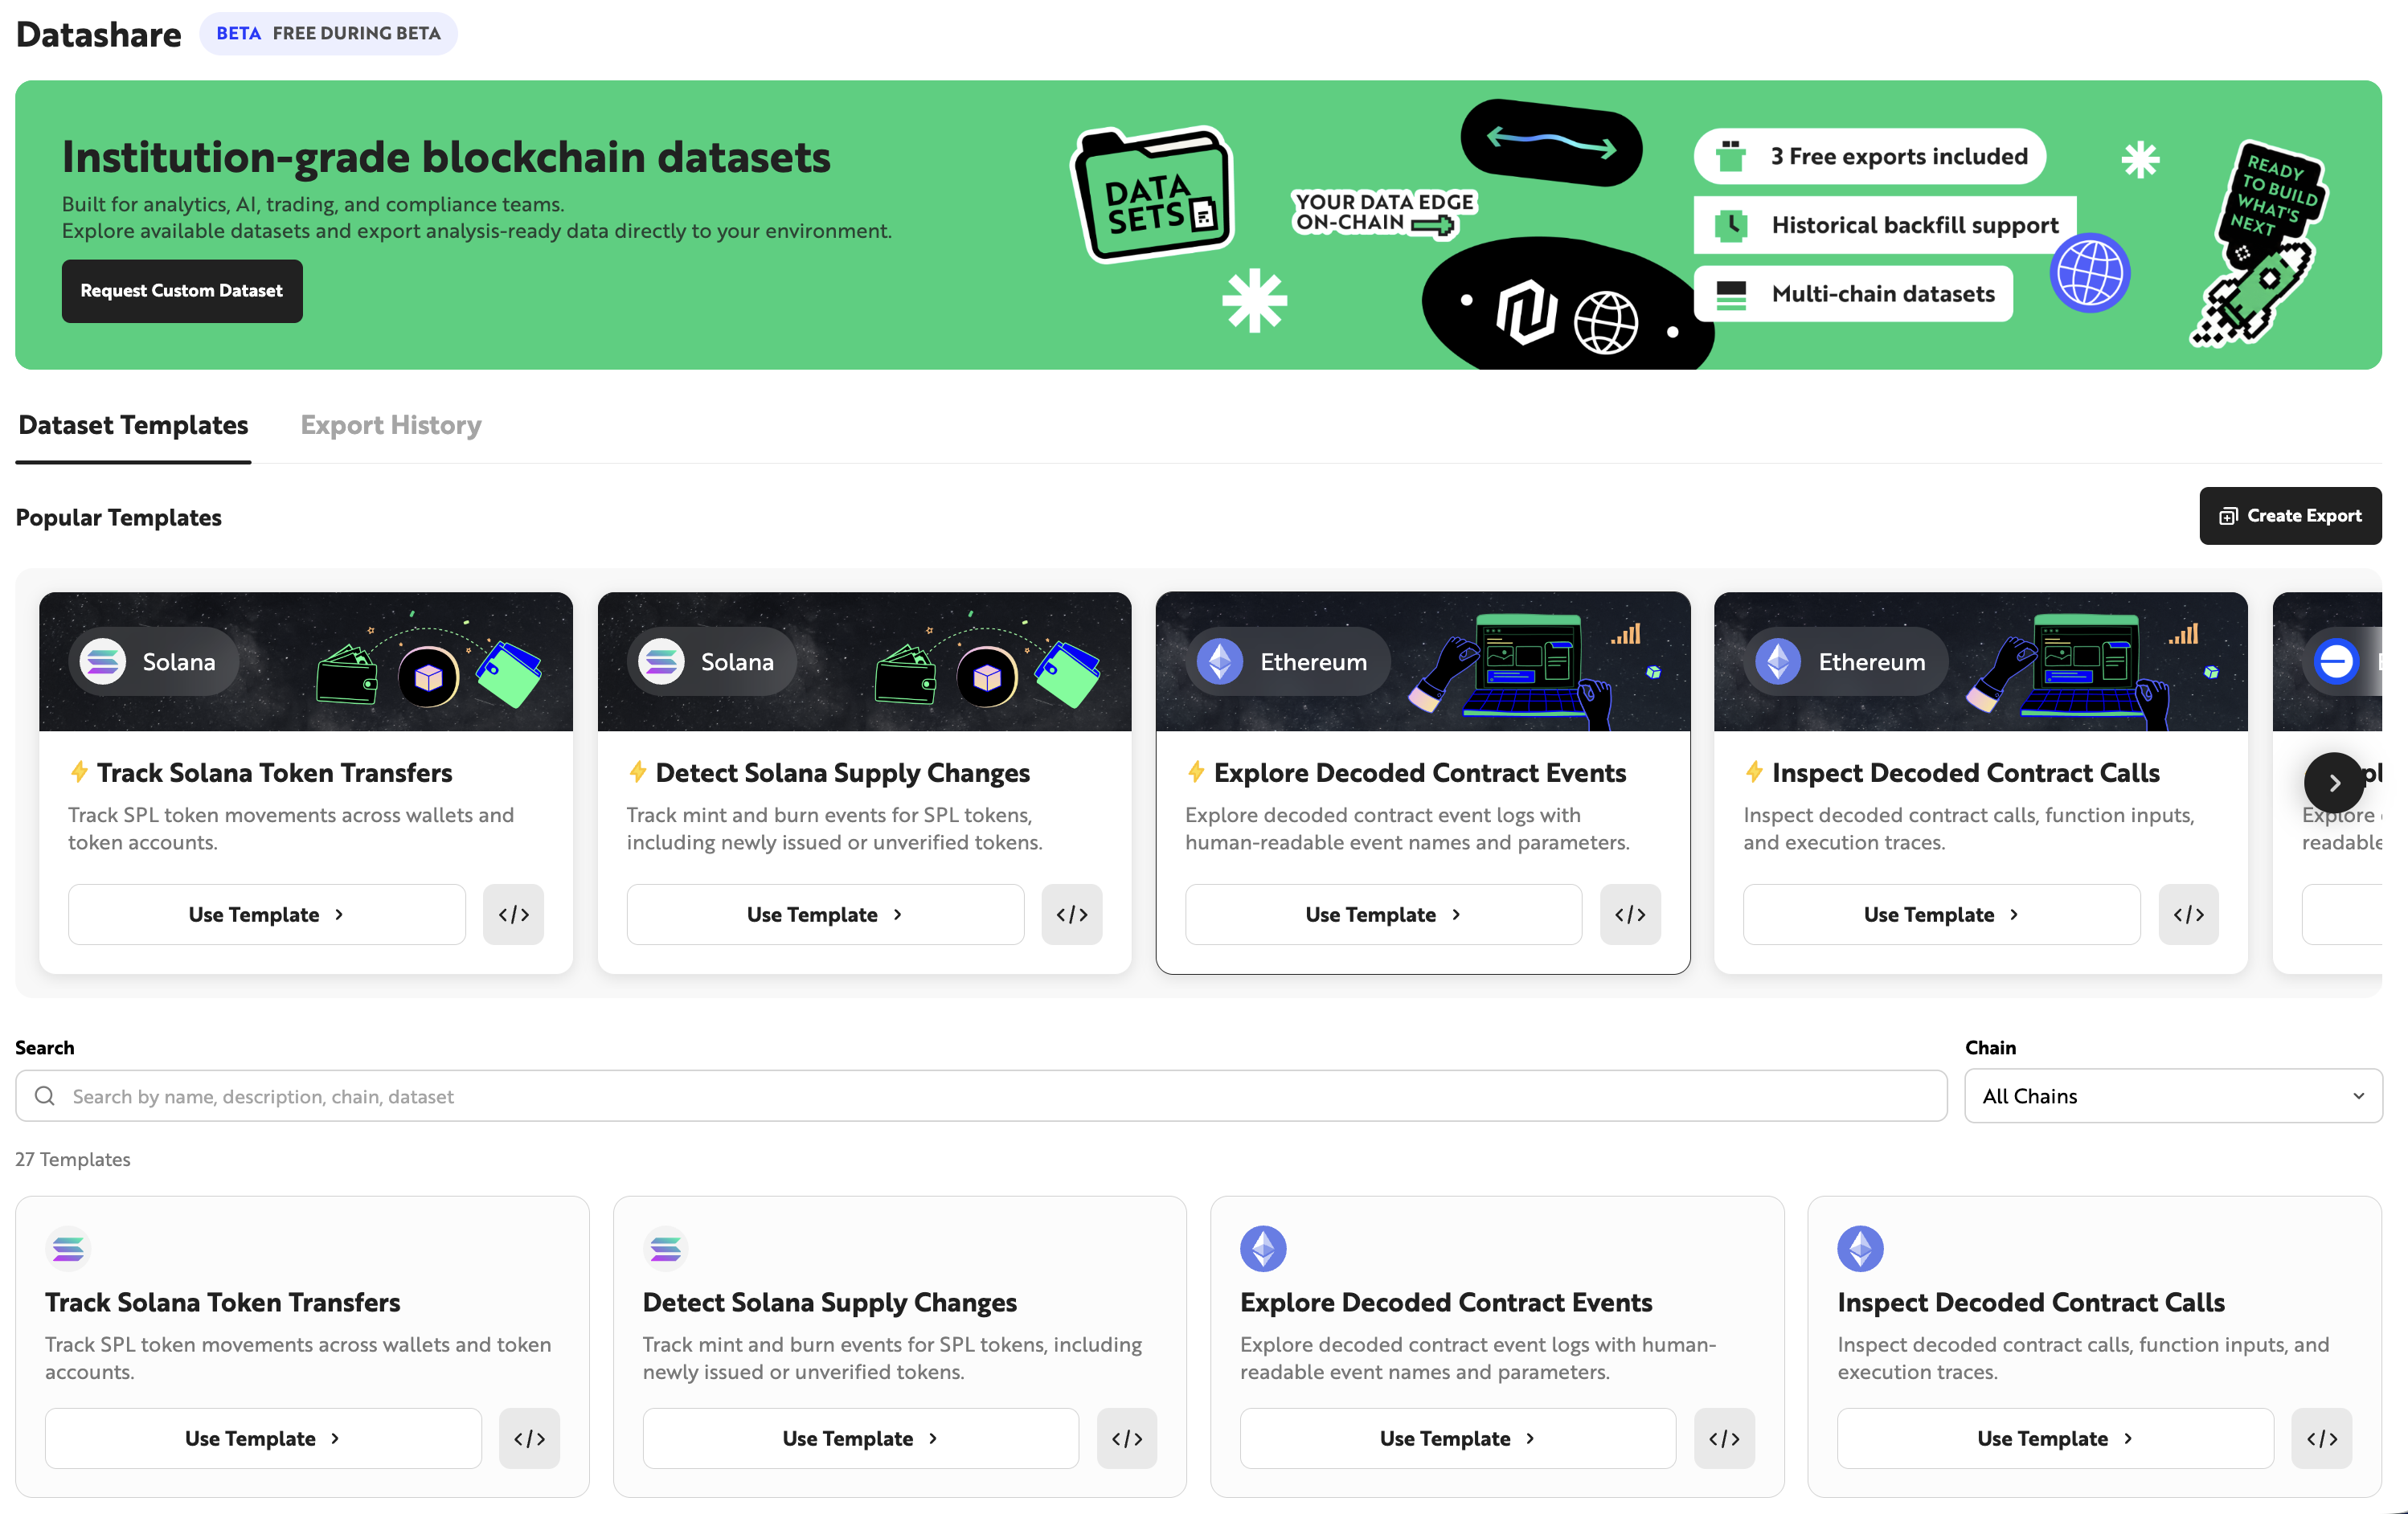
You can access the Datashare dashboard by clicking the [Datashare] button in the left menu of the Nodit Console. The dashboard is divided into the [Dataset] tab, where you can browse dataset templates provided by Datashare, and the [Export History] tab, where you can view your data extraction history.
Dataset
In the Dataset tab, click a template to navigate to the [Export] page, or click the [</>] button to view sample data for that template.
You can view chain-specific datasets and their schemas in the Data Catalog.
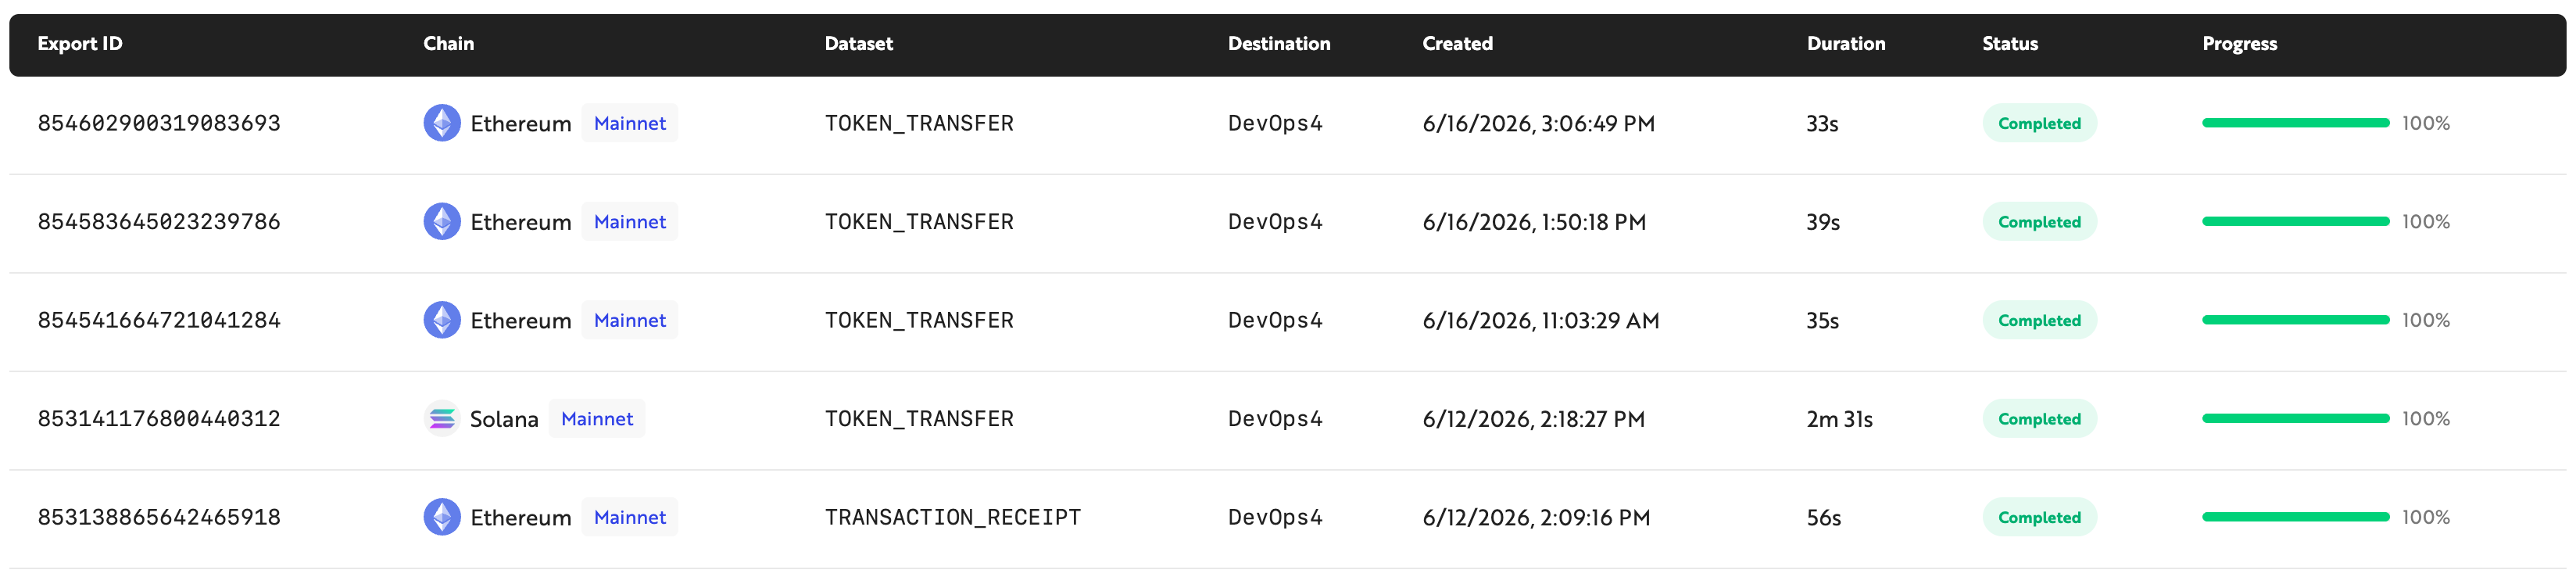
Export History
This tab displays your data extraction history. You can view information such as the type of dataset extracted, the time the extraction was run, the name of the destination storage, and the extraction status.
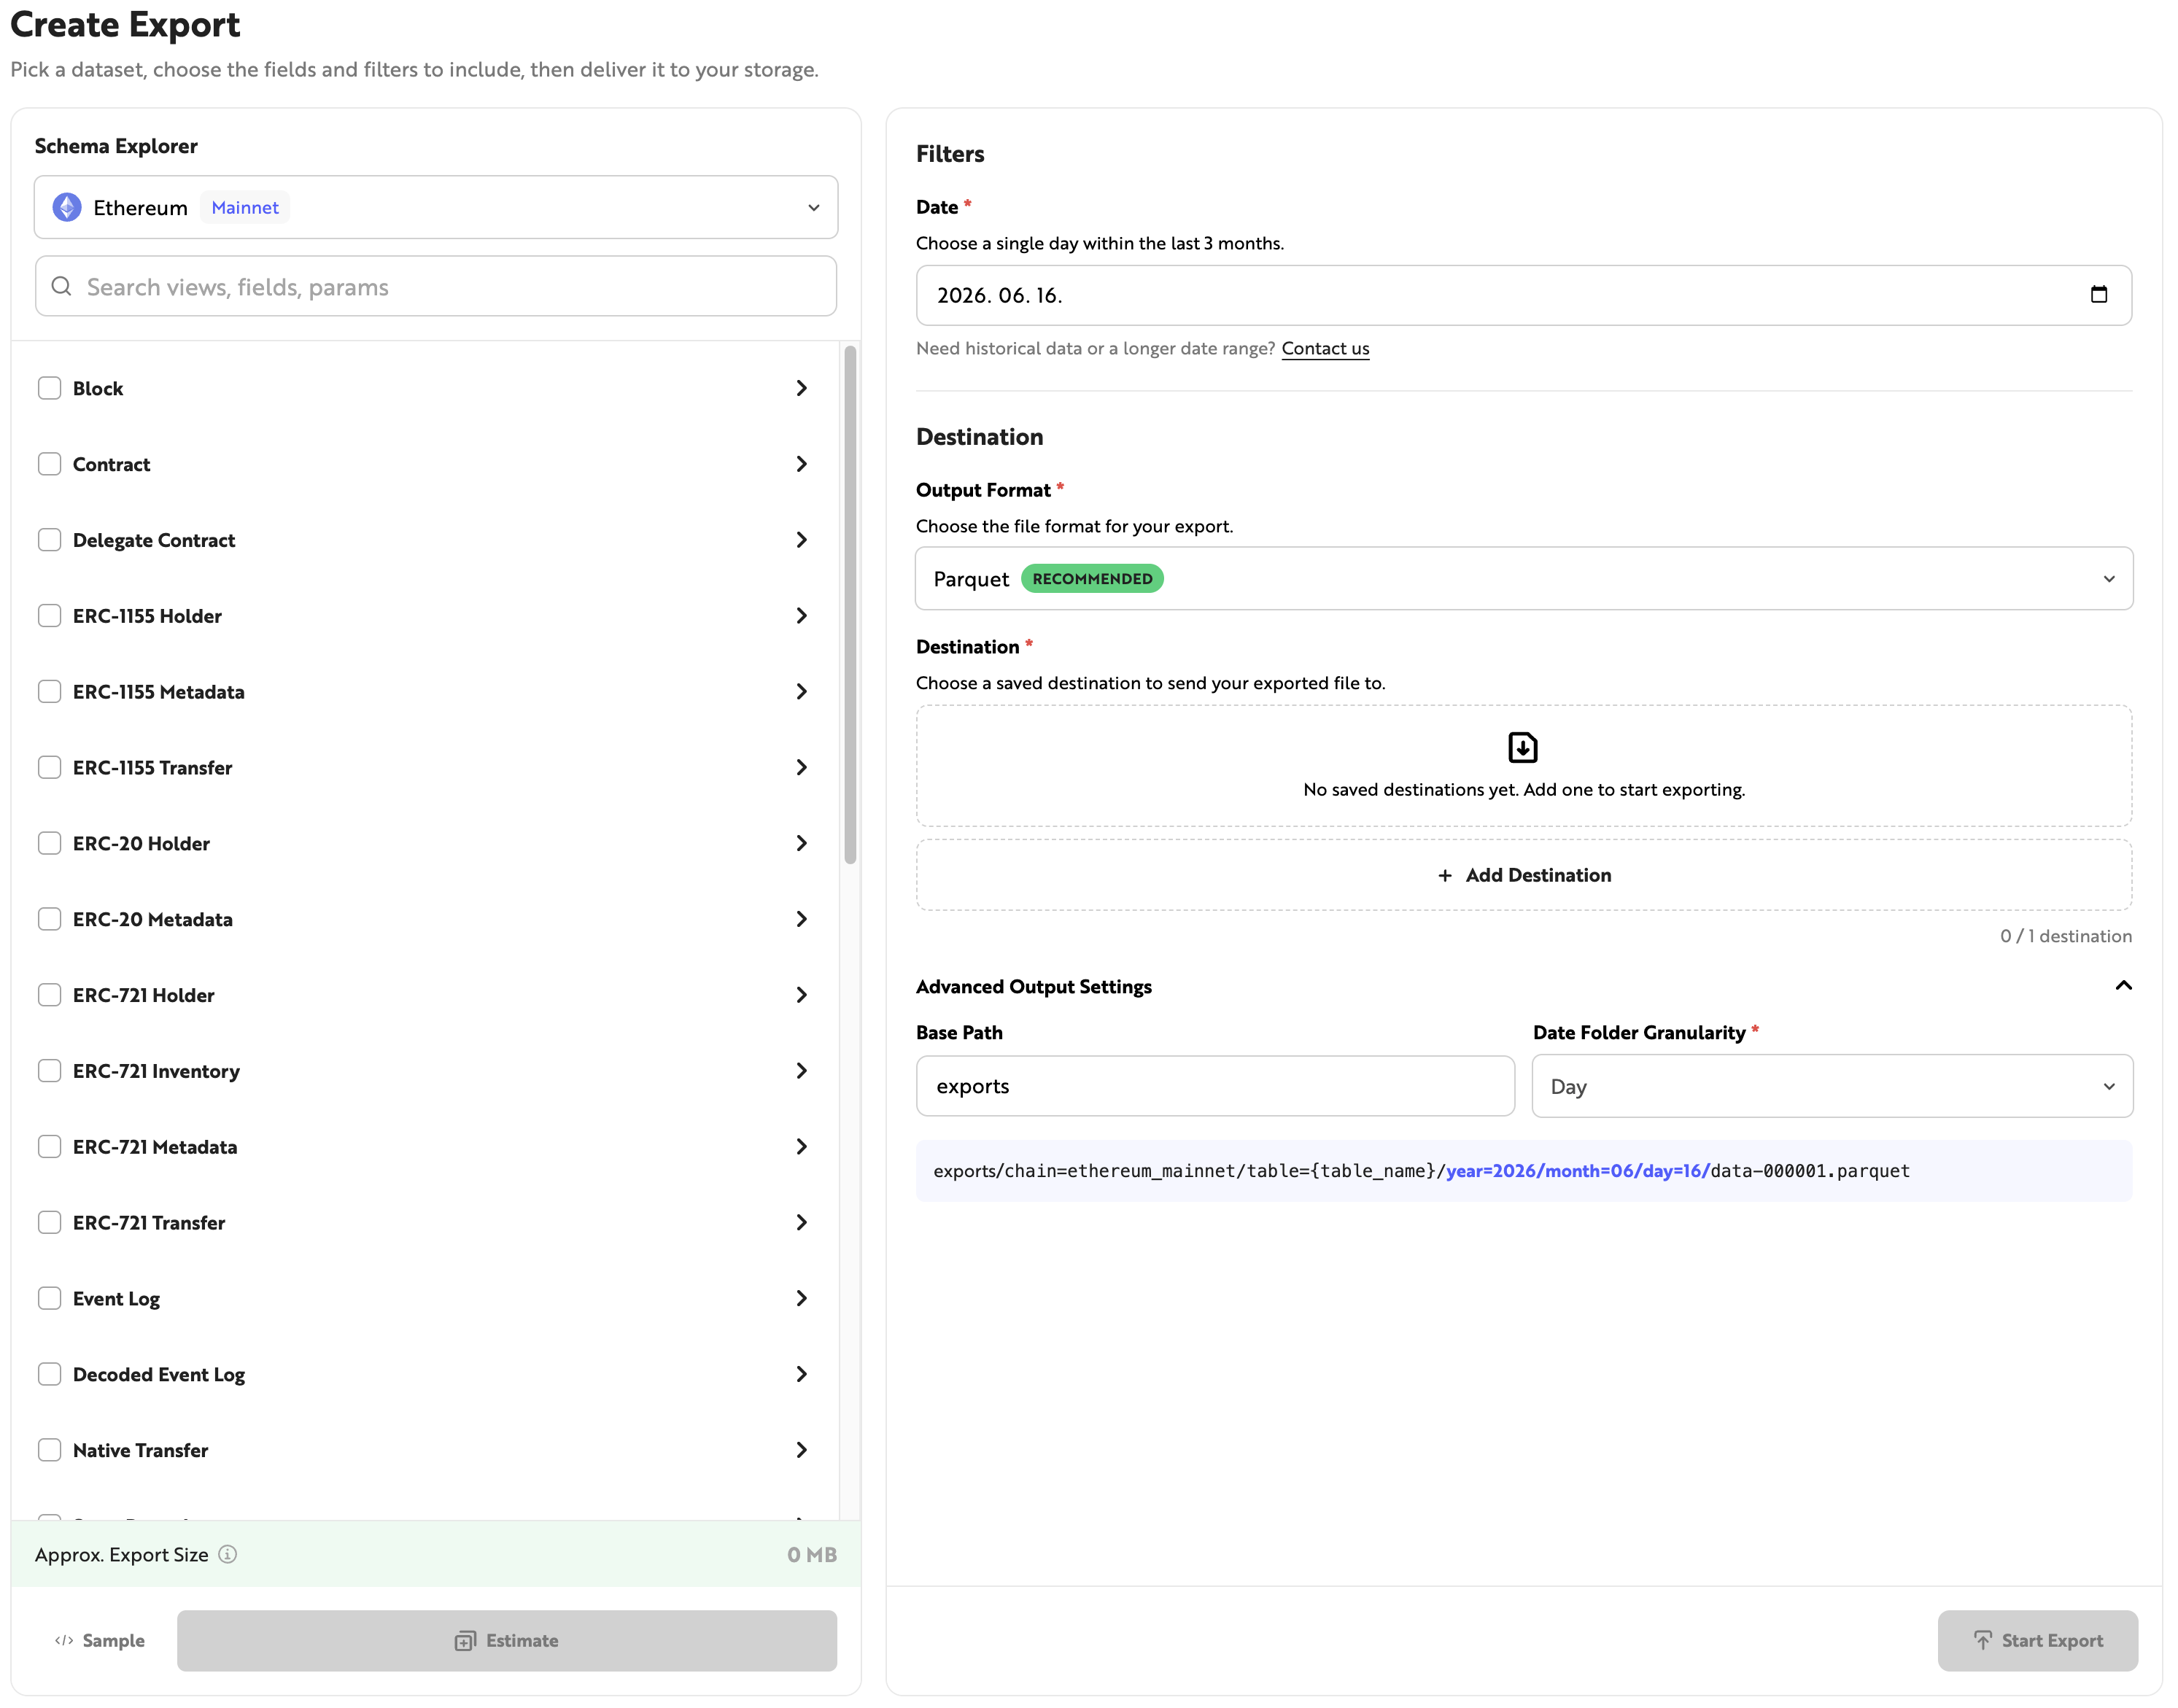
Create Export
The [Create Export] page is divided into the Schema Explorer and Filters sections. In the Schema Explorer section, you can select the dataset and fields to extract. In Filters, you can set the conditions for the data to be extracted.
Schema Explorer
Select the blockchain and dataset from which to extract data. You can view the data schema for each dataset and select the fields you want to extract. Sample data for the selected fields can be viewed by clicking the [Payload] button at the bottom, and you can estimate the size of the data to be extracted by clicking the [Estimate] button.
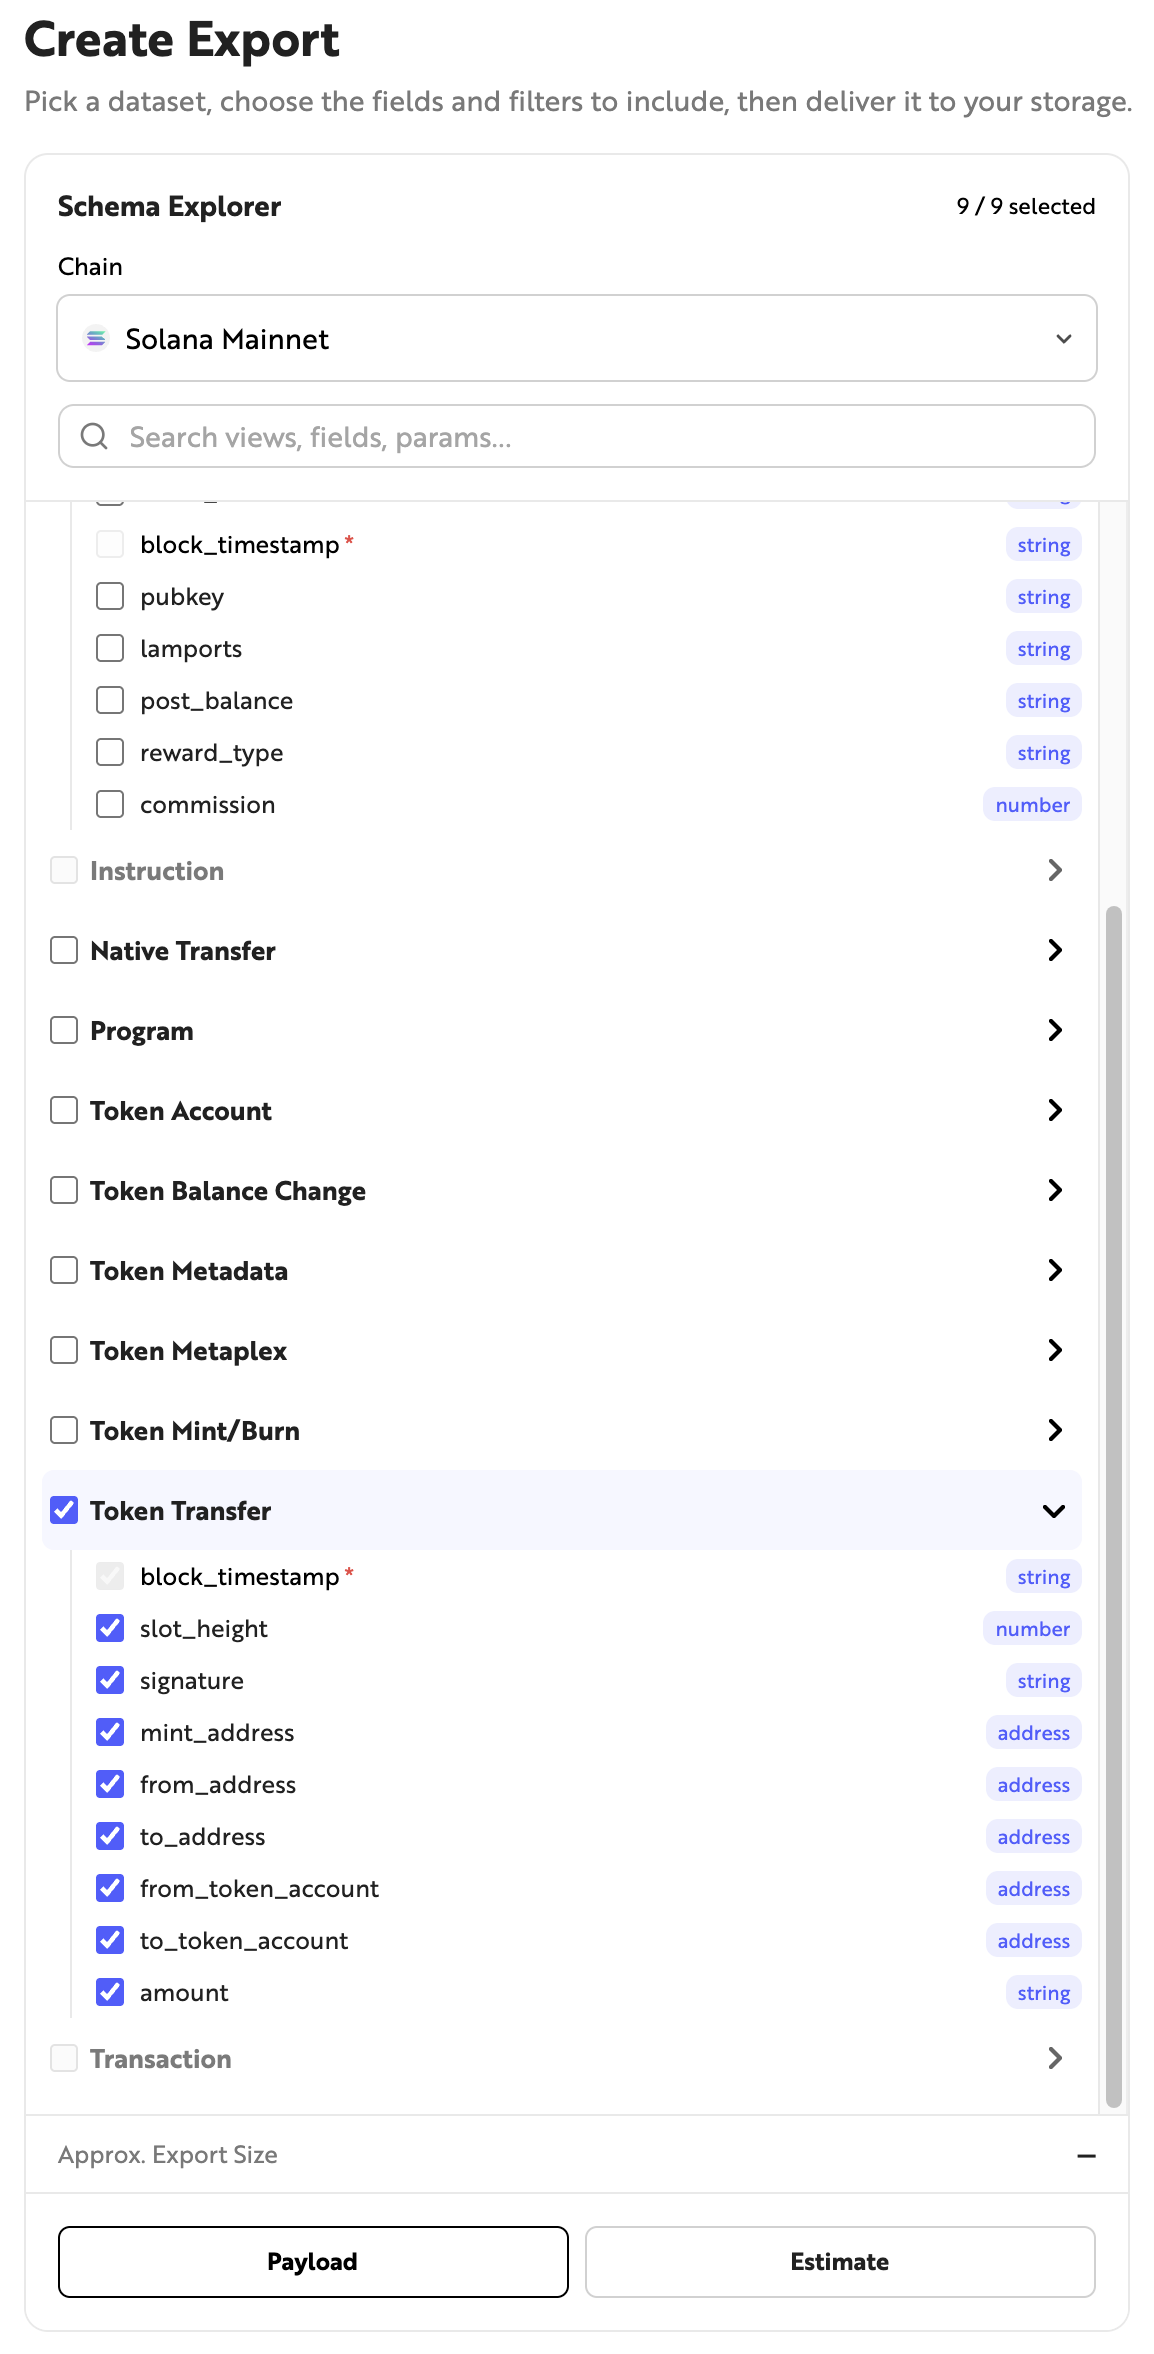
The estimated data size is the size before compression. It may differ from the actual size stored in your storage.
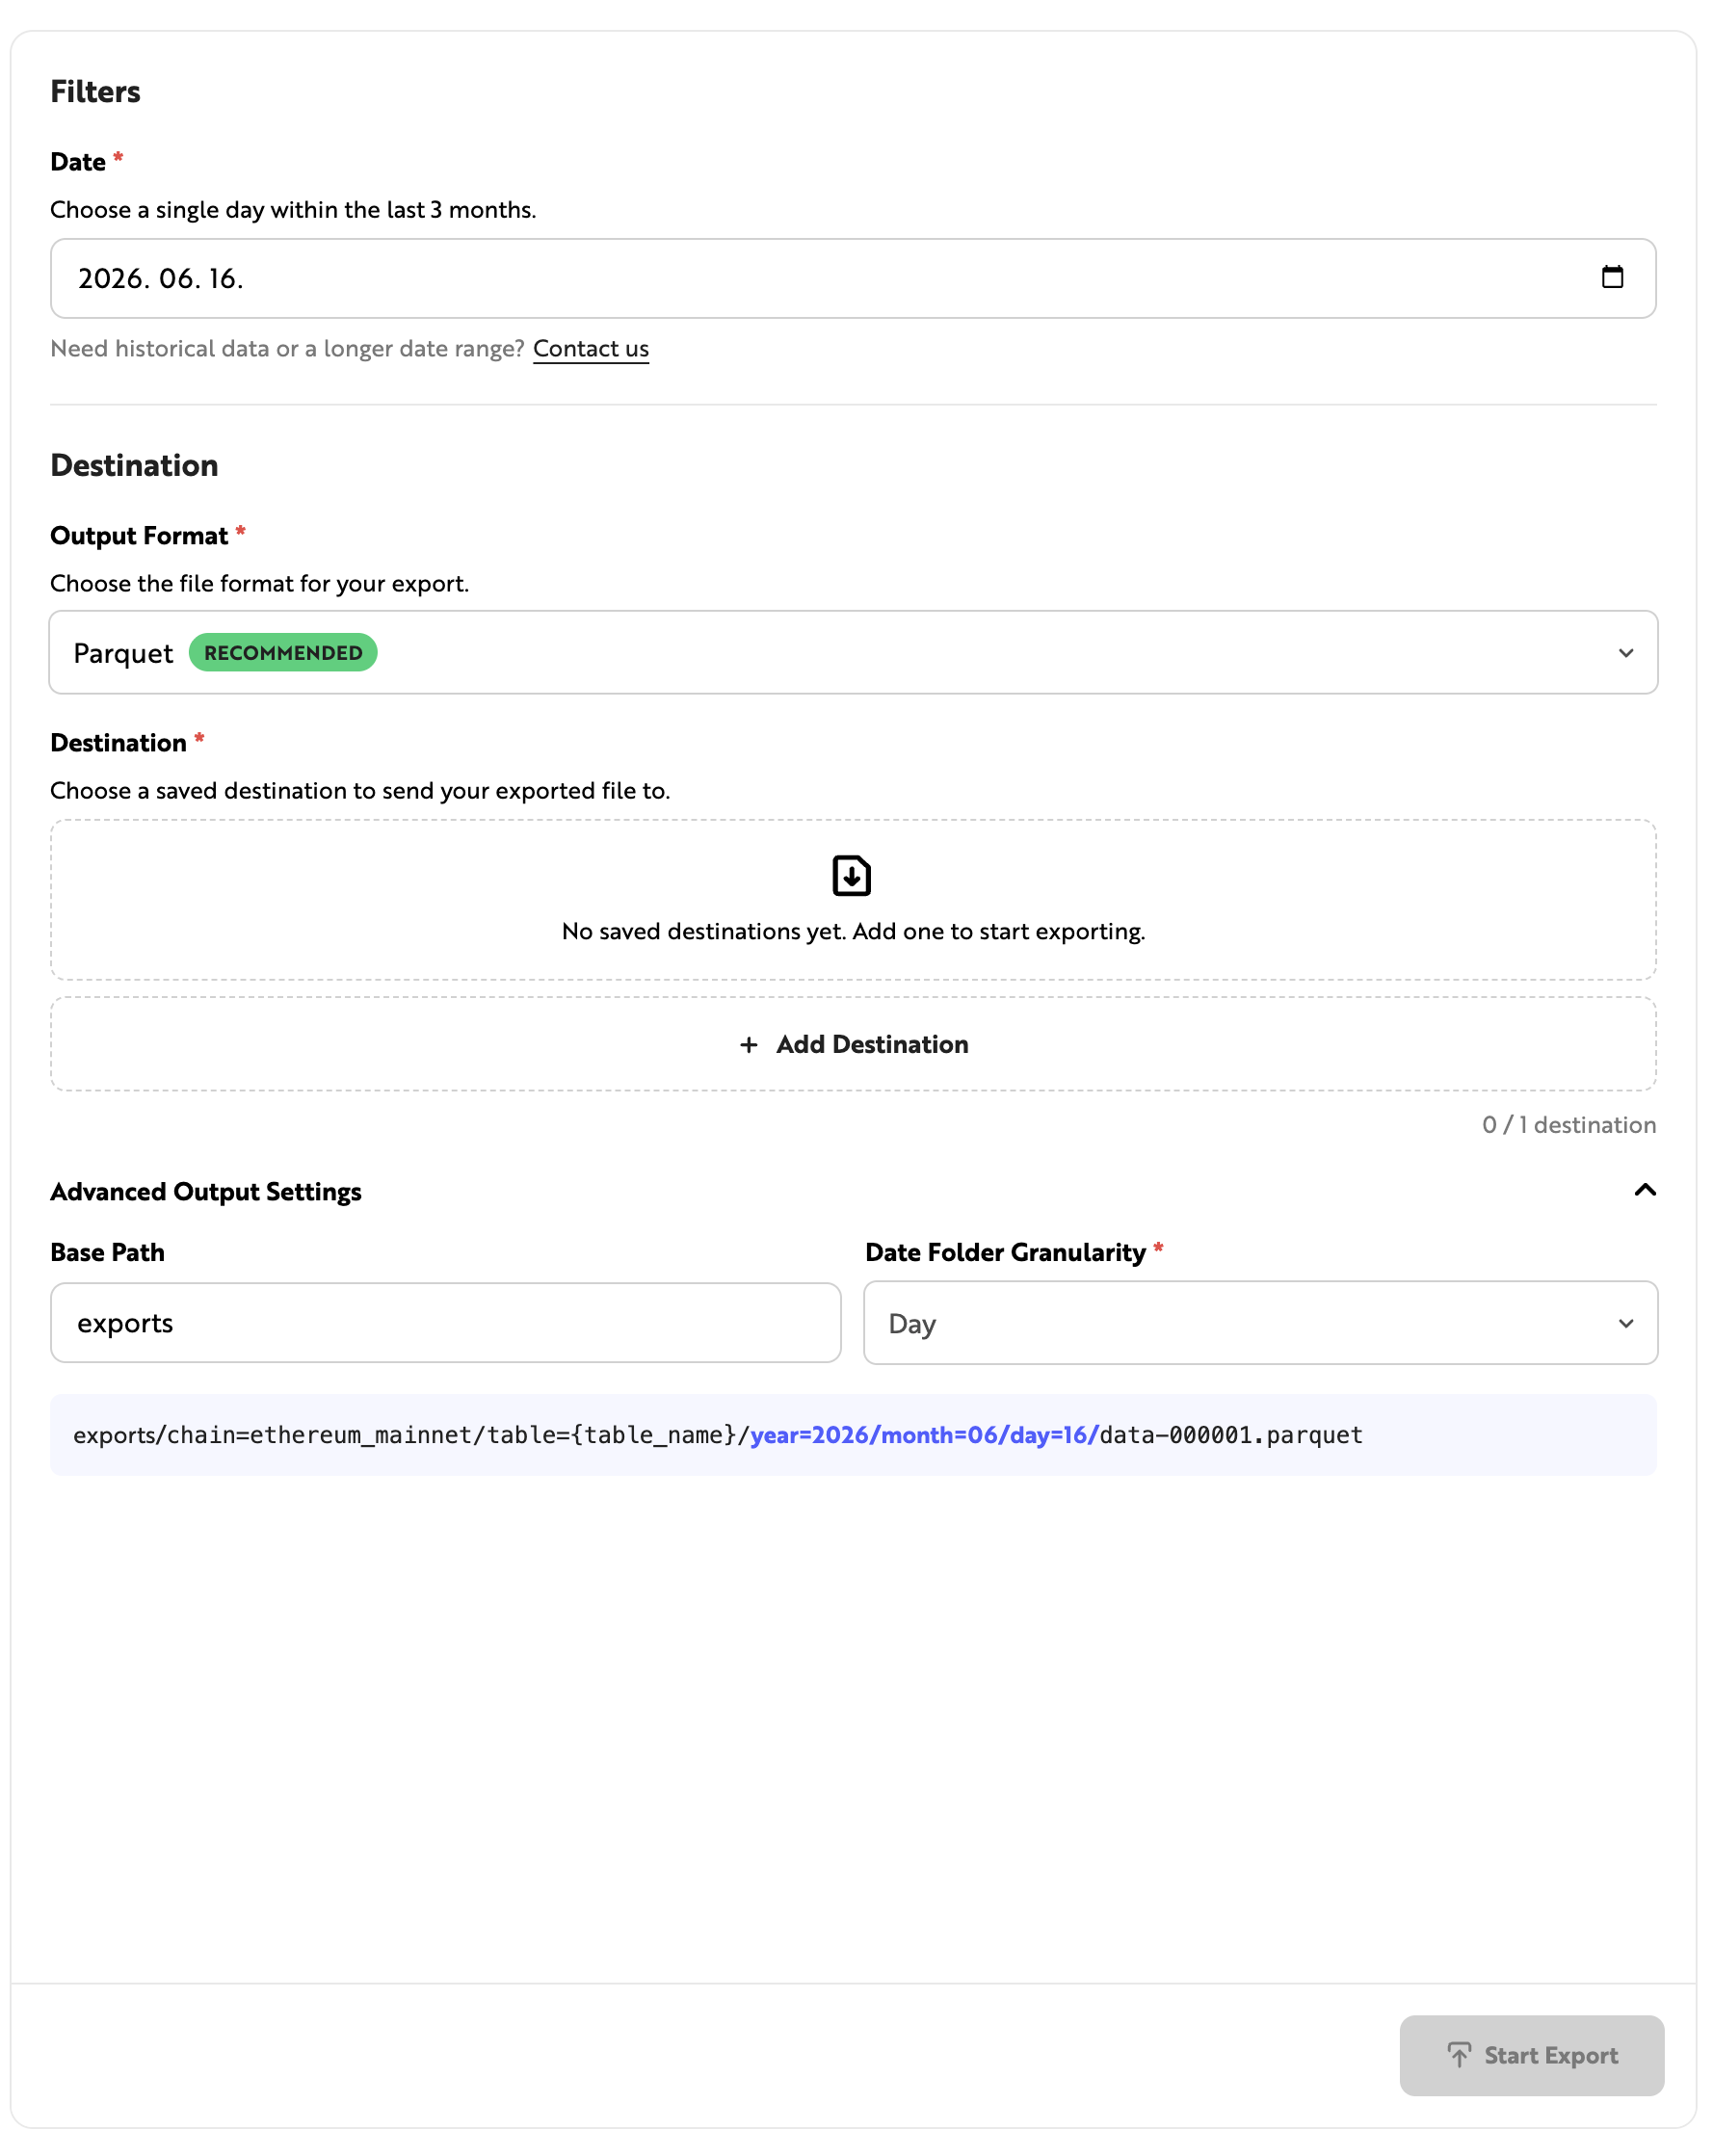
Filters
This section is for setting the conditions before extracting the selected dataset. You can configure the date range of the data to be extracted and the destination storage, and set optional filters depending on the selected dataset. Enter the required values and click [Start Export] to begin extracting data. You can check the extraction progress in the [Export History] tab on the Datashare dashboard.
Datashare can be run from the Nodit Console. If you need a custom dataset or have any questions, please contact us at [email protected].
Destination Configuration
A Destination refers to the user's storage where on-chain data extracted via Datashare is stored. AWS S3, Google Cloud Storage, and Cloudflare R2 are supported. You can configure the destination by entering the storage Region, Bucket, Access Key ID, Secret Access Key, and other details in Datashare.
AWS S3 Destination Configuration
Using AWS S3 as an example, here is how to generate the Access Key ID and Secret Access Key required for Destination configuration. After signing up for an AWS account, navigate to the IAM menu in the AWS Console.
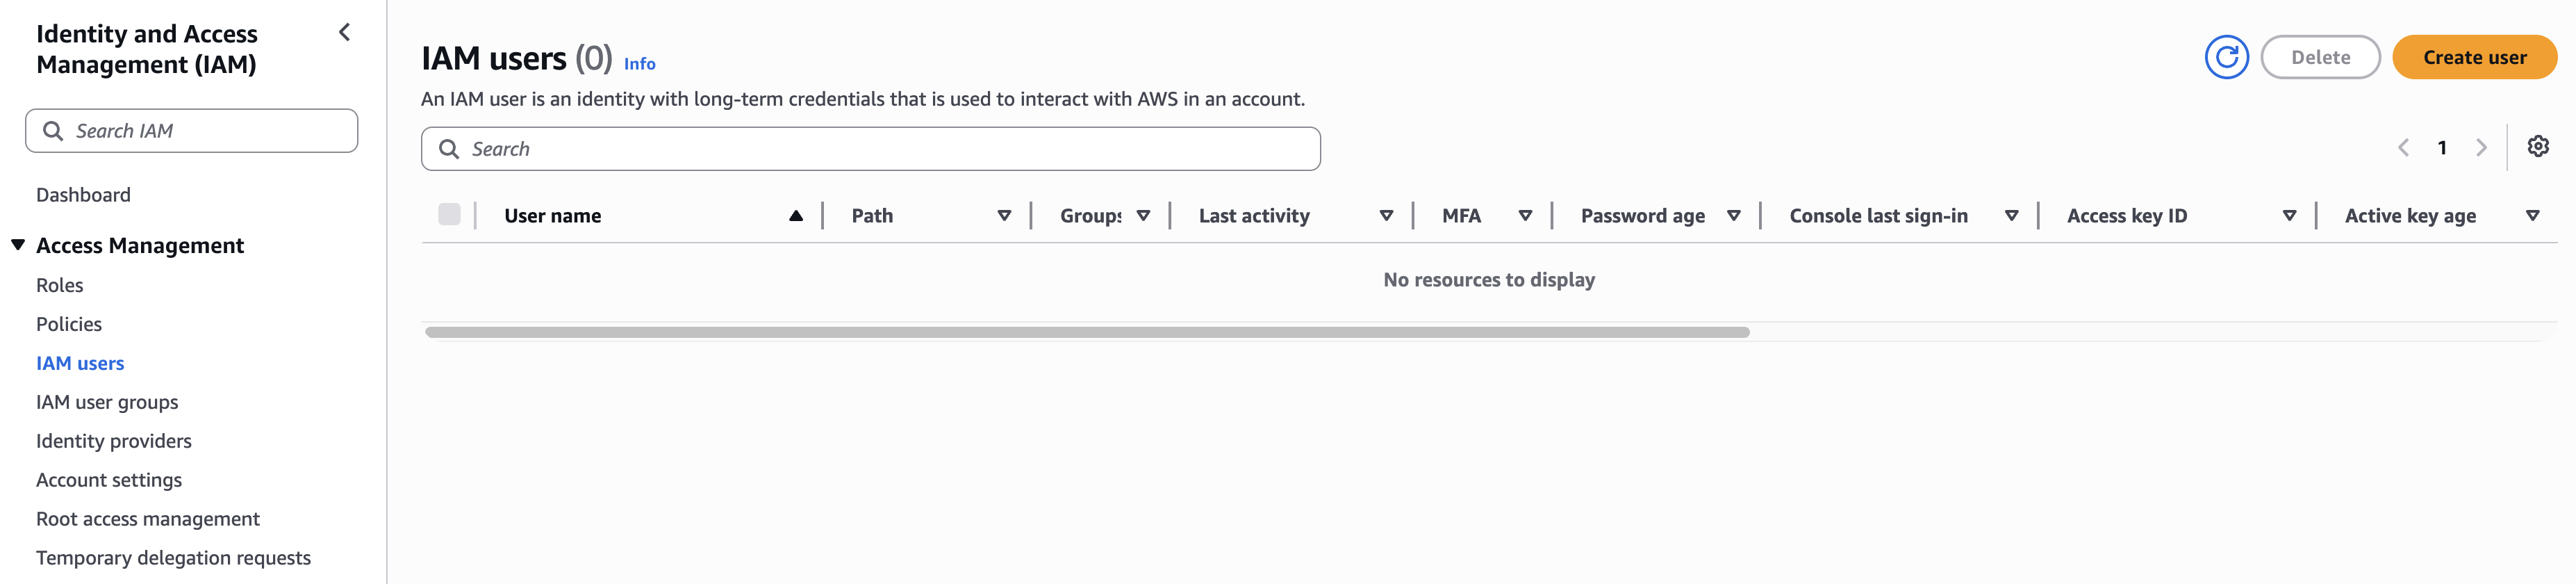
Click [IAM users] in the left menu, then click the [Create User] button to create an IAM user.
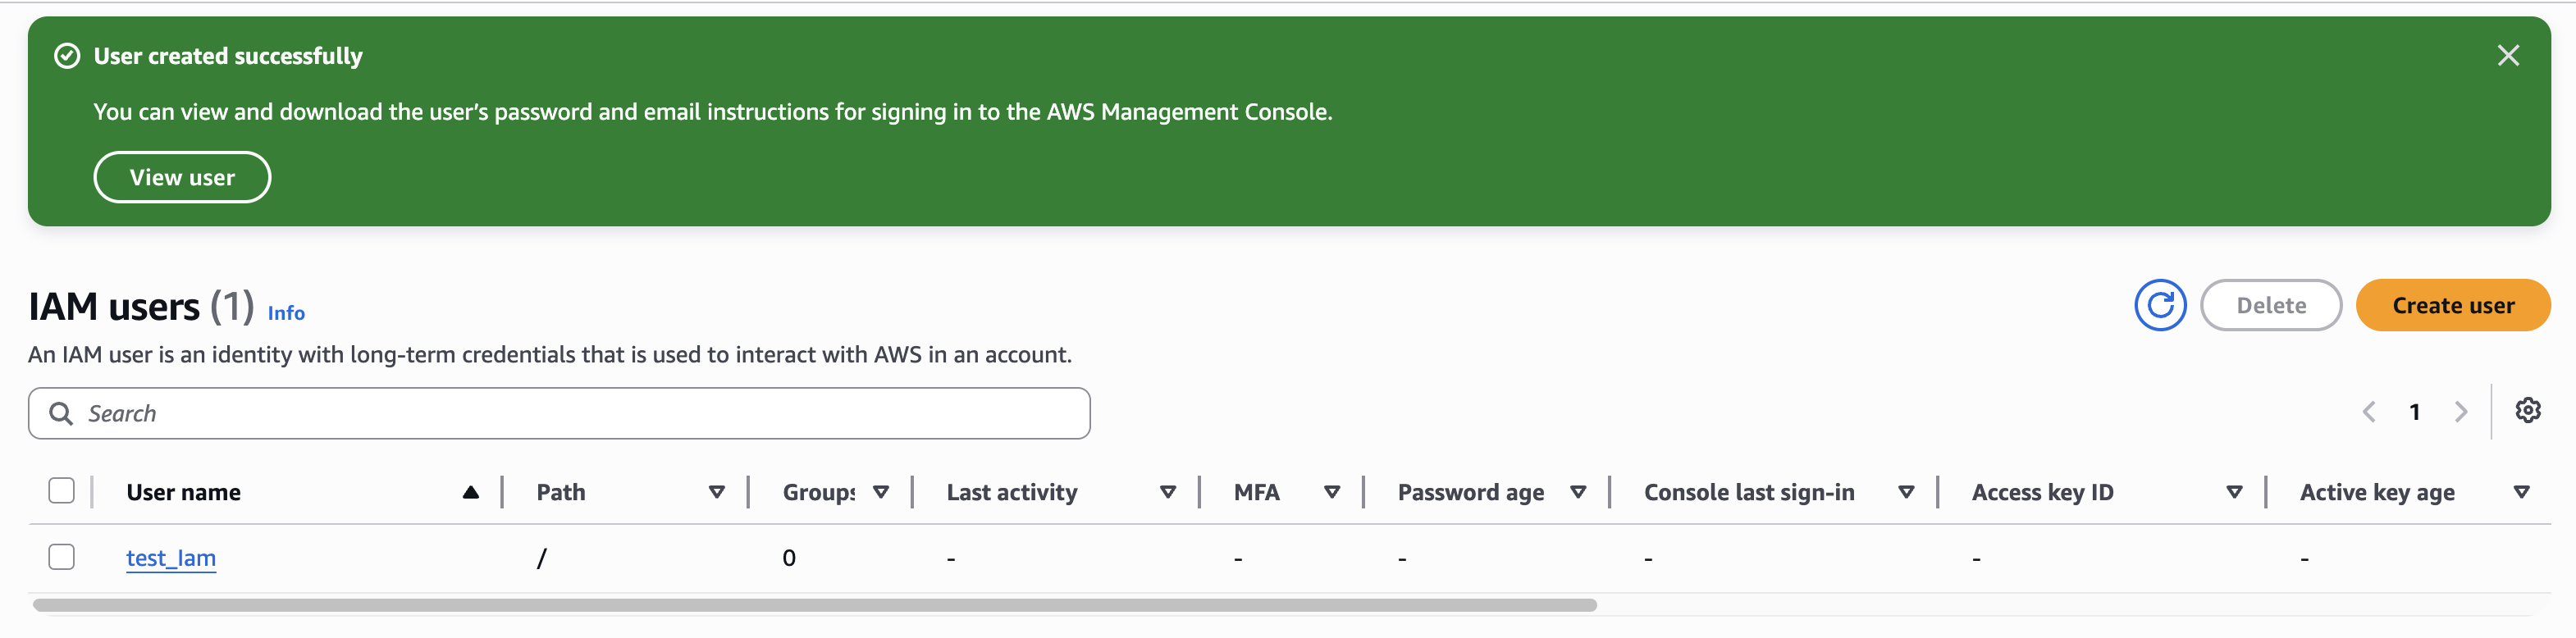
In the IAM users list, click the IAM user name under [User Name] to edit the account settings. Click the [Security credentials] tab.
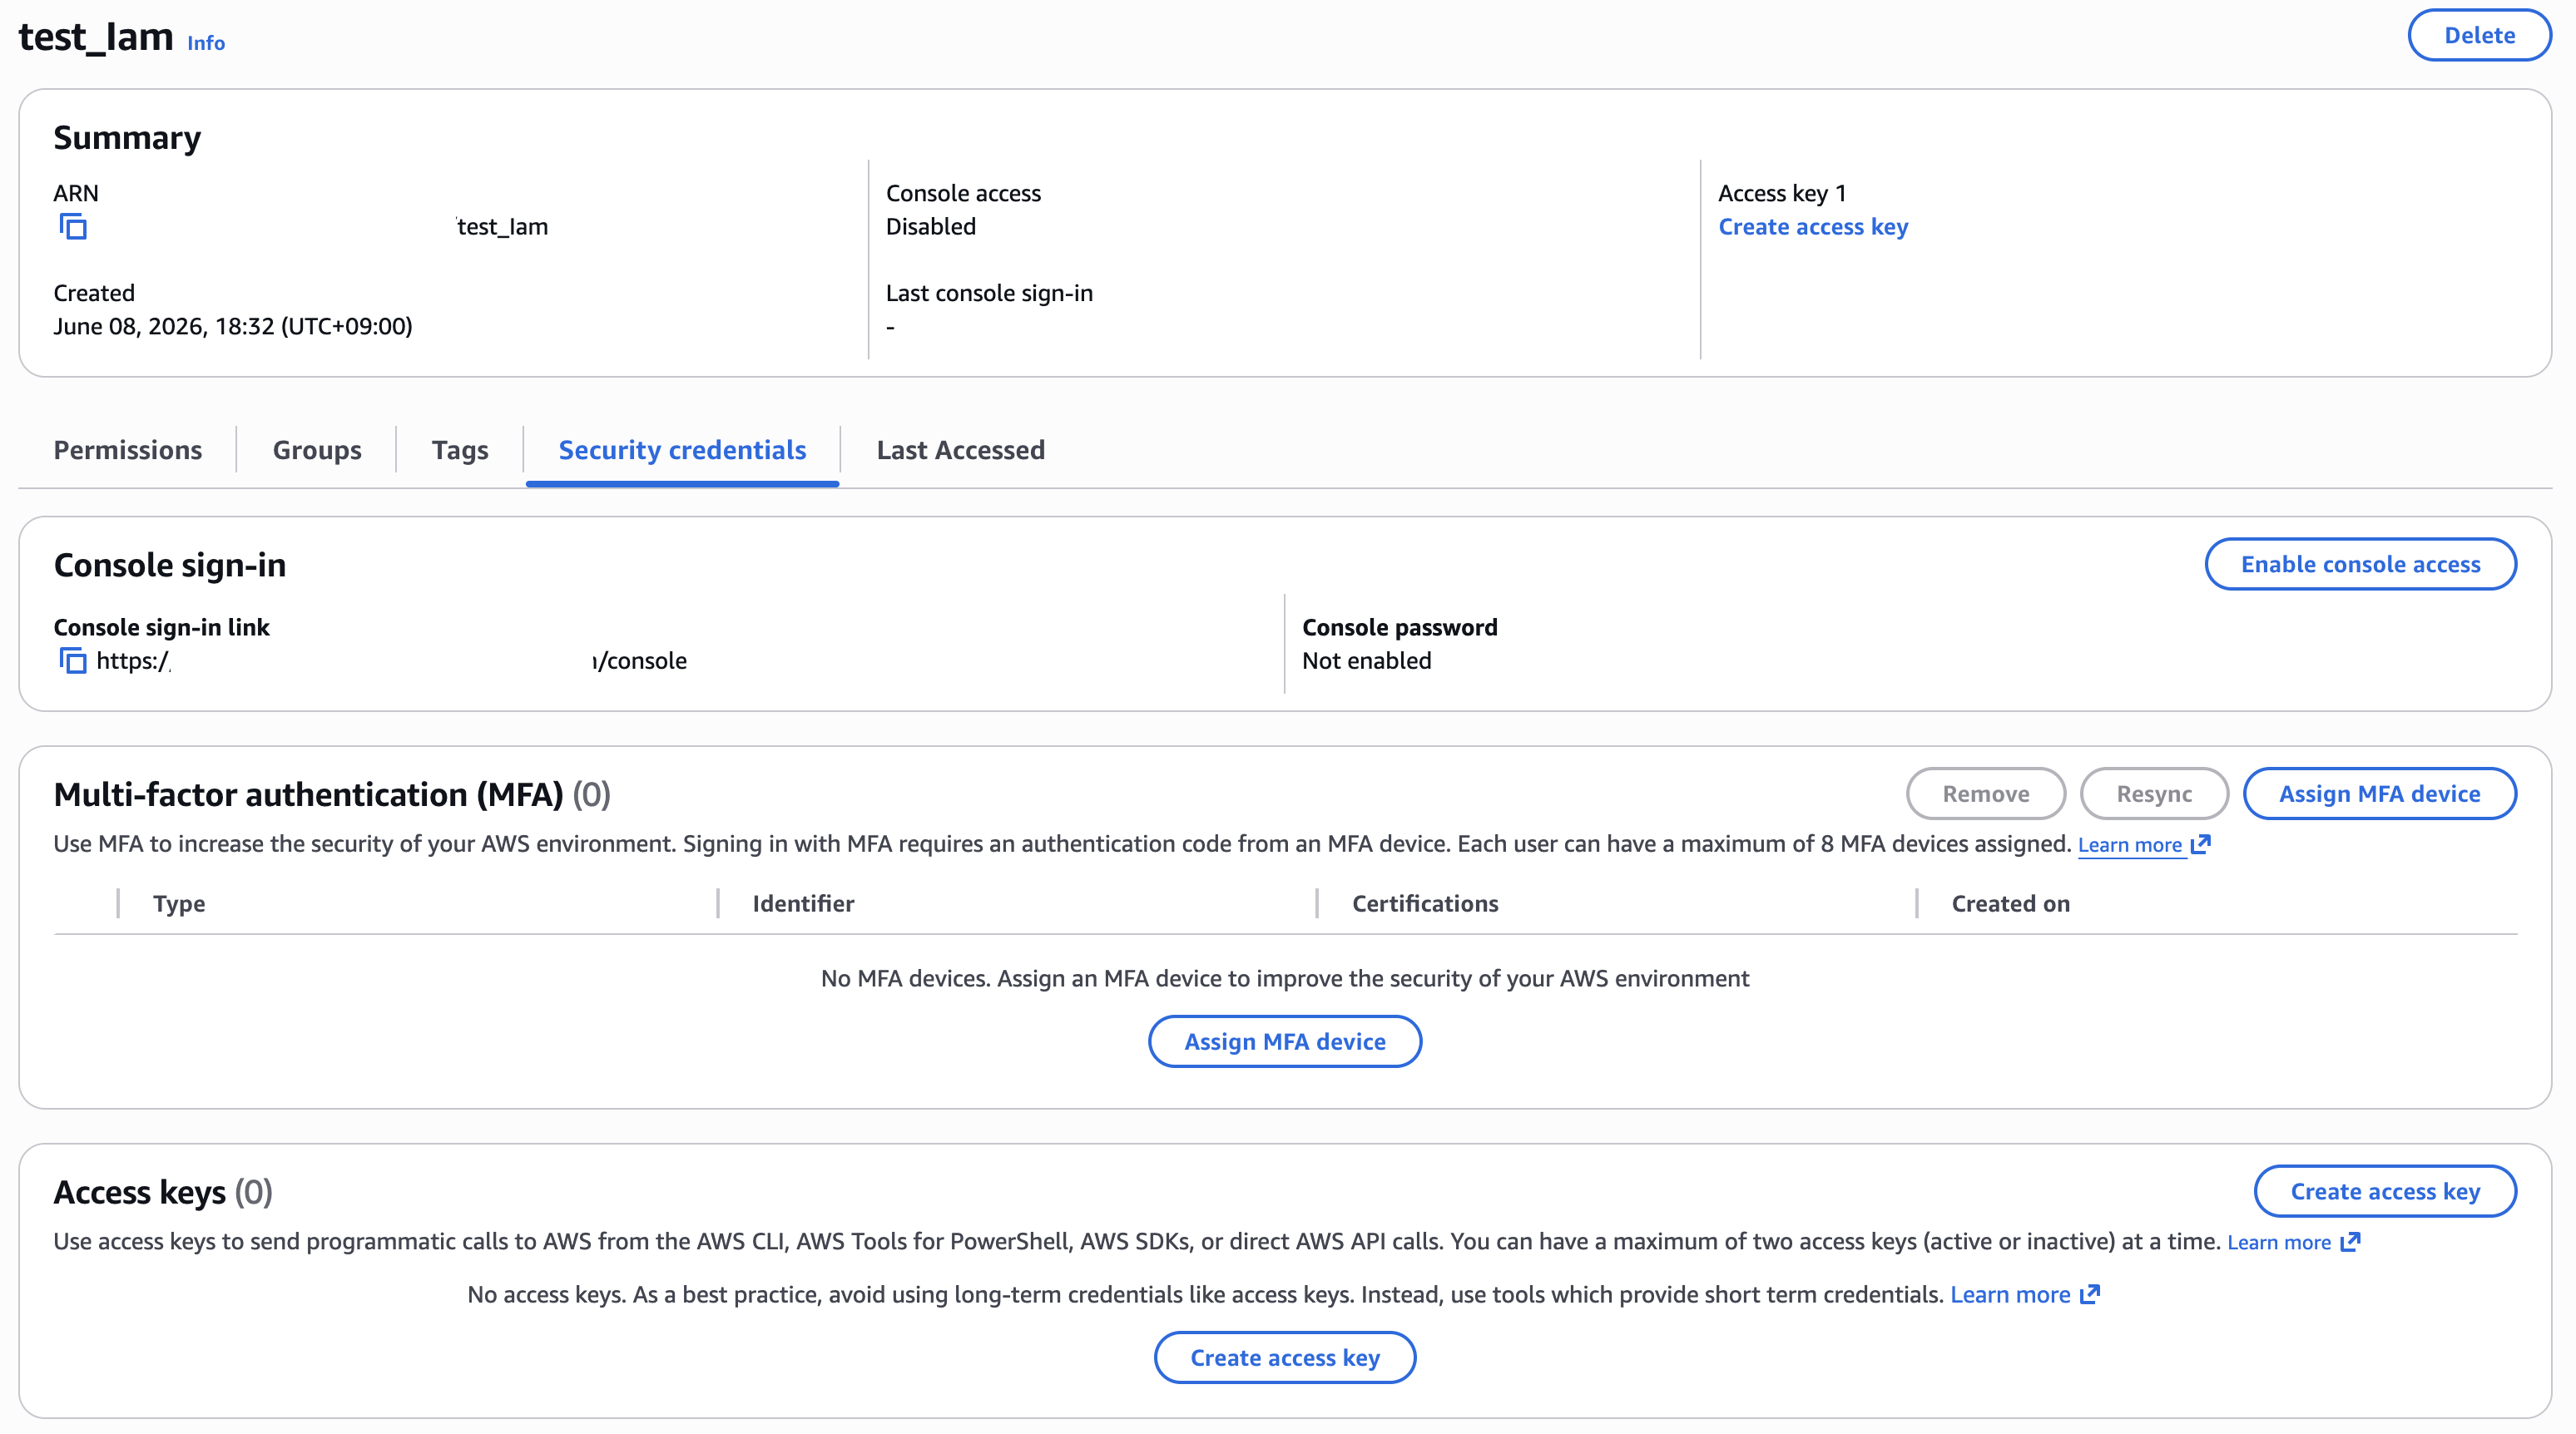
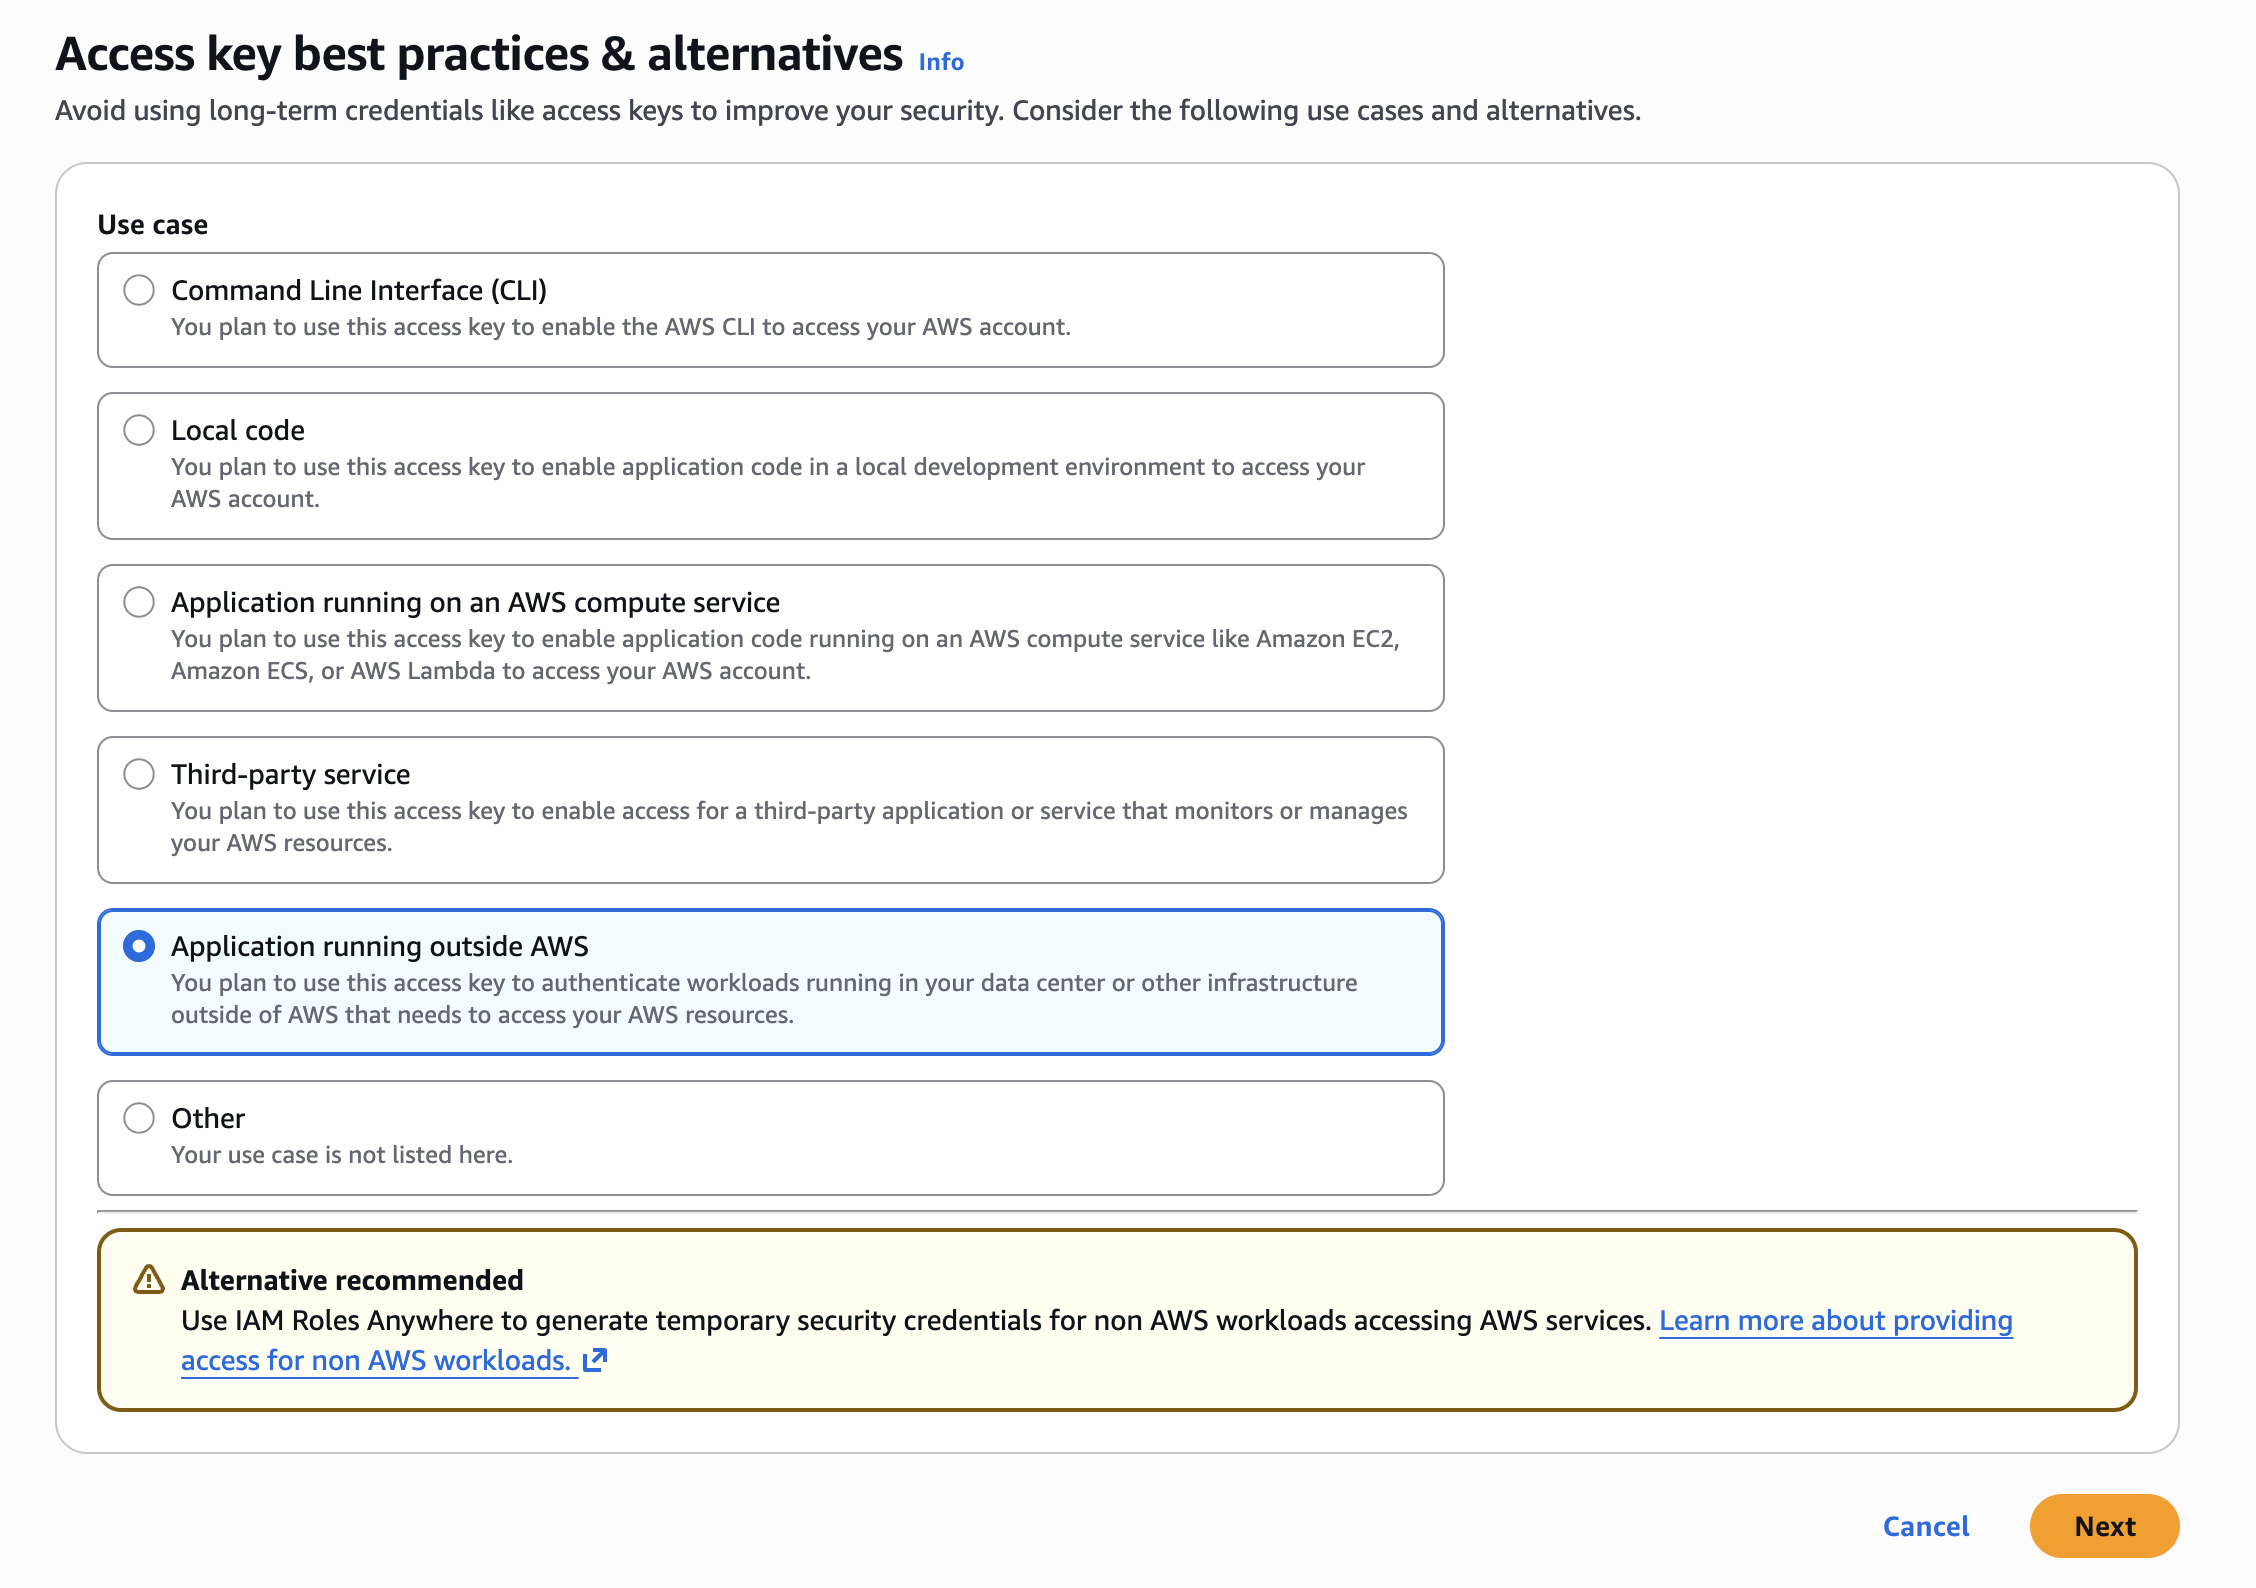
On the [Security credentials] page, click the [Create access key] button in the Access Keys section to generate an access key. Select the use case for the access key.
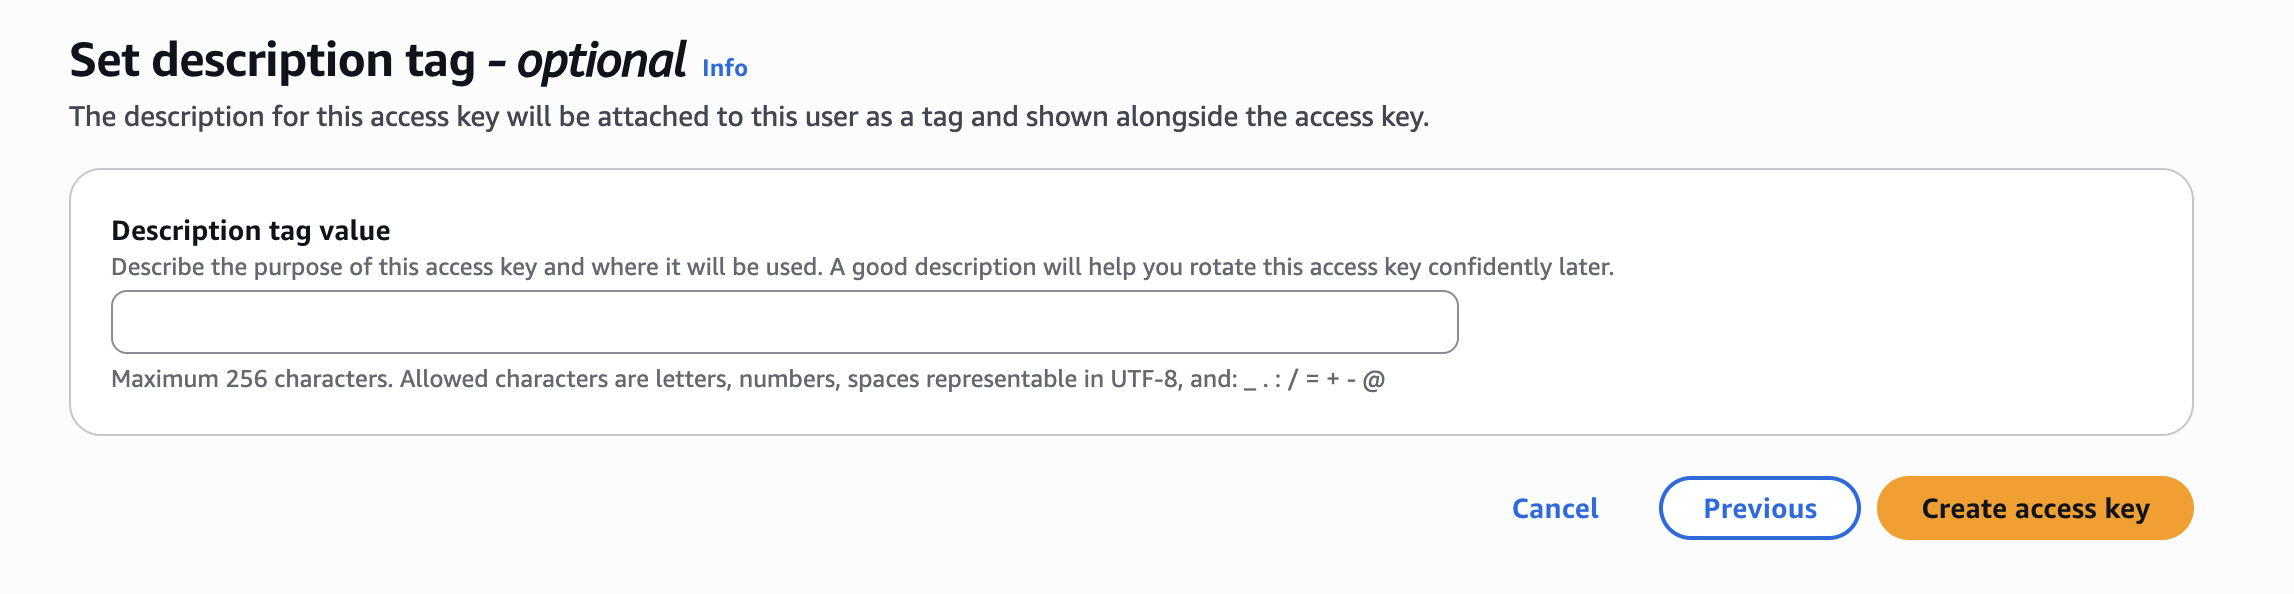
You can add a description for the access key to help identify its purpose.
Create the access key. After creation, both the Access Key and Secret Access Key will be displayed. Note that the Secret Access Key can only be viewed at the time of initial creation.
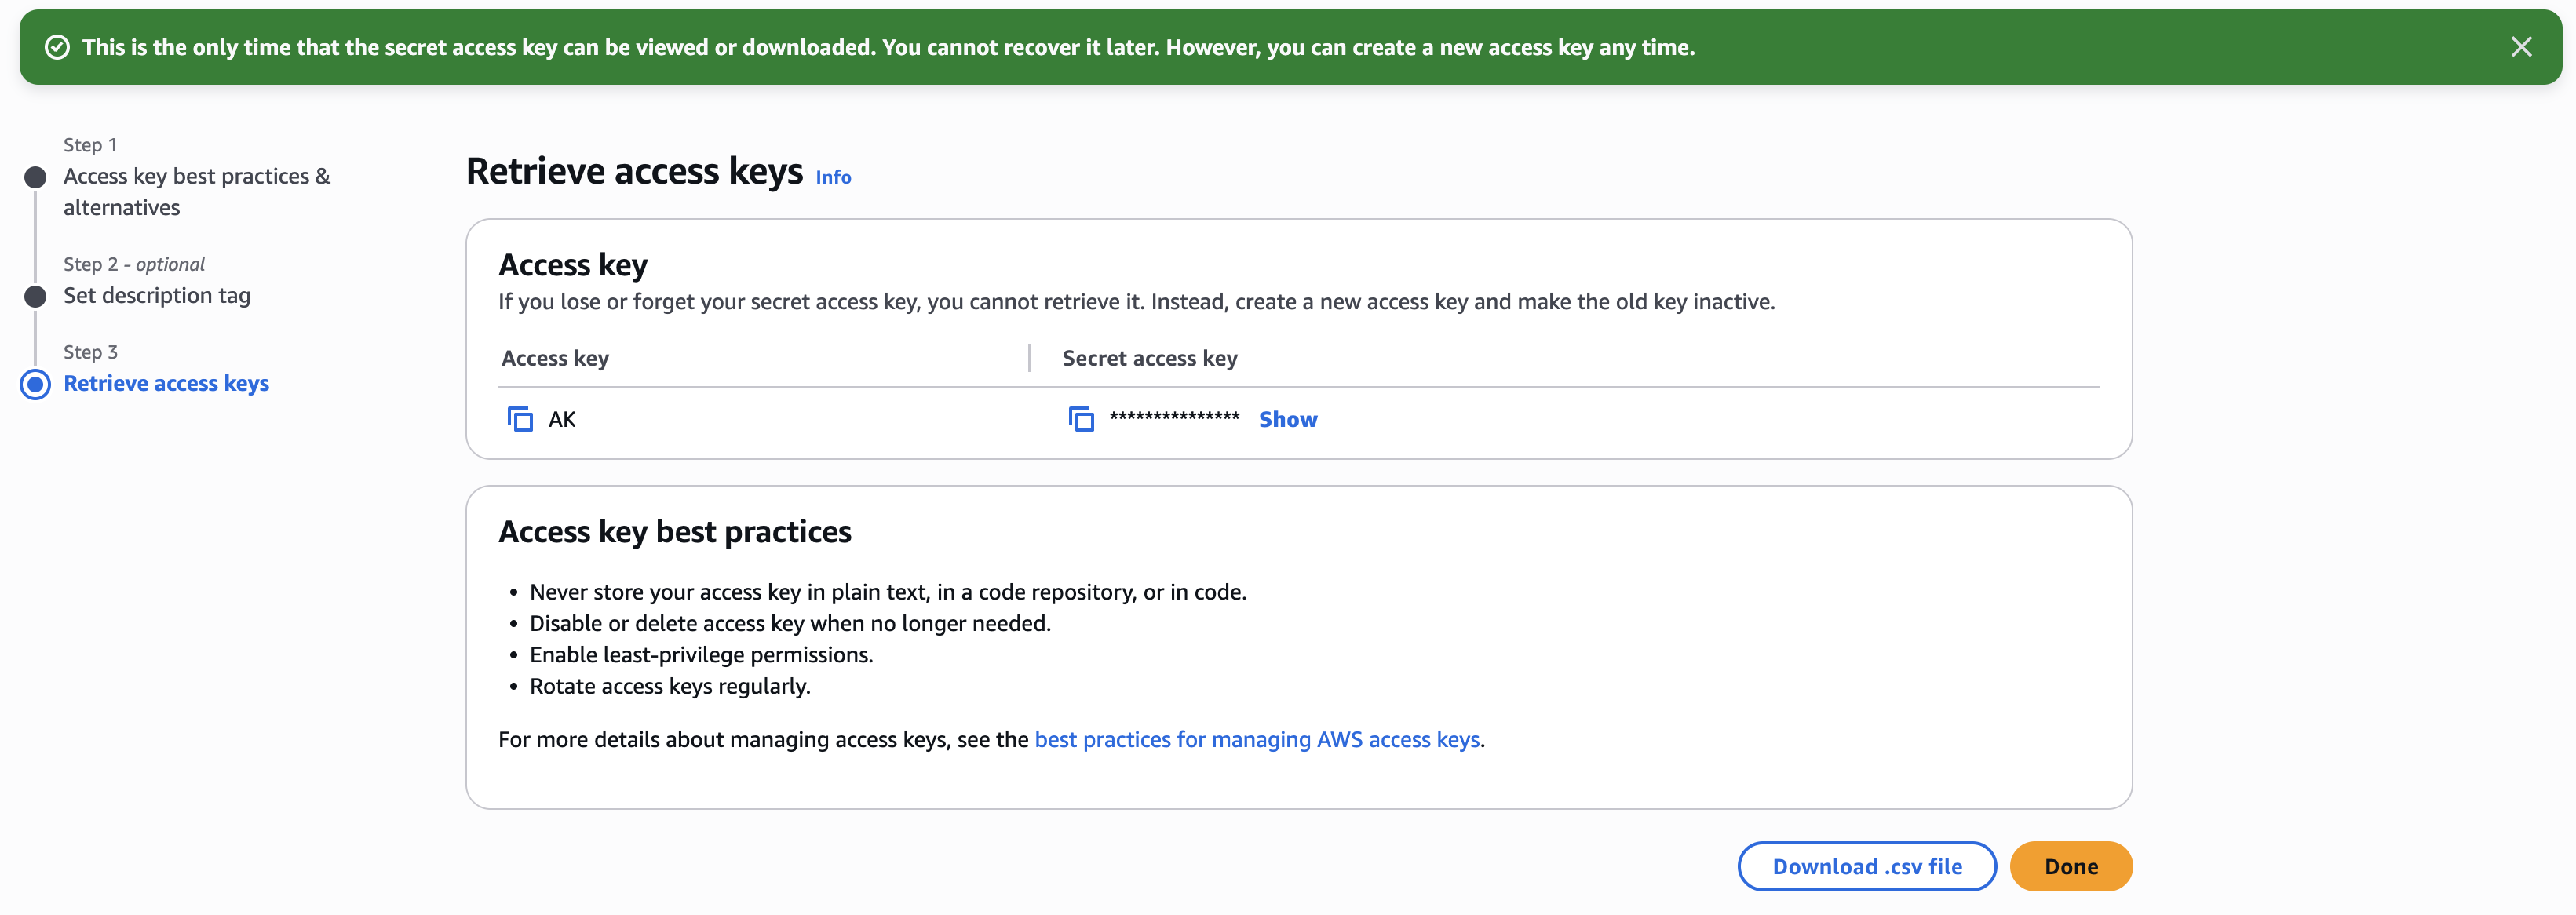
If the Access Key ID or Secret Access Key is exposed externally, it may lead to account compromise depending on the permissions associated with that key. Please take care to ensure that your Access Key ID and Secret Access Key are never exposed externally.
Datashare requires the Region, Bucket, Access Key ID, and Secret Access Key when configuring a Destination. In addition, the s3:PutObject permission is required to store data in your S3 bucket.
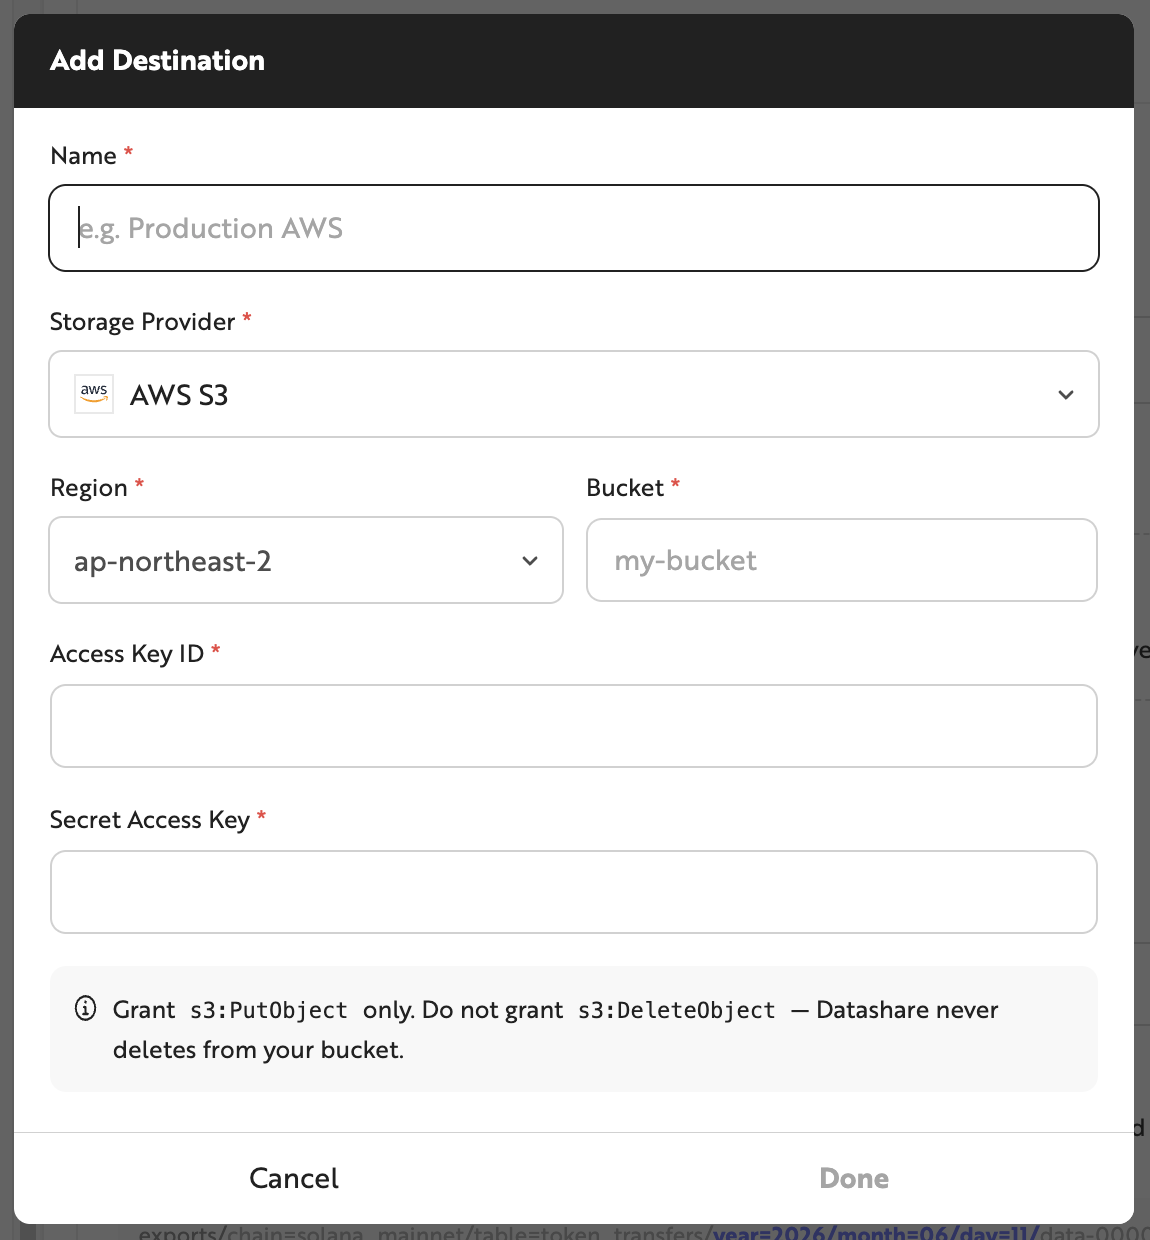
Even if the Access Key ID, Secret Access Key, Region, and Bucket information are correct, data transfer may fail if the IAM User does not have the required S3 permissions. Please verify the IAM User's permissions before starting a data transfer.