X402 Logs
X402 Logs provides a way to view your Nodit X402 usage and payment history. This guide describes the features X402 Logs offers and explains how to use them.
Connecting a Wallet
This section explains how to connect a wallet to X402 Logs. You can connect up to four wallets. Depending on the connection method, you can either view logs temporarily or save the wallet so its Nodit X402 history is available every time you visit the X402 Logs page.
X402 Logs is not supported for Team Accounts. To use X402 Logs, click the profile icon at the top of the left menu in the Nodit Console to switch to a personal account.
- Click the [Add Wallet] button in the upper right and select the mainnet for the wallet you want to connect. Base and Solana are supported.
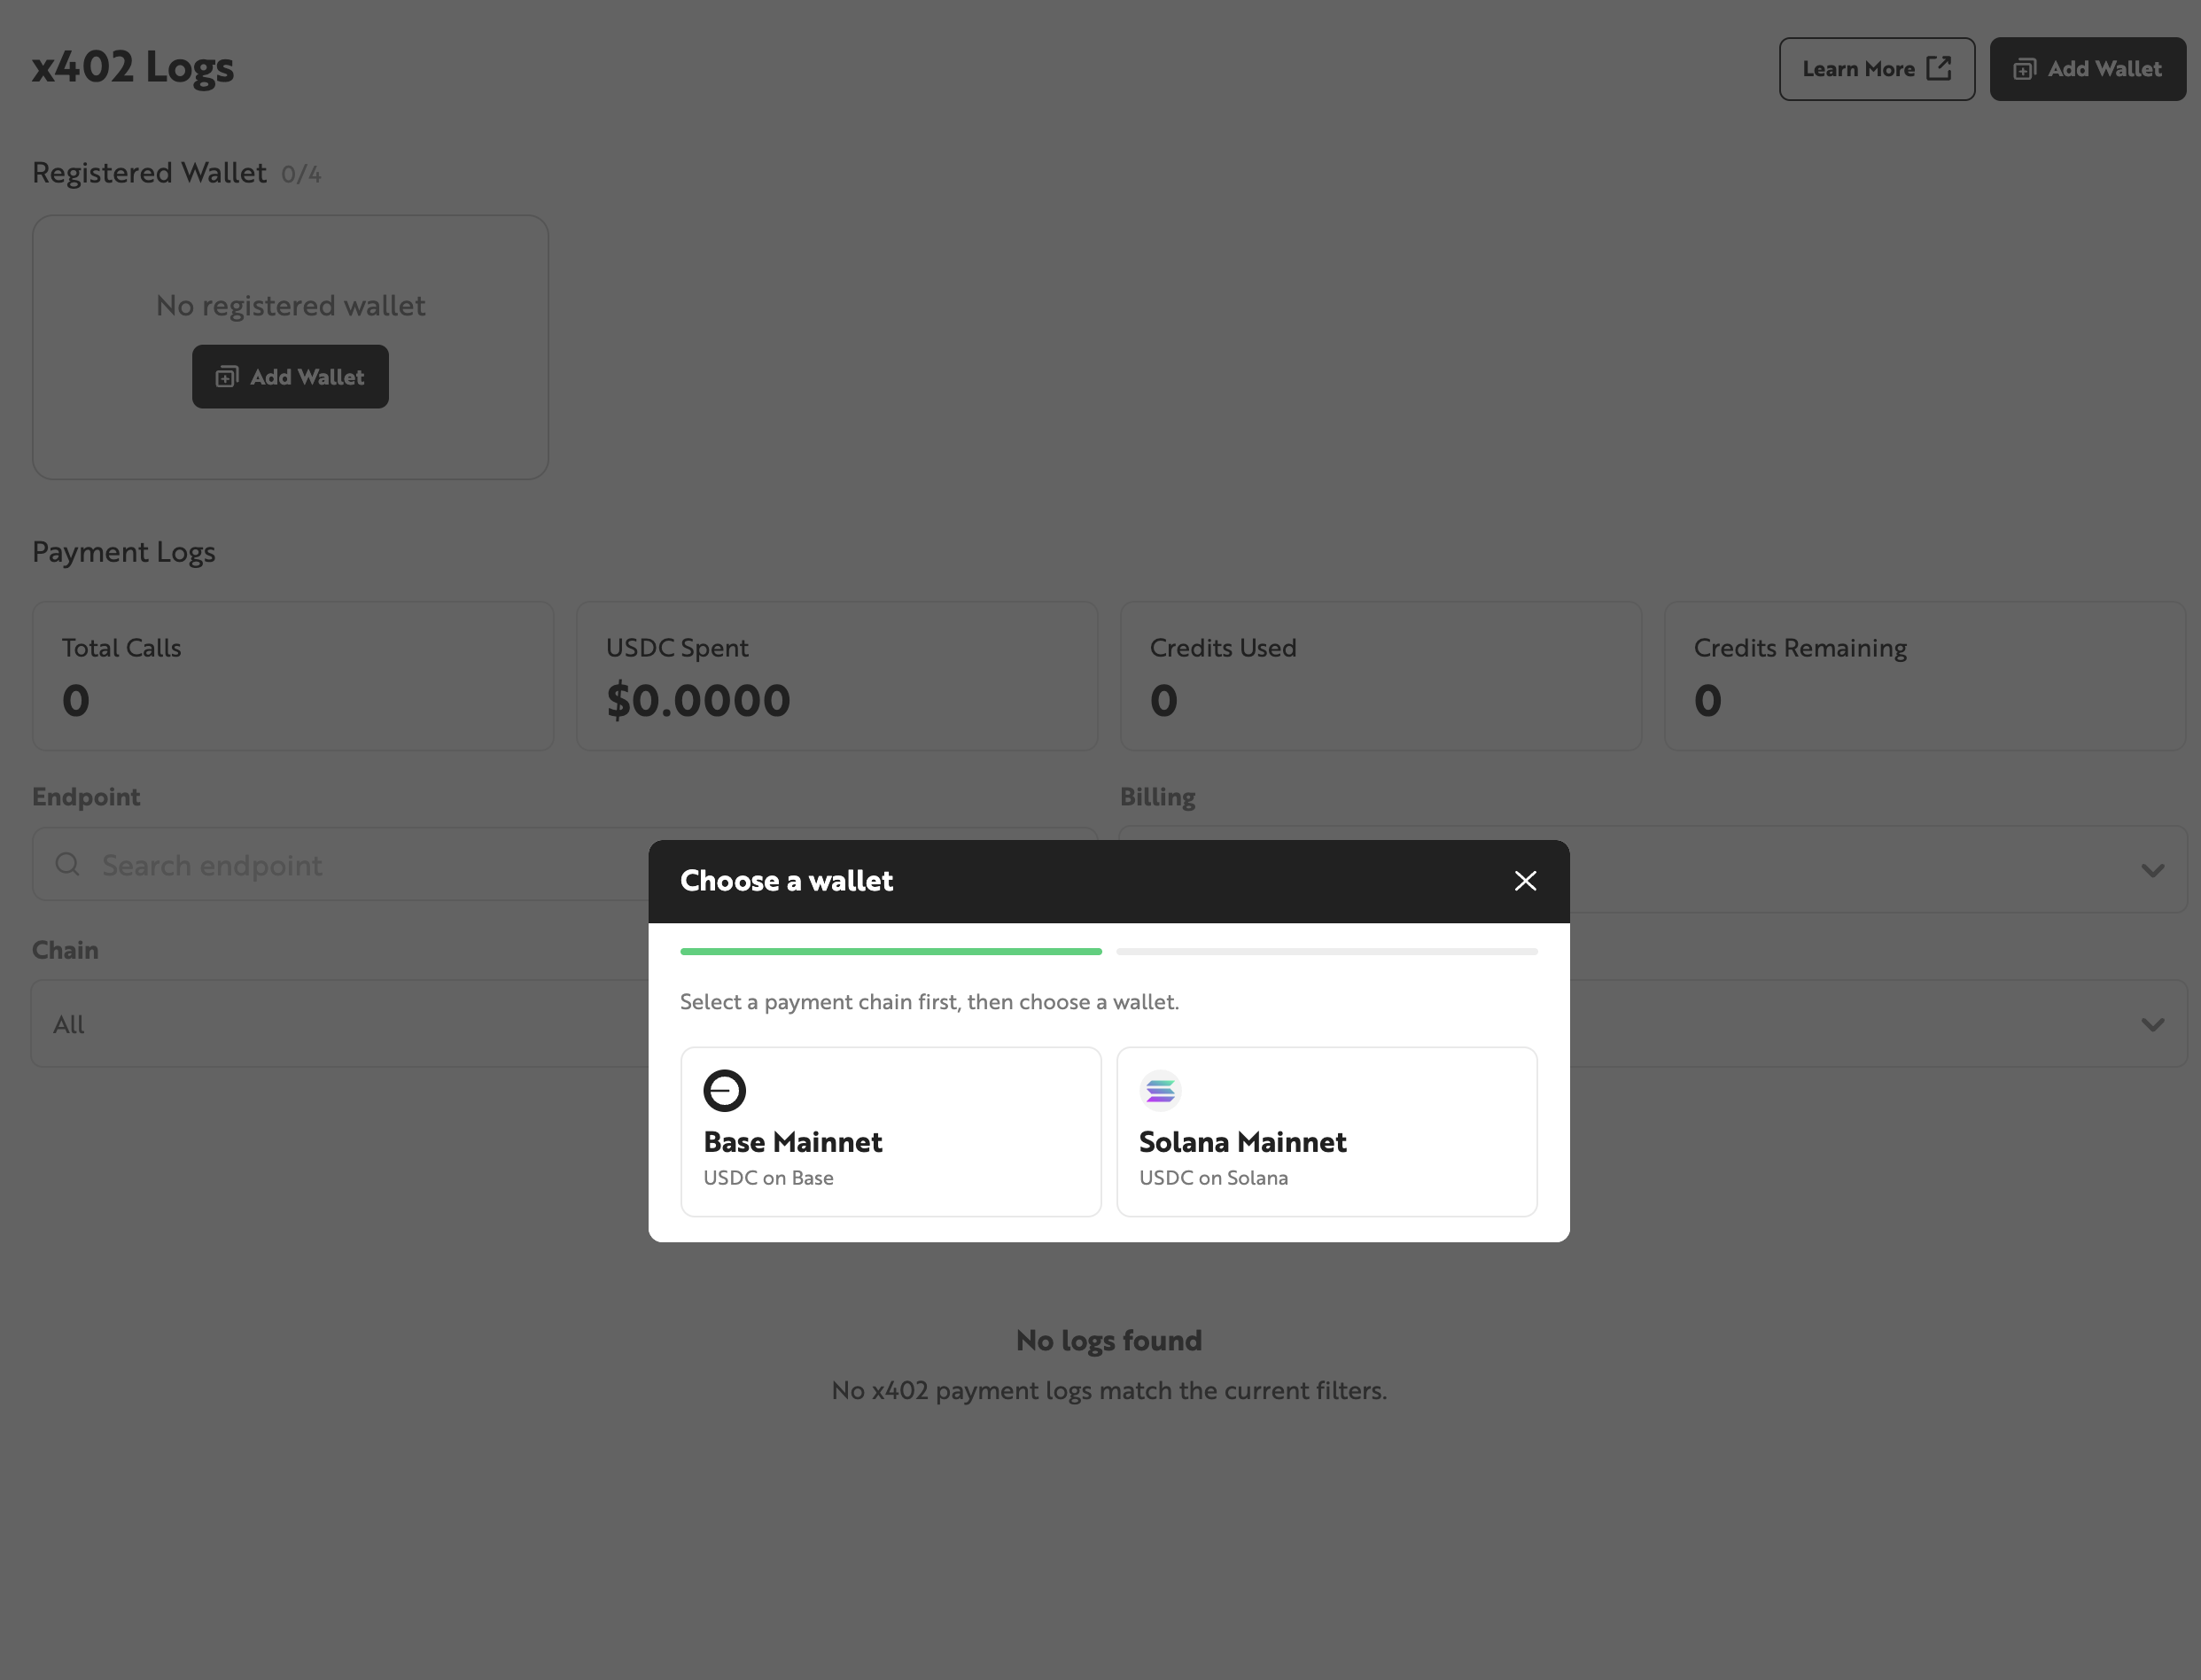
- Select the wallet to connect (MetaMask). This guide uses MetaMask as an example; the available wallets may vary depending on the selected mainnet.
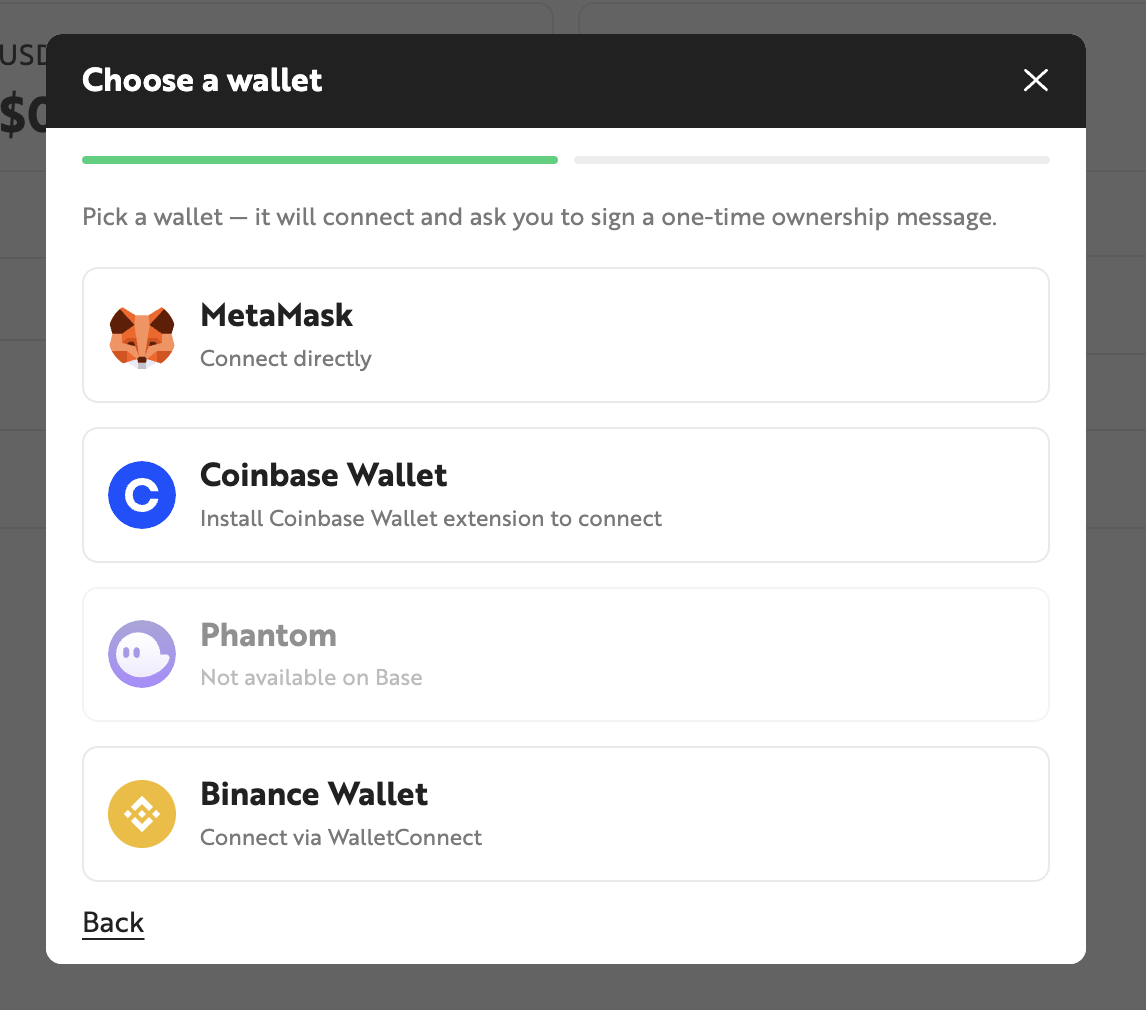
- A signature is required to verify your wallet. You can complete the signature through your wallet's browser extension.

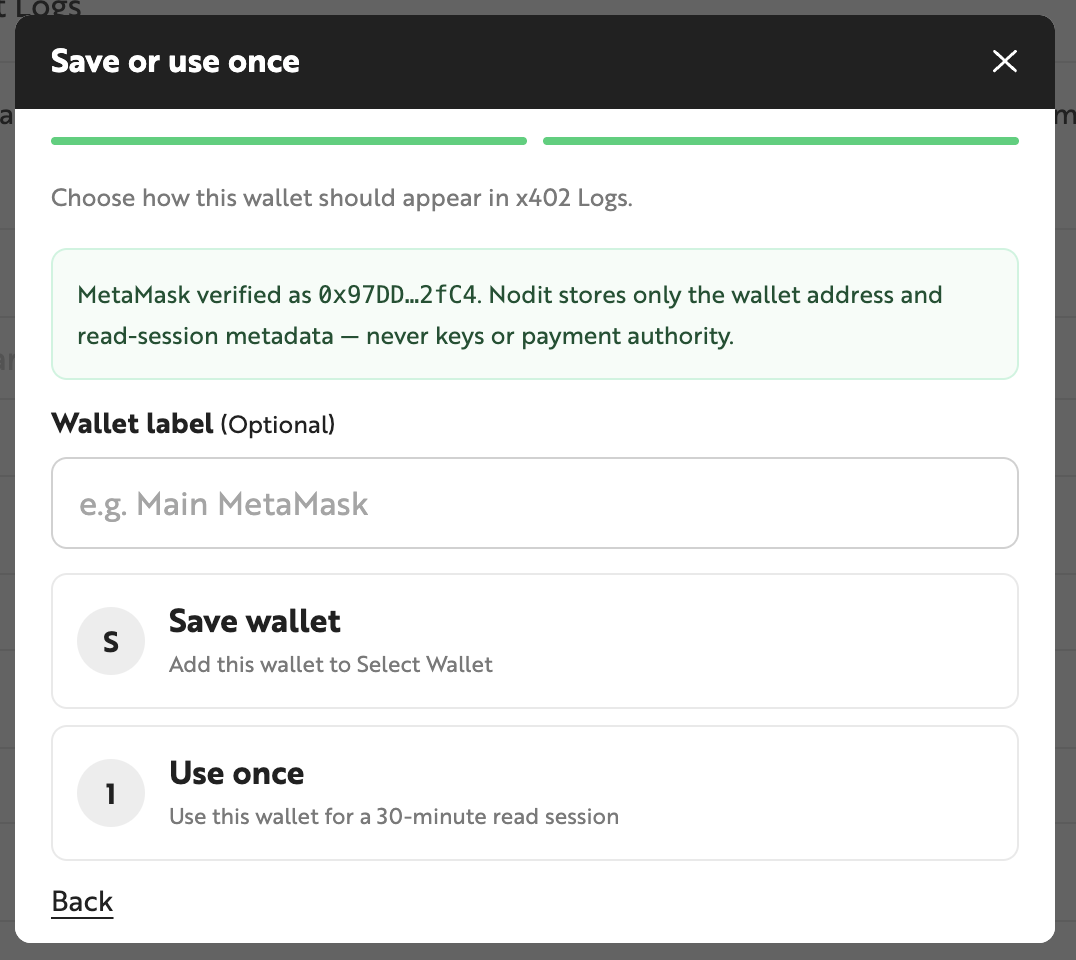
- After signing, you can set the wallet connection method and label. The available connection methods are:
- Save wallet: Saves your wallet information. The saved wallet's Nodit X402 history is available every time you access X402 Logs and remains valid until you delete it.
- Use once: Registers your wallet for one-time use. The wallet information is valid for 30 minutes; after it expires, the wallet's Nodit X402 usage history will no longer be visible in X402 Logs.
- You can confirm that your wallet has been registered.


Viewing Nodit X402 Usage
After connecting a wallet, you can view the number of Nodit API calls made via Nodit X402 with that wallet, Credits used and remaining, and the total USDC spent through Nodit X402.

- Total Calls: The number of Nodit API calls made through Nodit X402.
- USDC Spent: The total amount of USDC spent to use Nodit X402.
- Credits Used: The amount of Credits consumed via Nodit X402.
- Credits Remaining: The amount of Credits remaining for use with Nodit X402.
Nodit X402 supports two billing methods: Pay Per Use (PPU), which charges per API call, and Credit, which consumes pre-loaded Credits with each API call.
For more details on each method, refer to the X402 Payment Guide.
Filtering and Searching Payment History
You can filter payment history by billing method, the chain used for the Nodit API call, and payment status. The default is to show all records (ALL). You can also search for specific payment records by the endpoint of the called API. Details for each table column are as follows.
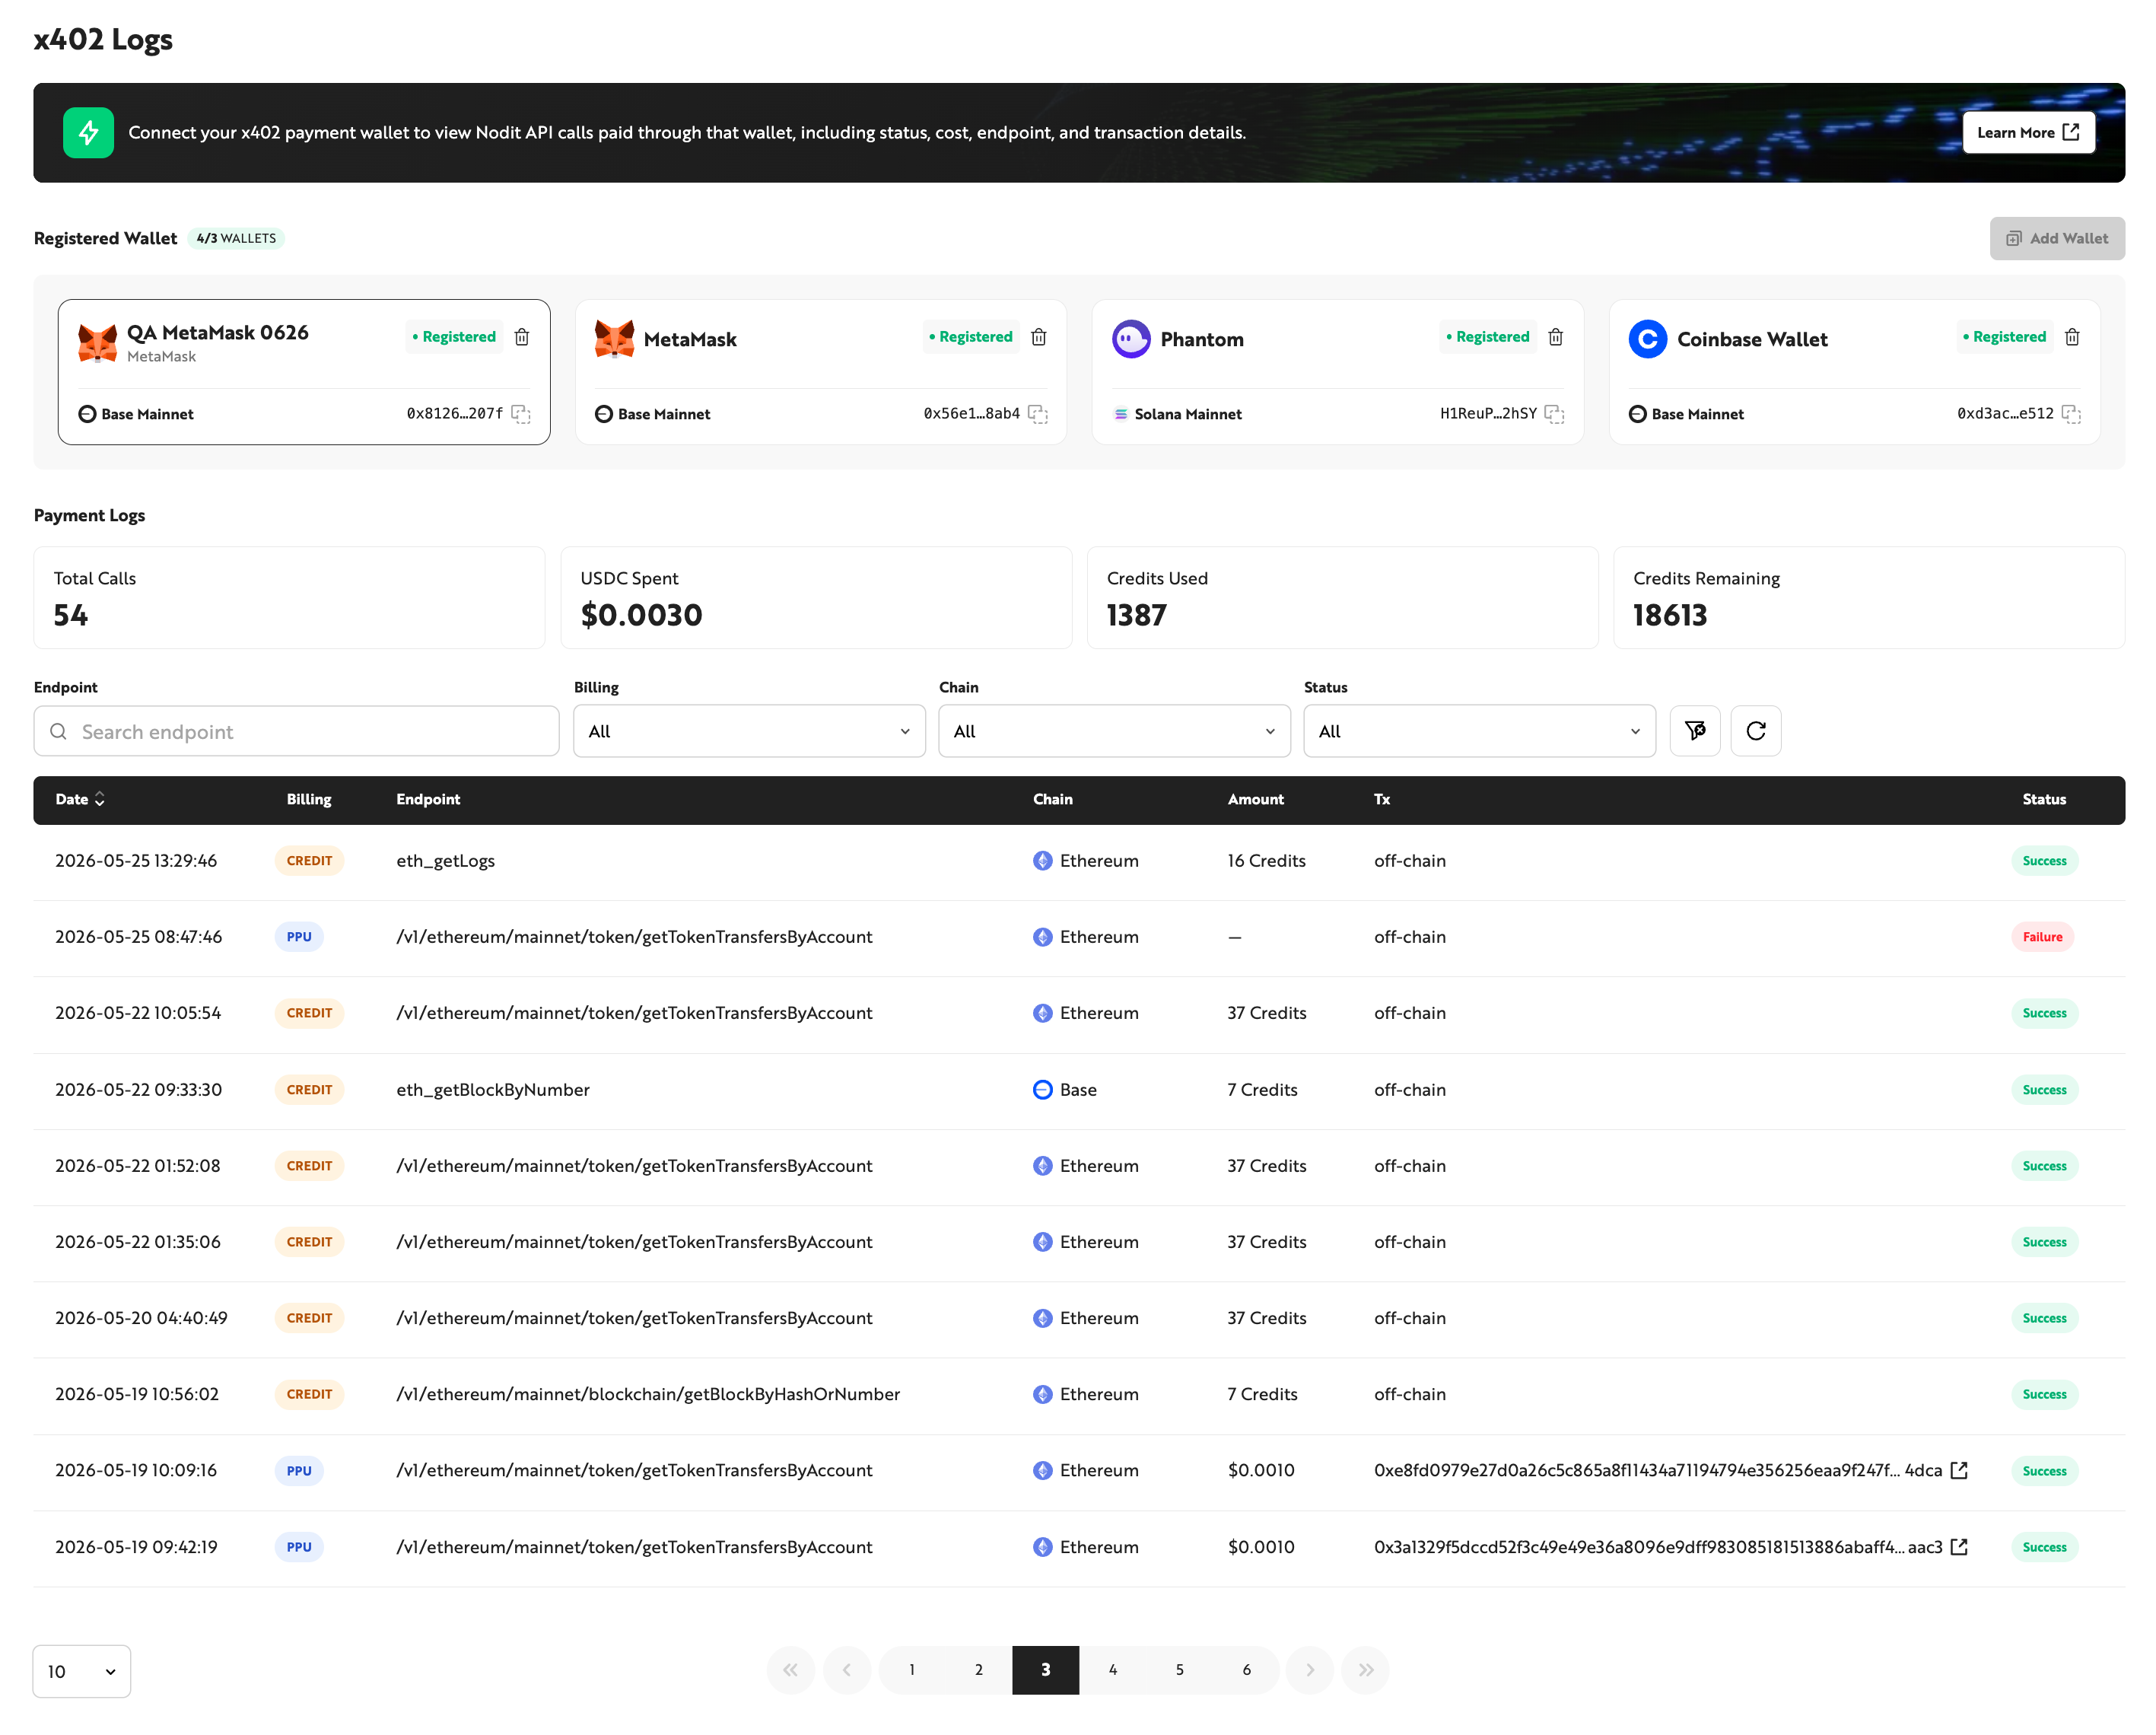
- Date: The time the payment occurred. Click [Date] in the table header to change the sort order. The default sort order is descending.
- Billing: The billing method used when calling the Nodit API via Nodit X402. Options are PPU and Credit.
- Endpoint: The endpoint of the Nodit API called via Nodit X402. Use this to identify which API was called.
- Chain: The chain from which data was retrieved by the Nodit API call. For example, if the Chain value is Ethereum, the Nodit API queried Ethereum data.
- Amount: The Credits or payment amount spent to make the Nodit API call. Displayed as Credits or USD depending on the billing method.
- Tx: Transaction information for the charge. If the billing method is Credit, it shows
off-chain; if PPU, it shows the transaction hash of the actual payment transfer. - Status: The payment status of the Nodit X402 transaction.