Webhook Quickstart
What is Nodit Webhook?
Nodit Webhook lets you define and register the on-chain events you want to track in advance. The Nodit server monitors whether those events occur and, when they do, calls the designated Webhook Endpoint to deliver the event data. By receiving on-chain event notifications asynchronously and in real time through a backend endpoint in your project, you can effectively monitor user actions, token activity, transaction processing status, and more. Follow the steps below to create and start using a Nodit Webhook.
- Implement an endpoint to receive Webhook notifications
- Create a Webhook through the Nodit Console or API
2-1. Select the target network to monitor and define the event to track using an Event Type
2-2. Enter the Webhook Endpoint created in step 1 - (Optional) Update or delete your Webhook configuration
Instant Webhook option is now available.
The Instant Webhook option, newly supported from May 30, 2025, allows you to receive a Webhook message as soon as the target event is detected by a Nodit node, regardless of whether the block containing that event has been finalized. This option is suited for projects that require an immediate response and fast notification upon event occurrence rather than waiting for event finalization (Confirmation). It is particularly effective for applications where fast feedback is critical, such as user action tracking, UI responsiveness improvements, and proactive risk detection.
When the Instant Webhook option is disabled, messages are sent only after the block containing the event transaction has been finalized, the same behavior as the standard Webhook. If a block is rolled back or reorganized, the event may not have ultimately occurred, so disabling this option and using the standard Webhook is recommended when data finality is important.
💡 When creating or querying a Webhook via the API, set the isInstant field to true or false to enable or disable this option.
Q. My Webhook status was automatically deactivated. What should I do?
A. Starting May 20, 2025, Nodit's plan policy has been partially updated. For Free Trial plan users, created Webhooks remain active for a maximum of 9 days. Webhooks on Free Trial plan accounts are automatically deactivated at UTC 00:00:00 after 9 days from creation or reactivation, and a notification email is sent to the Nodit account email address 2 days before deactivation. Deactivated Webhooks can be reactivated directly through the Webhook menu in the Console or via the API, and once reactivated, they remain available for another maximum of 9 days.
To use a Webhook continuously, check its status regularly and reactivate it when needed, or consider upgrading your plan for longer availability.
Webhook API Usage Example
1. Environment Setup
1-1. Sign Up for the Nodit Console
Nodit provides Node services that connect to various blockchain networks. Click the link below to access the Nodit Console and create an account.
1-2. Obtain a Webhook Listener Endpoint
To create a Webhook, you need a separate Webhook Listener server to receive notifications. This server handles incoming event notifications from external sources. For production use, you need to build a Webhook Listener server yourself, but for this example — where we only need to verify the Webhook response — a third-party service is used.
[Third-party service examples]
-
Postman Mock Server: Postman Mock Server lets you mock an API and provides a temporary URL to receive Webhook requests. Setup is straightforward through Postman's mock server creation feature. For detailed setup instructions, see the link below.
▶︎ Set up Postman Mock server -
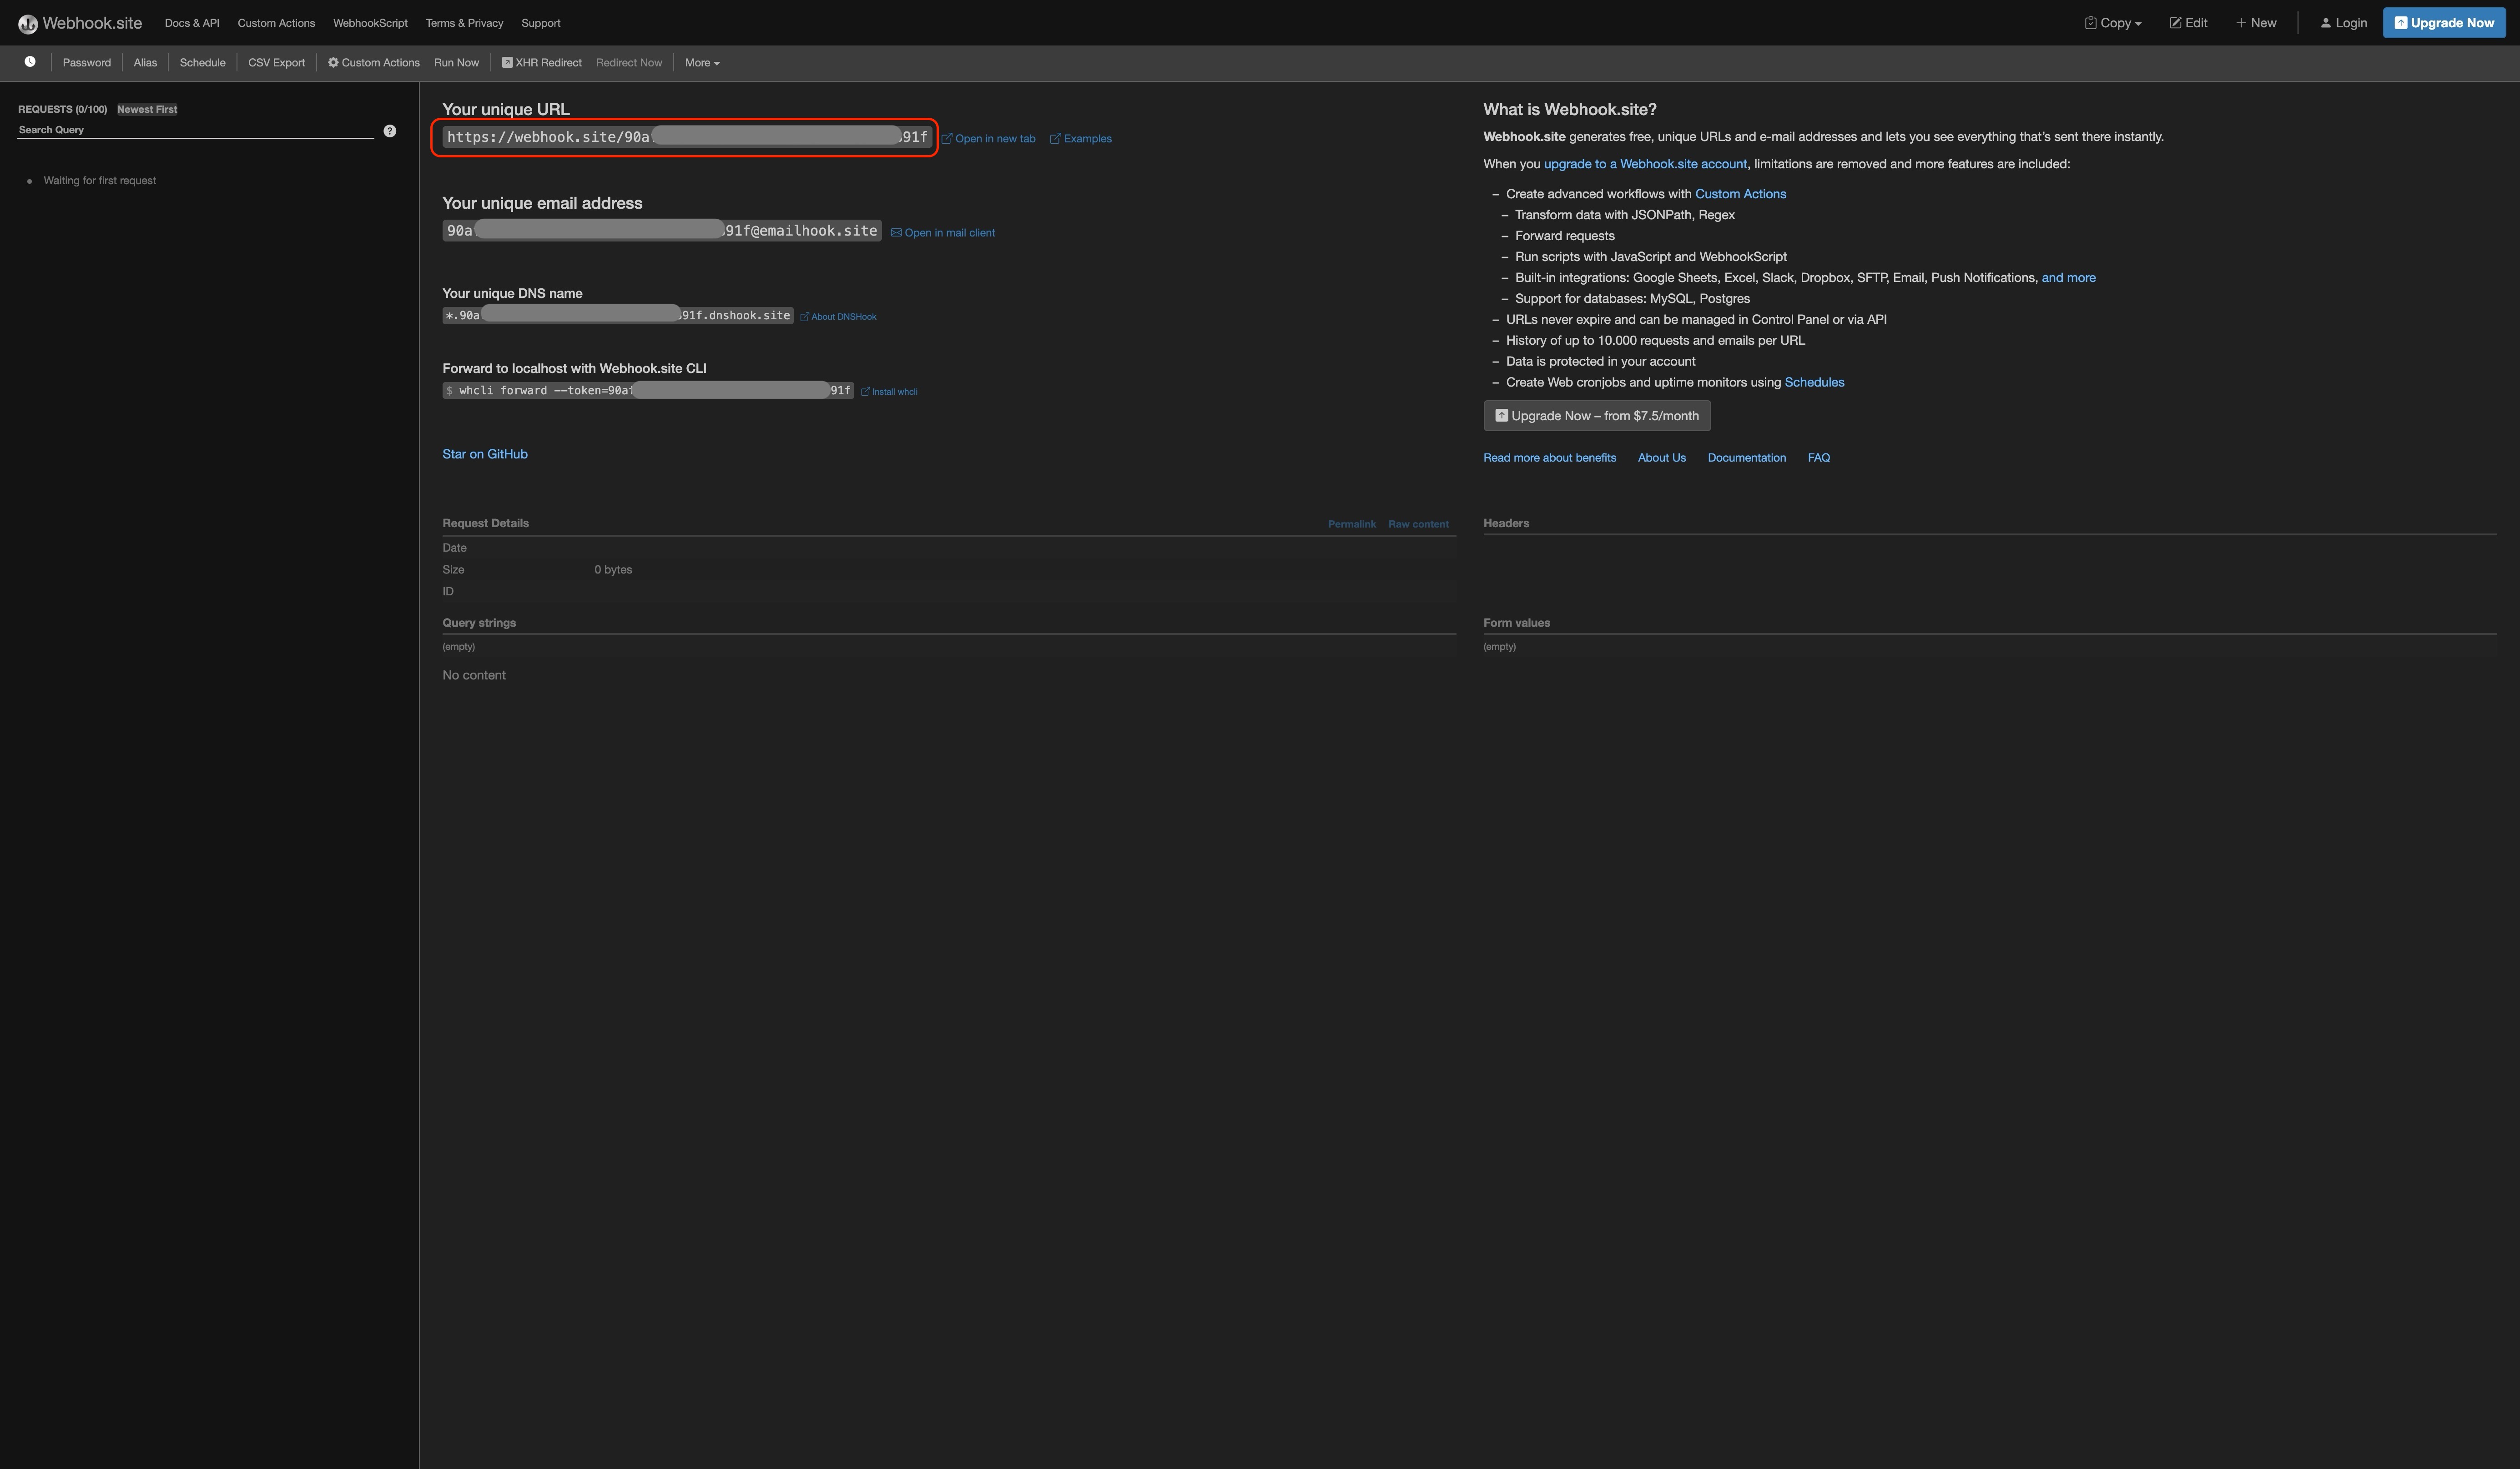
Webhook.site: Webhook.site provides a service to capture and inspect Webhook data in real time. With this service, you can start testing Webhooks immediately without setting up a separate server. Click the link below to get a free Webhook Listener Endpoint.
▶︎ Webhook.site
This example uses Webhook.site to verify the Webhook response. Go to Webhook.site and copy the unique URL provided.
2. Creating a Webhook
You can subscribe to events of your choice through the Console or the Webhook API. This example uses the Webhook API to create a Webhook that subscribes to the BLOCK_PERIOD event.
- X-API-KEY: Enter the actual API key provided in the Nodit Console. The API key is required to securely access the service and verify your identity.
- webhookUrl: Enter the Webhook Listener Endpoint that will receive notifications for the subscribed event. Paste the Webhook Listener Endpoint you copied above into
webhookUrl.
curl --request POST \
     --url https://web3.nodit.io/v1/ethereum/mainnet/webhooks \
     --header 'X-API-KEY: {Your API key}' \
     --header 'accept: application/json' \
     --header 'content-type: application/json' \
     --data '
{
  "eventType": "BLOCK_PERIOD",
  "description": "Webhook Test",
  "notification": {
    "webhookUrl": "{Your webhook listener endpoint}"
  },
  "condition": {
    "period": 1
  }
}
'
After running the script above, if the Webhook is created successfully, a success message is returned along with a response that includes the subscription ID. Below is an example response.
{
  "subscriptionId": "2361",
  "description": "Webhook test",
  "protocol": "ETHEREUM",
  "network": "MAINNET",
  "eventType": "BLOCK_PERIOD",
  "notification": {
    "webhookUrl": "https://example.com/webhook"
  },
  "signingKey": "cd5...d12",
  "condition": {
    "period": 1
  },
  "createdAt": "2024-04-29T08:04:11.098Z"
}
3. Verifying the Response on the Webhook Listener Server
Once the Webhook is successfully created, it sends a notification to the Webhook Listener server each time the subscribed event occurs. Below is an example of a notification received on Webhook.site.
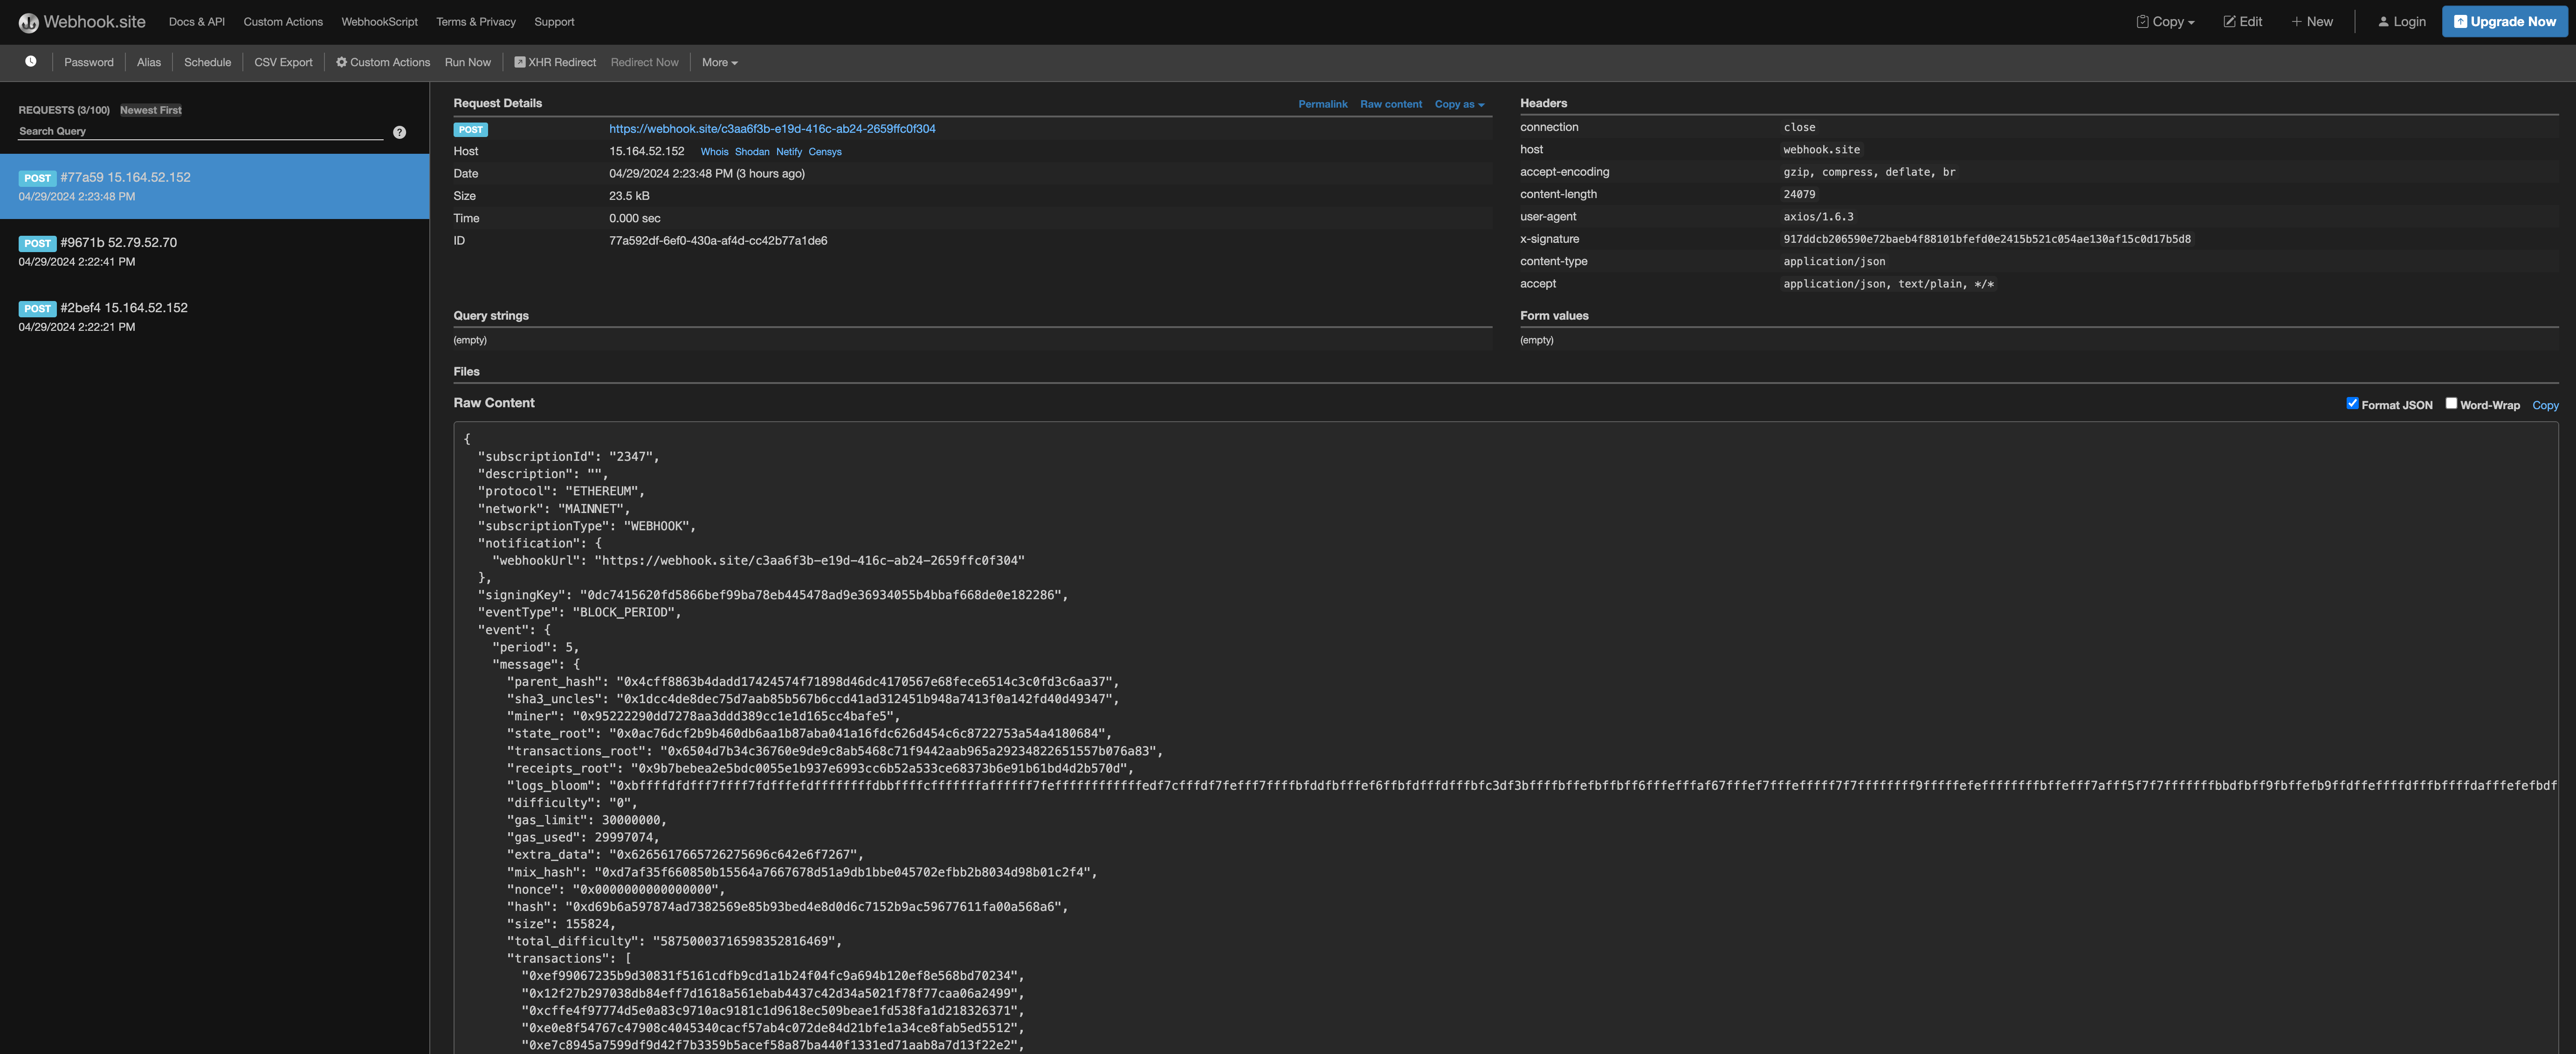
{
  "subscriptionId": "2347",
  "description": "Webhook test",
  "protocol": "ETHEREUM",
  "network": "MAINNET",
  "subscriptionType": "WEBHOOK",
  "notification": {
    "webhookUrl": "https://webhook.site/c3aa6f3b-e19d-416c-ab24-2659ffc0f304"
  },
  "signingKey": "0dc...286",
  "eventType": "BLOCK_PERIOD",
  "event": {
    "period": 5,
    "message": {
      "parent_hash": "0x4cff8863b4dadd17424574f71898d46dc4170567e68fece6514c3c0fd3c6aa37",
      "sha3_uncles": "0x1dcc4de8dec75d7aab85b567b6ccd41ad312451b948a7413f0a142fd40d49347",
      "miner": "0x95222290dd7278aa3ddd389cc1e1d165cc4bafe5",
      "state_root": "0x0ac76dcf2b9b460db6aa1b87aba041a16fdc626d454c6c8722753a54a4180684",
      "transactions_root": "0x6504d7b34c36760e9de9c8ab5468c71f9442aab965a29234822651557b076a83",
      "receipts_root": "0x9b7bebea2e5bdc0055e1b937e6993cc6b52a533ce68373b6e91b61bd4d2b570d",
      "logs_bloom": "0xbffffdfdfff7ffff7fdfffefdffffffffdbbffffcfffffffaffffff7feffffffffffffedf7cfffdf7fefff7ffffbfddfbfffef6ffbfdfffdfffbfc3df3bffffbffefbffbff6fffefffaf67fffef7fffefffff7f7ffffffff9fffffefeffffffffbffefff7afff5f7f7fffffffbbdfbff9fbffefb9ffdffeffffdfffbffffdafffefefbdffdffff7ef8fdfffbffffffffffbfdfbf7ff6f7fffffbebefffdfffffbeffdfff9fdfef7fafffffffffffffefbeffffffffffffffffdffffdbfe7fbfff7fdffffbfffcfdb7fffffffbffffbffffbffffefffddffff7fefffadffffffbfffffffffffffdeffbedfdf7bf1fbdffafffffefffdffffff7fdfffeffbffffd",
      "difficulty": "0",
      "gas_limit": 30000000,
      "gas_used": 29997074,
      "extra_data": "0x6265617665726275696c642e6f7267",
      "mix_hash": "0xd7af35f660850b15564a7667678d51a9db1bbe045702efbb2b8034d98b01c2f4",
      "nonce": "0x0000000000000000",
      "hash": "0xd69b6a597874ad7382569e85b93bed4e8d0d6c7152b9ac59677611fa00a568a6",
      "size": 155824,
      "total_difficulty": "58750003716598352816469",
      "transactions": [
        "0xef99067235b9d30831f5161cdfb9cd1a1b24f04fc9a694b120ef8e568bd70234",
				// ... snip
        "0x586442f7566519e7e3f026bfd318a65f559783cafe0f5a9b3162dc7f50c0d6cb"
      ],
      "transaction_count": 318,
      "log_count": 1548,
      "base_fee_per_gas": 5838584039,
      "withdrawals_root": "0xc0419b57a2665a2682834b323193cdbc56f13698aed0467a028b586ae9720488",
      "withdrawal_count": 16,
      "blob_gas_used": "0x0",
      "excess_blob_gas": "0x60000",
      "parent_beacon_block_root": "0x40735f721e4de4c63825f5885795ade7ac314a8502953ef14c074b64b70b2b4e",
      "type": "block",
      "number": 19758850,
      "timestamp": 1714368119
    }
  },
  "createdAt": "2024-04-29T05:23:46.838Z"
}
When using a Webhook with the Kaia chain, the Webhook payload structure and the format of certain fields may differ from other Ethereum-compatible chains. This is to maintain the unique data specification defined for each chain. Kaia Webhook data is generated based on the API response data belonging to the kaia namespace of the node. For example, the transaction_type field in transaction-related Webhook payloads returns values in different formats for Kaia and Ethereum, as shown below.
- Ethereum
transaction_type: 2 (Number type) - Kaia
transaction_type: "TxTypeEthereumDynamicFee" (String type)
4. Updating and Querying a Webhook
The following section covers how to update a registered Webhook and then permanently delete it.
The Nodit Webhook service provides the ability to pause notifications. When paused, the registered Webhook is not deleted — only the notifications are suspended. Run the example script below to set the isActive field to false. (Make sure to provide a valid SUBSCRIPTION_ID and YOUR_API_KEY.)
curl --request PATCH \
     --url https://web3.nodit.io/v1/ethereum/mainnet/webhooks/{SUBSCRIPTION_ID} \
     --header 'X-API-KEY: {YOUR_API_KEY}' \
     --header 'accept: application/json' \
     --header 'content-type: application/json' \
     --data '{
     "isActive":false
}'
A response of result: true indicates the update was successful.
{
  "result": true
}
To verify the update, query the Webhook information. (Make sure to provide a valid SUBSCRIPTION_ID and YOUR_API_KEY.)
curl --request GET \
     --url 'https://web3.nodit.io/v1/ethereum/mainnet/webhooks?subscriptionId={SUBSCRIPTION_ID}' \
     --header 'X-API-KEY: {YOUR_API_KEY}' \
     --header 'accept: application/json'
{
  "total": 1,
  "rpp": 10,
  "page": 1,
  "items": [
    {
      "subscriptionId": "2361",
      "description": "webhook Test",
      "environmentId": "9999999999999999999",
      "protocol": "ETHEREUM",
      "network": "MAINNET",
      "subscriptionType": "WEBHOOK",
      "eventType": "BLOCK_PERIOD",
      "notification": {
        "webhookUrl": "https://example.com/webhook"
      },
      "signingKey": "0a2...2fd",
      "isActive": false,
      "updatedAt": "2024-04-29T08:20:20.000Z",
      "createdAt": "2024-04-29T08:17:21.826Z",
      "condition": {
        "period": 1
      }
    }
  ]
}
5. Deleting a Webhook
Finally, delete the Webhook you subscribed to. Once deleted, the action cannot be undone, so proceed with care. Deleting a Webhook stops all its configurations and data delivery, meaning you will no longer receive event notifications. Use the example script below to delete the Webhook created in this example.
curl --request DELETE \
     --url https://web3.nodit.io/v1/ethereum/mainnet/webhooks/{SUBSCRIPTION_ID} \
     --header 'X-API-KEY: {YOUR_API_KEY}' \
     --header 'accept: application/json'
A response of result: true indicates the deletion was successful.
{
  "result": true
}
Webhook Retry Policy
Nodit Webhook currently supports up to 1 retry. If a 200 OK response is not received after calling the webhookUrl, a retry is triggered 15 seconds after the initial request.