
What is Nodit Stream?
Nodit의 Stream 서비스는 양방향 Stream 채널을 통해 여러 네트워크들로부터 원하는 온체인 이벤트를 구독하여 실시간으로 받아볼 수 있는 기능입니다. Nodit Webhook과 동일한 EventType을 사용하여 원하는 데이터를 필터링 할 수 있으나, 비동기 채널이 아닌 동기화된 WebSocket 채널을 통해 이벤트를 수신받을 수 있다는 점에서 Webhook과 구분됩니다.
Nodit Stream Endpoint
Nodit Stream을 사용하기 위한 WebSocket Endpoint는 다음과 같습니다.
- wss://web3.nodit.io/v1/websocket
Stream과 Node 서비스에서 제공되는 wss 기능은 서로 다른 기능인가요?네, Nodit 콘솔의 네트워크별 카드에서 보여지는 WSS Endpoint는 Node Client에서 제공하는 자체 WebSocket 통신을 사용하기 위한 Endpoint입니다. Stream 서비스는 Web3 Data API와 같이 Nodit팀이 구축한 별도의 WebSocket 서버를 통해 정제된 데이터를 구독하는 기능으로서, 실제 데이터를 조회하고자 하는 대상 네트워크의 종류와 상관없이 단일 Endpoint를 통해 사용하실 수 있습니다.
Stream Tutorials
1. 환경 세팅
이 예제에서는 JavaScript를 사용하여 WebSocket 연결 코드를 구현합니다. 이 예제를 실습하기 위해서는 다음과 같은 작업을 먼저 수행해야 합니다.
1-1. Node.js 설치
Node.js는 JavaScript 런타임으로 다양한 JS 애플리케이션을 실행할 수 있도록 지원합니다. 아래 링크를 클릭하여 Node.js를 설치할 수 있습니다. 다양한 버전이 있지만, 안정적인 사용을 위해서 LTS 최신 버전으로 설치하는 것을 권장합니다.
1-2. socket.io-client 설치
socket.io-client는 클라이언트 측에서 사용되는 WebSocket 기반 실시간 통신을 위한 라이브러리입니다. 이를 이용하여 서버에 연결하여 실시간 데이터를 송수신하고 이벤트를 수신합니다. Node.js가 설치되어 있다면 터미널과 명령어를 이용하여 간편하게 설치할 수 있습니다. WebSocket을 구현할 Root Directory 경로의 터미널에 아래의 명령어를 입력합니다.
npm install socket.io-client1-3. Nodit 콘솔 가입
Nodit에서는 다양한 블록체인 네트워크에 연결할 수 있는 Node 서비스를 제공합니다. 아래 링크를 클릭하여 Nodit Console에 접속하여 회원가입을 진행하세요.
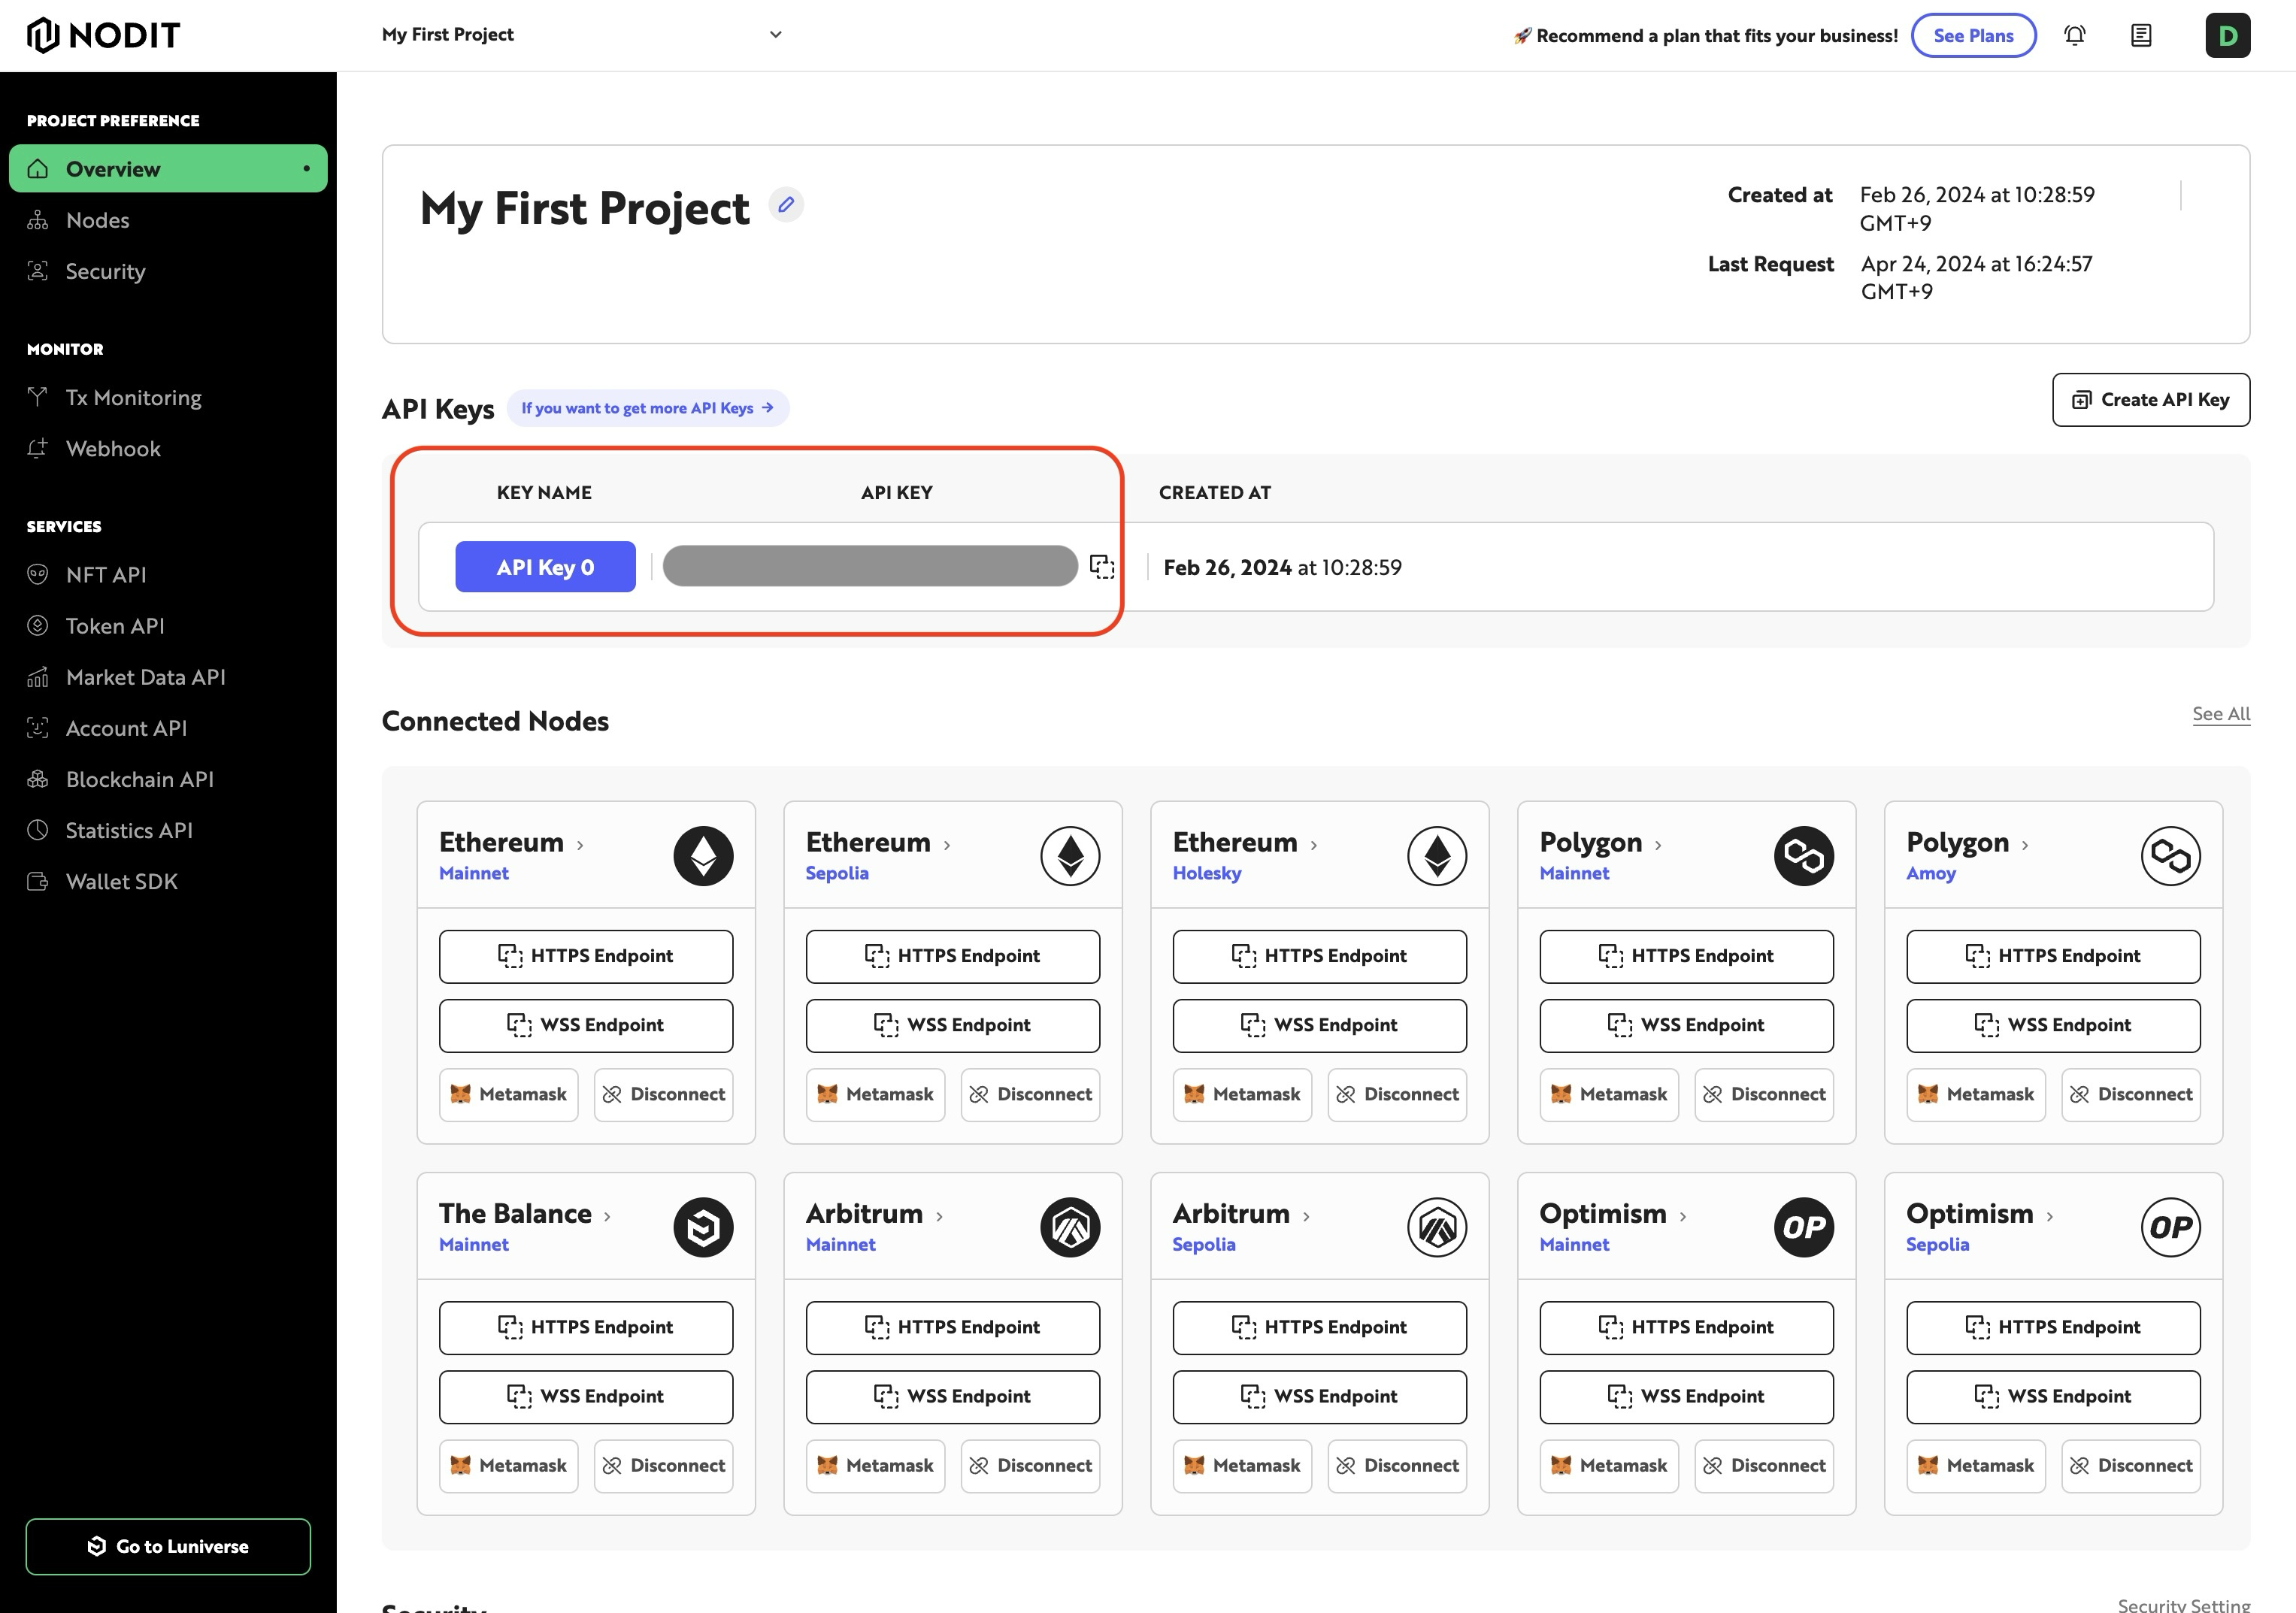
1-4. API key
프로젝트 Overview 페이지에서 생성된 API key를 복사하여 안전한 곳에 보관합니다.
2. 코드 작성
이번 예제에서는 Websocket을 이용하여 BLOCK_PERIOD 이벤트를 구독하여 1개의 블록이 생성될 때마다 알림을 받는 코드를 작성해봅니다. 아래 예제 코드에서 몇가지 변수들에 필요한 값을 입력합니다. 이 변수들은 WebSocket 코드를 적절하고 안전하게 작동하도록 설정하는 데 중요한 역할을 합니다. 실제 환경에 맞게 데이터를 적절히 대체하여 사용하세요.
messageId: WebSocket 메시지의 고유 식별자입니다. 애플리케이션에 관련된 실제 ID로 대체해야 합니다. 메시지 ID는 서버와 클라이언트 간의 구체적인 메시지 또는 이벤트를 구분하는 데 사용됩니다.description: 이 변수는 WebSocket 연결의 목적에 대한 간략한 설명을 포함합니다. 실제 연결의 용도를 설명하는 내용으로 대체해야 합니다. 이 설명은 서비스 로그, 모니터링 또는 문제 해결 시 해당 연결을 쉽게 식별할 수 있게 도와줍니다.apiKey: Nodit 콘솔에서 제공된 실제 API 키로 대체해야 합니다. API 키는 서비스에 안전하게 접근하고, 사용자의 인증을 확인하는 데 필수적인 요소입니다.protocol: 이 변수는 사용자가 상호 작용하고 있는 블록체인 프로토콜을 나타냅니다. 예를 들어 "Ethereum", "Arbitrum" 등과 같이 구체적인 프로토콜 이름으로 대체해야 합니다. 프로토콜은 WebSocket 연결이 어떤 블록체인 기술과 상호 작용하는지 정의합니다.network: 이 변수는 대상 네트워크를 지정합니다. 예를 들어 "mainnet", "testnet", "sepolia" 등의 구체적인 네트워크로 대체해야 합니다. 네트워크는 프로토콜 내에서 실제 데이터가 전송되는 특정 환경을 지정합니다.
import io from "socket.io-client";

// {Your websocket message ID} - This is a unique identifier for your WebSocket message. You need to replace this placeholder with an actual ID that is relevant to your application.
const messageId = "{Your websocket message ID}";

// eventType specifies the type of event you want to subscribe to on the blockchain. For example, "BLOCK_PERIOD" could be used to receive events related to blockchain block timings.
const eventType = "BLOCK_PERIOD";

// The WebSocket URL to connect to. You need to use the appropriate URL provided by your blockchain service provider.
const url = "wss://web3.nodit.io/v1/websocket";

// Parameters for configuring the subscription. You should replace the placeholder in 'description' with a brief description of your WebSocket connection's purpose.
const params = {
  description: "{description about your websocket}",
  condition: {
    period: 1 // You can set this to any integer greater than zero. This could be used to specify the frequency of events, such as receiving an event every 'n' blocks.
  }
};

// Options for the WebSocket connection. These include security settings and additional parameters required by the server.
const options = {
  rejectUnauthorized: false, // This should be true in production for better security unless your server uses a self-signed certificate.
  transports: ["websocket"],
  path: "/v1/websocket/",
  auth: {
      apiKey: "{Your Api Key}", // Replace this with your actual API key provided by the service.
  },
  query: {
      protocol: "{protocol}", // Replace this with the blockchain protocol you are interacting with, e.g., "ethereum", "arbitrum", etc.
      network: "{network}", // Replace this with the specific network you are targeting, e.g., "mainnet", "testnet".
  },
};

// This function establishes a connection to the server and handles various WebSocket events.
function connectToServer() {
  return new Promise((resolve, reject) => {
    const socket = io(url, options);

    socket.on("connect", () => {
      socket.on("subscription_registered", (message) => {
        console.log("registered", message);
      });

      socket.on("subscription_connected", (message) => {
        console.log("subscription_connected", message);

        // Emit a subscription message with your specific messageId, eventType, and parameters.
        socket.emit("subscription", messageId, eventType, JSON.stringify(params));
      });

      socket.on("subscription_error", (message) => {
        console.error(`nodit_subscription_error: ${message}`);
      });

      socket.on("subscription_event", (message) => {
        console.log("subscription Event : ", message);
      });

      socket.on("disconnect", (message) => {
        console.warn(`disconnect`, message);
      });

      resolve(socket);
    });

    socket.on("connect_error", (error) => {
      console.error(`Socket connection error to : `, error);
      reject(error);
    });
  });
}

connectToServer();
3. 실행 및 응답 확인하기
위의 코드와 같이 작성되었다면 터미널과 Node.js를 이용하여 해당 파일을 실행합니다.
node your_file_name.js실행 후, 예제의 WebSocket이 이더리움 네트워크와 정상적으로 연결되었다면 블록이 생성될 때 마다 다음과 같이 이벤트를 수신받게 됩니다.
subscriptionId: 97139
subscription Event :
  eventType: "BLOCK_PERIOD",
  event: {
    "period":1,
    "message":{
      "number":17767702,
      "hash":"0x836c2ada70123019592fc52763757c87061935bbab2609d2dac1d0e9a93a6186",
      "parent_hash":"0xc8936f4c504b1640df7e1c920dbd1879a0906c7d44cf369d7f26b2939bfa2864",
      "nonce":"0x0000000000000000",
      "sha3_uncles":"0x1dcc4de8dec75d7aab85b567b6ccd41ad312451b948a7413f0a142fd40d49347",
      "logs_bloom":"0x1d374002c00c144a39093818900082b050884050220a14960209123380de5e80c4581182411812b173505850b0b5818112ad99b88dcf39abc651fc95d5ed2b04649070b87fa209ccbe23c02fc829b16c9c804020016e0c8b20805f42cc611800da80041507d304350971a2476d921a8db9934bcc290e0549d68d13f014082f062e3a92d03692002012d0704842a08800f9050d835910246c56aa4153a81134308ef82dc47101fec2601329e7f05414a2860c003f226d86ee8221276610108c5d89548da24018c10e261ca6422096378c0d7903076328129800d520868a11e846c1ffb1a904c68590034524c47c818c2480e137be5b1e44e268198af3b6023d89",
      "transactions_root":"0xed72506de019800931029aa7f4efdb255b9a6c2ebab2751afd98e3d2875e4159",
      "state_root":"0x35ee38917ecf6a96f9512690b4717002f233dd0dfe08f404097c0eff91f4aa20",
      "receipts_root":"0x59f4b1fc17aa8e408eec5377f4b37314333476229b350fe4b4549868ba8c7fdc",
      "miner":"0x1f9090aae28b8a3dceadf281b0f12828e676c326",
      "difficulty":0,
      "total_difficulty":5.875000371659836e+22,
      "size":58801,
      "extra_data":"0x7273796e632d6275696c6465722e78797a",
      "gas_limit":30000000,
      "gas_used":11663189,
      "timestamp":1690258955,
      "transaction_count":107,
      "base_fee_per_gas":17895212572
    }
  }
Websocket 호출 코드를 더욱 자세하게 확인할 수 있습니다!Nodit Developer Portal은 Websocket 호출 코드를 더욱 자세하게 확인할 수 있도록 Recipe를 제공하고 있습니다! 아래 링크를 클릭하여 확인해 보세요!