Webhook
Key Features
When an event occurs, Webhook automatically sends an HTTP POST request to a registered Callback URL. On-chain events are delivered instantly without maintaining a persistent connection.
On-chain events integrate directly into existing enterprise workflow systems. Event-driven task automation such as payment confirmation and compliance alerts is achievable without separate polling logic.
Retry and backoff policies ensure message delivery even during temporary receiver outages. Signing Key-based signature verification confirms the integrity of received messages.
CEL-based conditional expressions, selective output fields, Live Sample, and Test Webhook enable precise on-chain event monitoring. The console also supports transmission history review and Easy Resend-based operations.
Overview
Nodit Webhook is an asynchronous notification service that automatically sends HTTP POST requests to a registered Callback URL when a defined on-chain event occurs. Unlike Stream, which requires maintaining a persistent connection, Webhook delivers data only at the moment an event occurs, making it well suited for event-driven asynchronous workflows.
In enterprise environments, Webhook serves use cases such as automating payment confirmations, alerting the responsible team when compliance thresholds are reached, and monitoring asset movements in custodial wallets by connecting on-chain events directly to internal business processes. In financial institution environments where persistence and controllability are critical, event delivery itself becomes part of operational control and audit frameworks.
Webhook can be categorized into two types based on its operational approach. Classic Webhook provides quick configuration centered on Event Types, while Flexible Webhook enables more precise condition-based notifications through CEL expressions and field selection.
The basic workflow of Webhook is as follows:
- Event occurrence: An event such as a new transaction, block creation, or smart contract interaction occurs on the blockchain.
- Trigger: The event triggers the Webhook.
- Data transmission: Webhook automatically sends an HTTP POST request containing the event data to the registered Callback URL.
Use Cases
Payment Confirmation Automation
As soon as an on-chain payment transaction is confirmed, a notification is sent to an internal settlement system or ERP. Payment completion is processed automatically without manually querying the blockchain state.
Compliance Threshold Triggers
When asset transfers exceeding a specific amount occur, an alert is automatically sent to the compliance team. Various conditions such as transaction amounts and specific addresses serve as filters, enabling a monitoring framework aligned with regulatory requirements.
Digital Asset Movement Monitoring
Notifications are received the moment asset movements occur on custodial wallet addresses. Registering separate Webhooks per wallet enables integration with anomaly detection and asset protection workflows.
Key Functions
Create a new Webhook from the Webhook menu in the Nodit Console. Select the target chain for events in the Select Networks area, then choose the event type to subscribe to in the Select Event Type area. Enter the Webhook URL to receive event data, then click the Test Webhook button to verify that the URL can receive messages successfully. Complete the Webhook creation by configuring the required conditions in the Conditions area based on the selected Event Type.
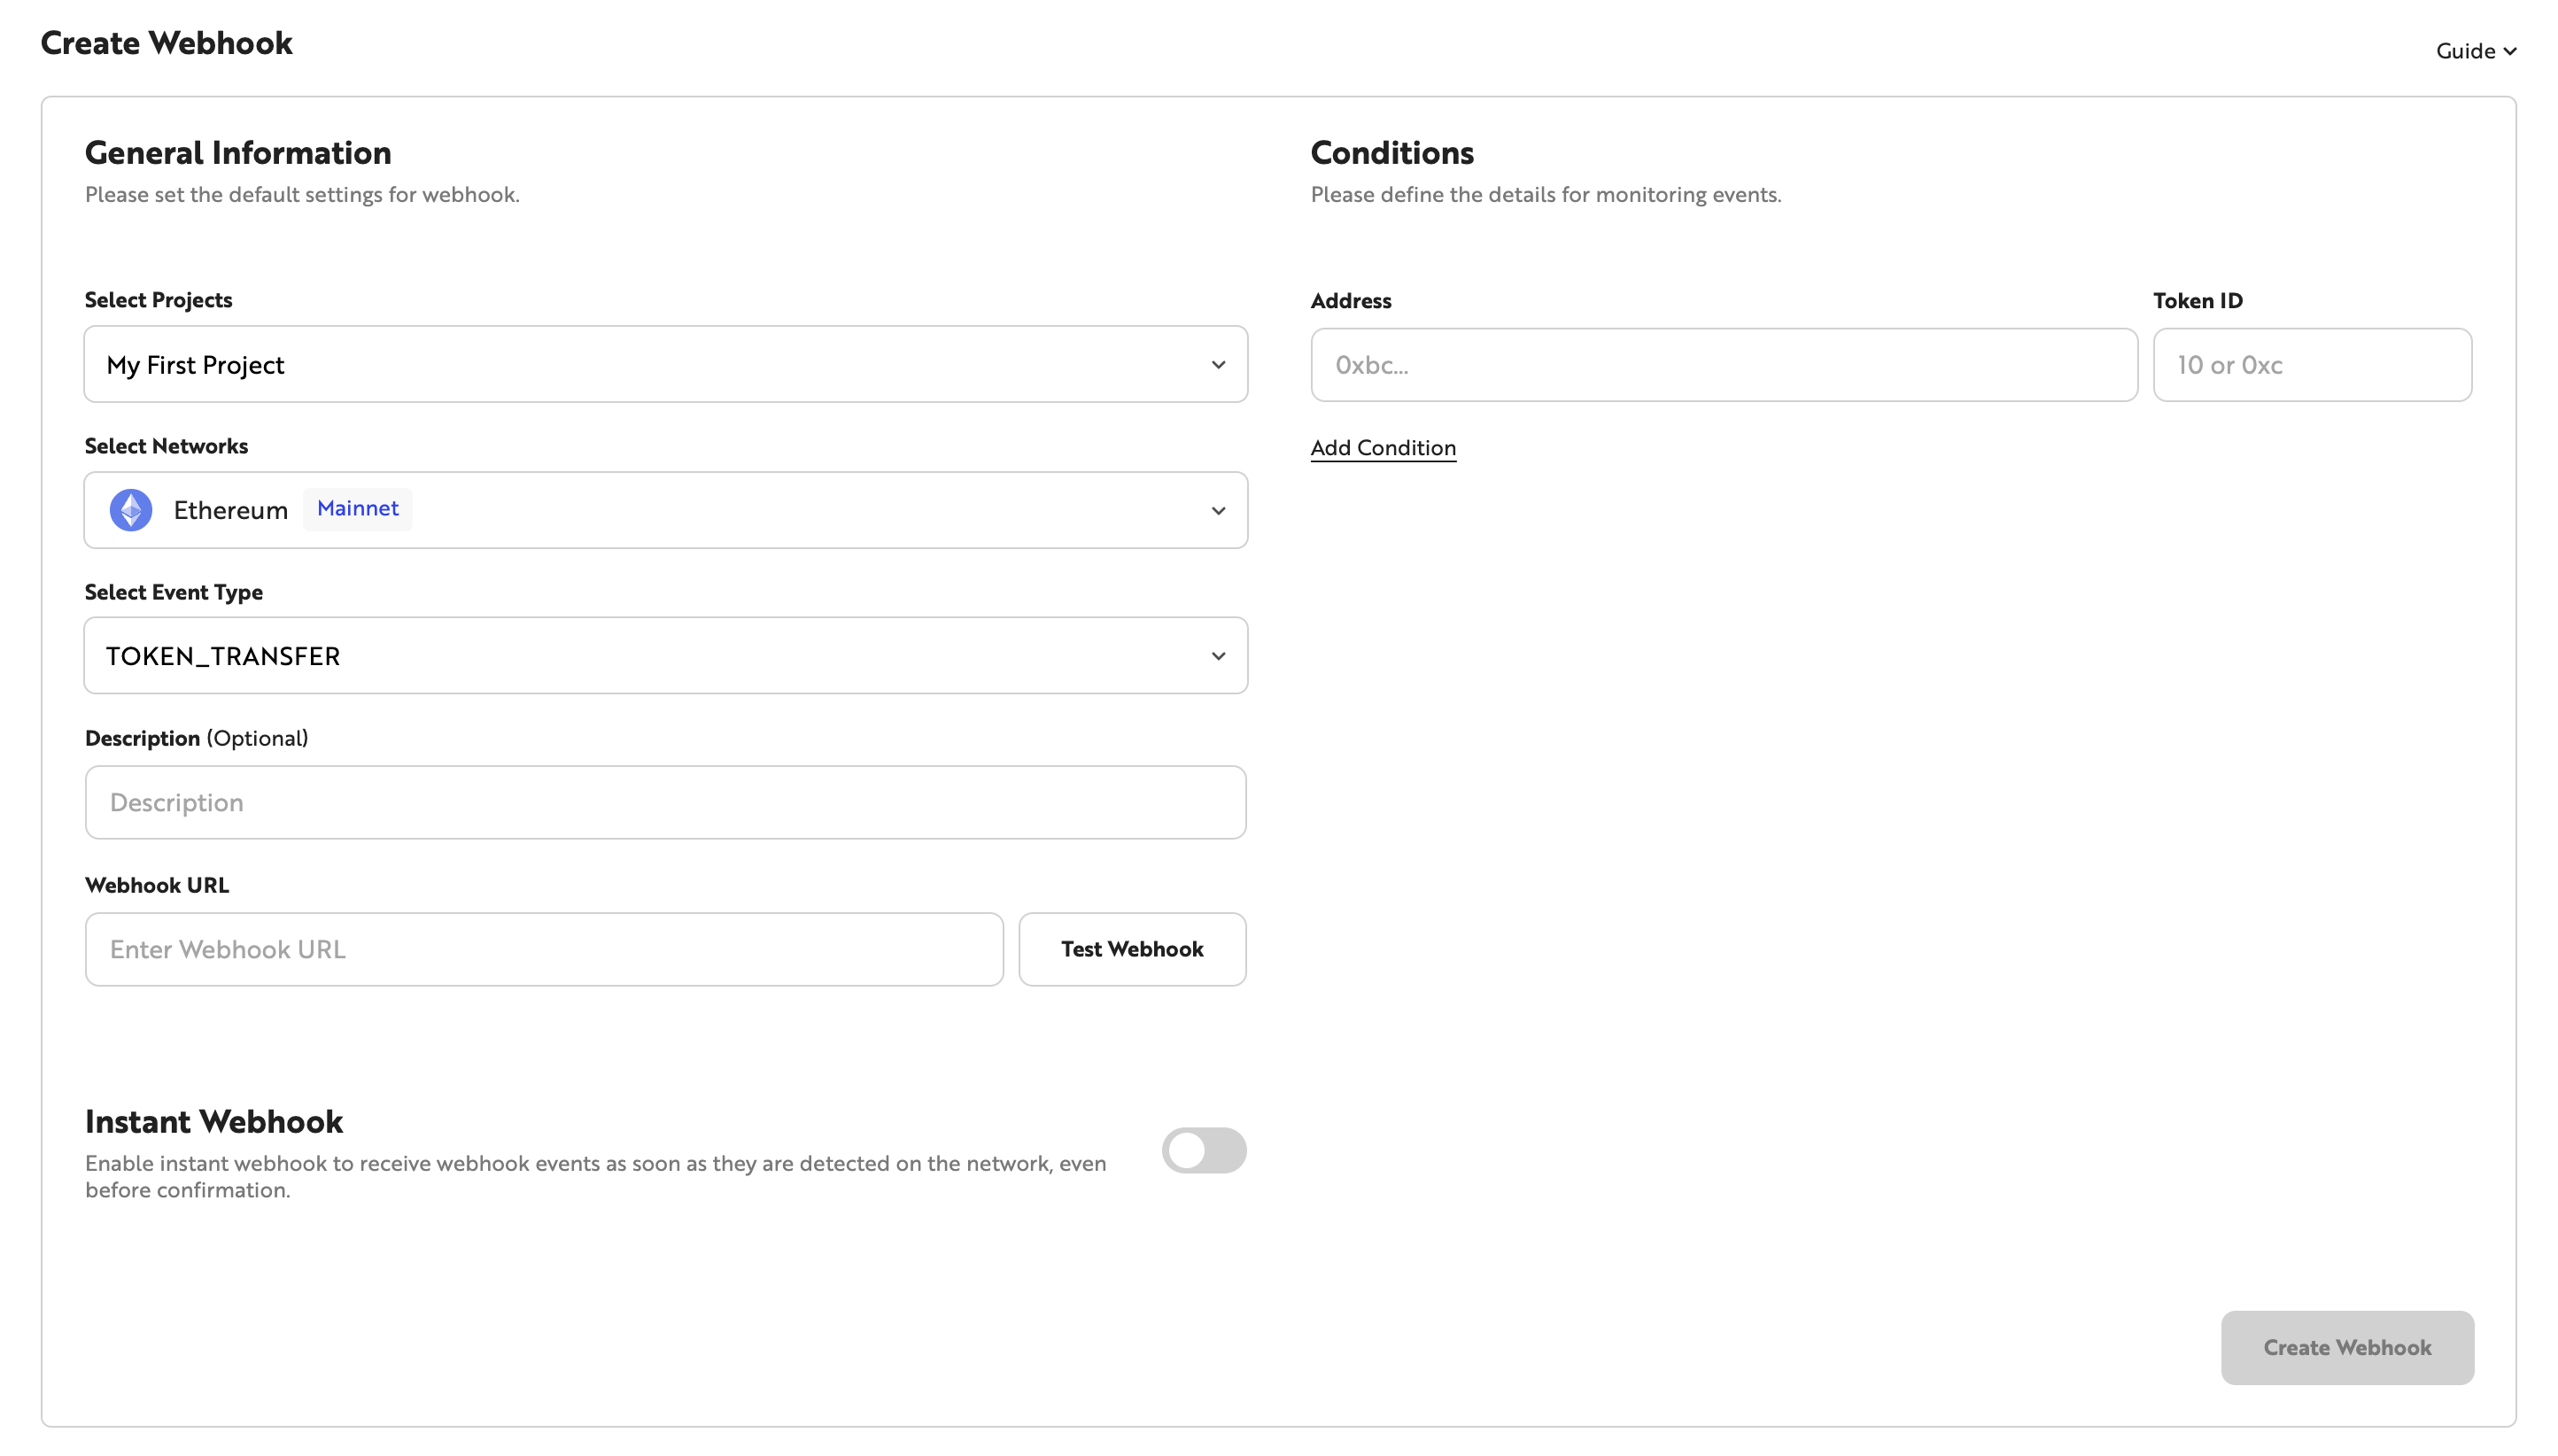
The Instant Webhook option, available since May 30, 2025, delivers Webhook messages as soon as a monitored event is detected by a Nodit node, regardless of whether the block containing the event has been finalized. This option is suitable for enterprise systems that require proactive risk detection or immediate UI responsiveness. Enable this option when rapid notification of event occurrence is critical.
Disabling the Instant Webhook option restores the default behavior where messages are sent only after the block containing the event transaction is finalized. Because events may ultimately not have occurred if the block is rolled back or reorganized, using the default Webhook behavior with the option disabled is recommended when data finality is important.
When creating or retrieving Webhooks via the API, set the isInstant field to true or false to enable or disable this option.
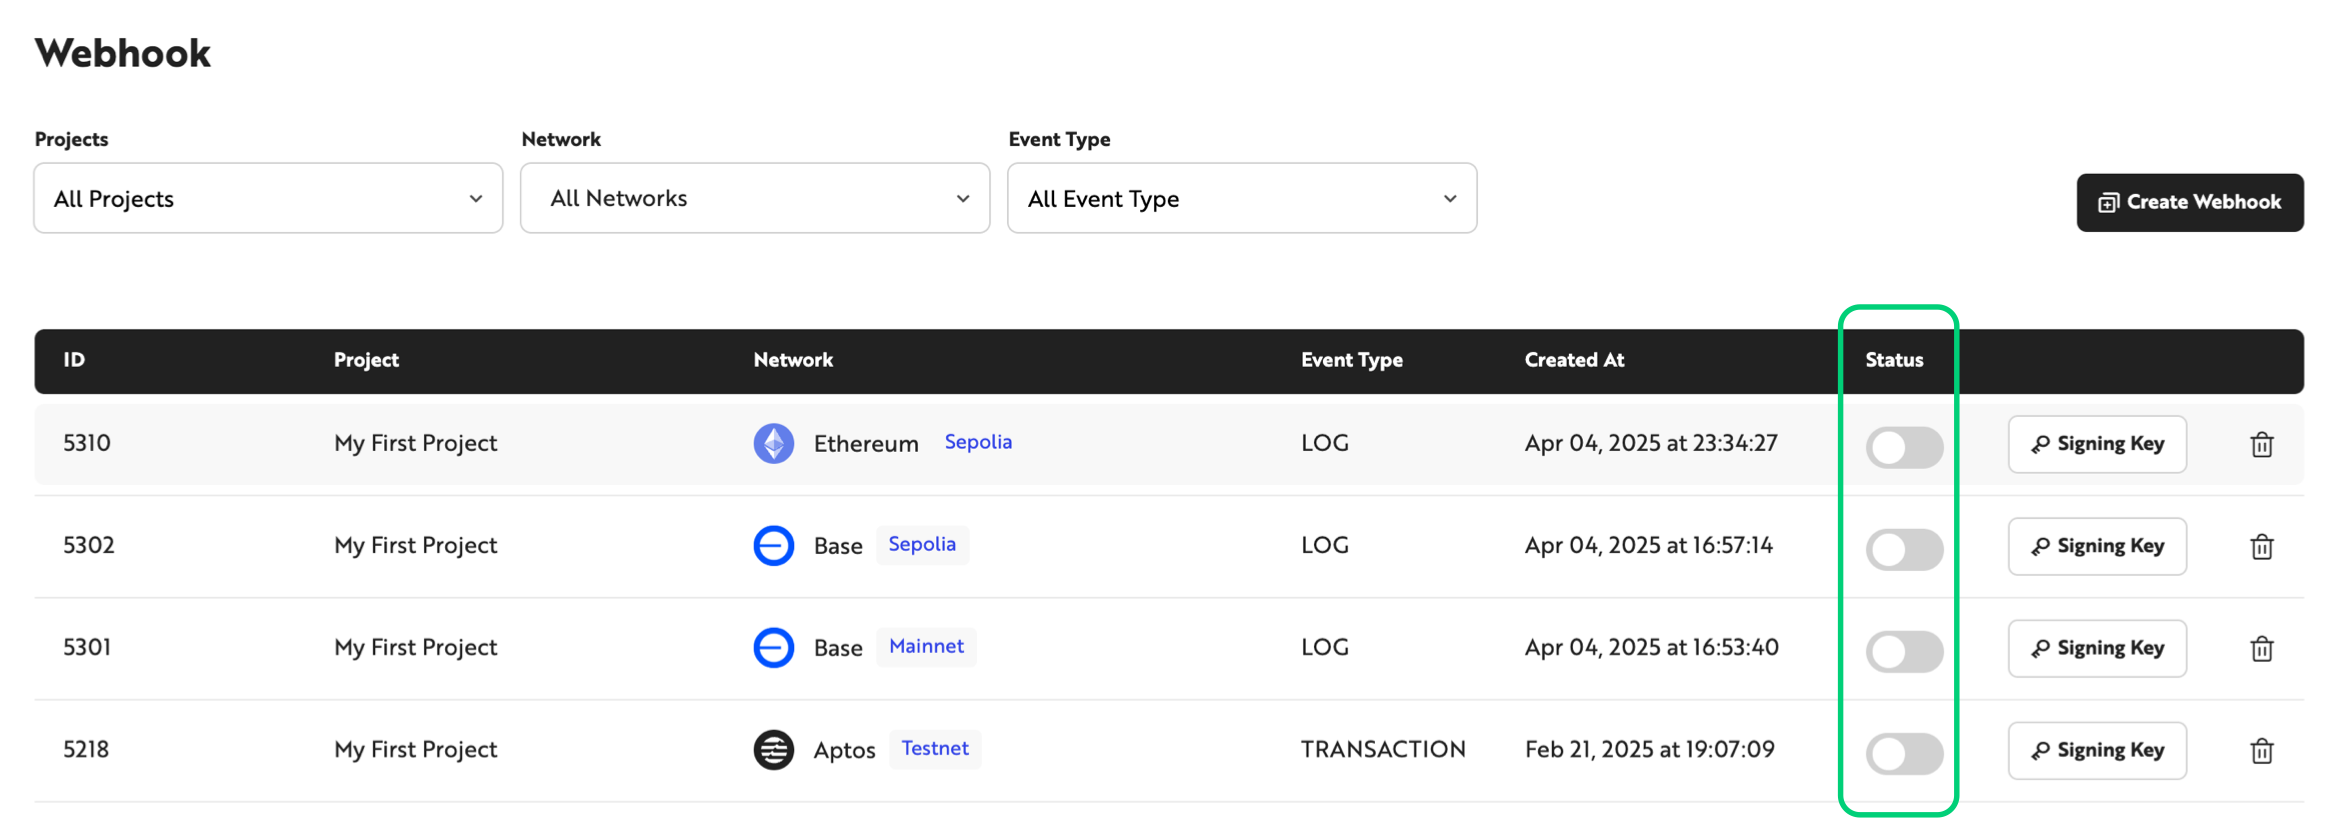
Once a Webhook is created, the Webhook list displays the ID, network, Event Type, creation date, status, and Signing Key for each Webhook. Click the toggle button to pause or resume Webhook message reception, or click the delete icon to remove Webhooks that are no longer needed.
Enabled: Event monitoring defined in the Webhook is active, and Webhook messages are received. Disabled: Webhook event monitoring is inactive, and Webhook messages are not received.
Flexible Webhook
Flexible Webhook can be used when precise conditional expressions and reduced payloads are needed. Flexible Webhook is a feature that configures conditions using Stream Types and CEL expressions and transmits only selected fields.
It is suitable for the following scenarios:
- AML alerts that detect only large-volume transfers of specific tokens
- Post-processing pipelines that receive only successful Transaction Receipts
- Operational structures that reduce internal message bus costs by delivering only necessary fields
- Cases where rules need to be validated before deployment using Live Sample and Test Webhook
Related documentation is available on the pages below:
- Flexible Webhook Overview
- Flexible Webhook Quickstart
- Flexible Webhook Stream Types
- Flexible Webhook Security & Reliability
- Flexible Webhook API
On the Starter plan, Webhooks are automatically disabled 9 days after activation. Under the plan policy effective as of May 20, 2025, Webhooks on Starter plan accounts are automatically disabled at UTC 00:00:00 nine days after creation or reactivation, and a notification email is sent to the Nodit account email two days before deactivation. Disabled Webhooks can be reactivated through the Webhook menu in the Console or via the API, and each reactivation provides up to 9 additional days of usage.
To operate Webhooks continuously, check the status regularly and reactivate as needed, or consider upgrading your plan.
Webhook Quickstart
Define the events to subscribe to and register a Callback URL to create a Webhook by following the steps below. Webhooks are created through the Webhook menu in the Nodit Console or via the API.
Creating and Managing Webhooks via API
When your application requires dynamically creating and deleting Webhooks, API-based management is available. Refer to the Webhook API Reference to call the API and verify that the Webhook was created successfully.
Create a free project in the Nodit Console to explore Webhook features. Go to Nodit Console