

Subscription
Subscribing to a Nodit paid plan unlocks higher Compute Unit (CU) limits and throughput. Before starting a subscription, register a payment method. This guide covers every subscription and billing procedure: enabling Auto-scaling for CU overage, registering and changing payment methods (credit/debit card, PayPal, Crypto Balance), subscribing to, changing, and canceling a plan, and applying coupons and credits.
Auto-scaling
When all Compute Units (CUs) included in your plan are exhausted, API calls are suspended. Auto-scaling prevents service interruption caused by unexpected traffic spikes or increased workloads — additional charges apply only to usage that exceeds the plan's CU limit.
Auto-scaling Pricing
Auto-scaling is available on paid plans starting from Basic. Overage usage is calculated at the rates below and billed through the payment method registered in the Nodit console. Plan-specific CU limits and pricing details are available on the Plans page.
| Spec | Free Trial | Basic | Developer | Business | Dedicated |
|---|---|---|---|---|---|
| Auto-scaling | Not Supported | $1.0/1M CUs | $1.0/1M CUs | $1.0/1M CUs | Custom |
Enabling and Disabling Auto-scaling
Auto-scaling is disabled by default. Because enabling it may result in additional charges for overage usage, activate it only when service continuity is required. Follow the steps below in the console to change the setting.
-
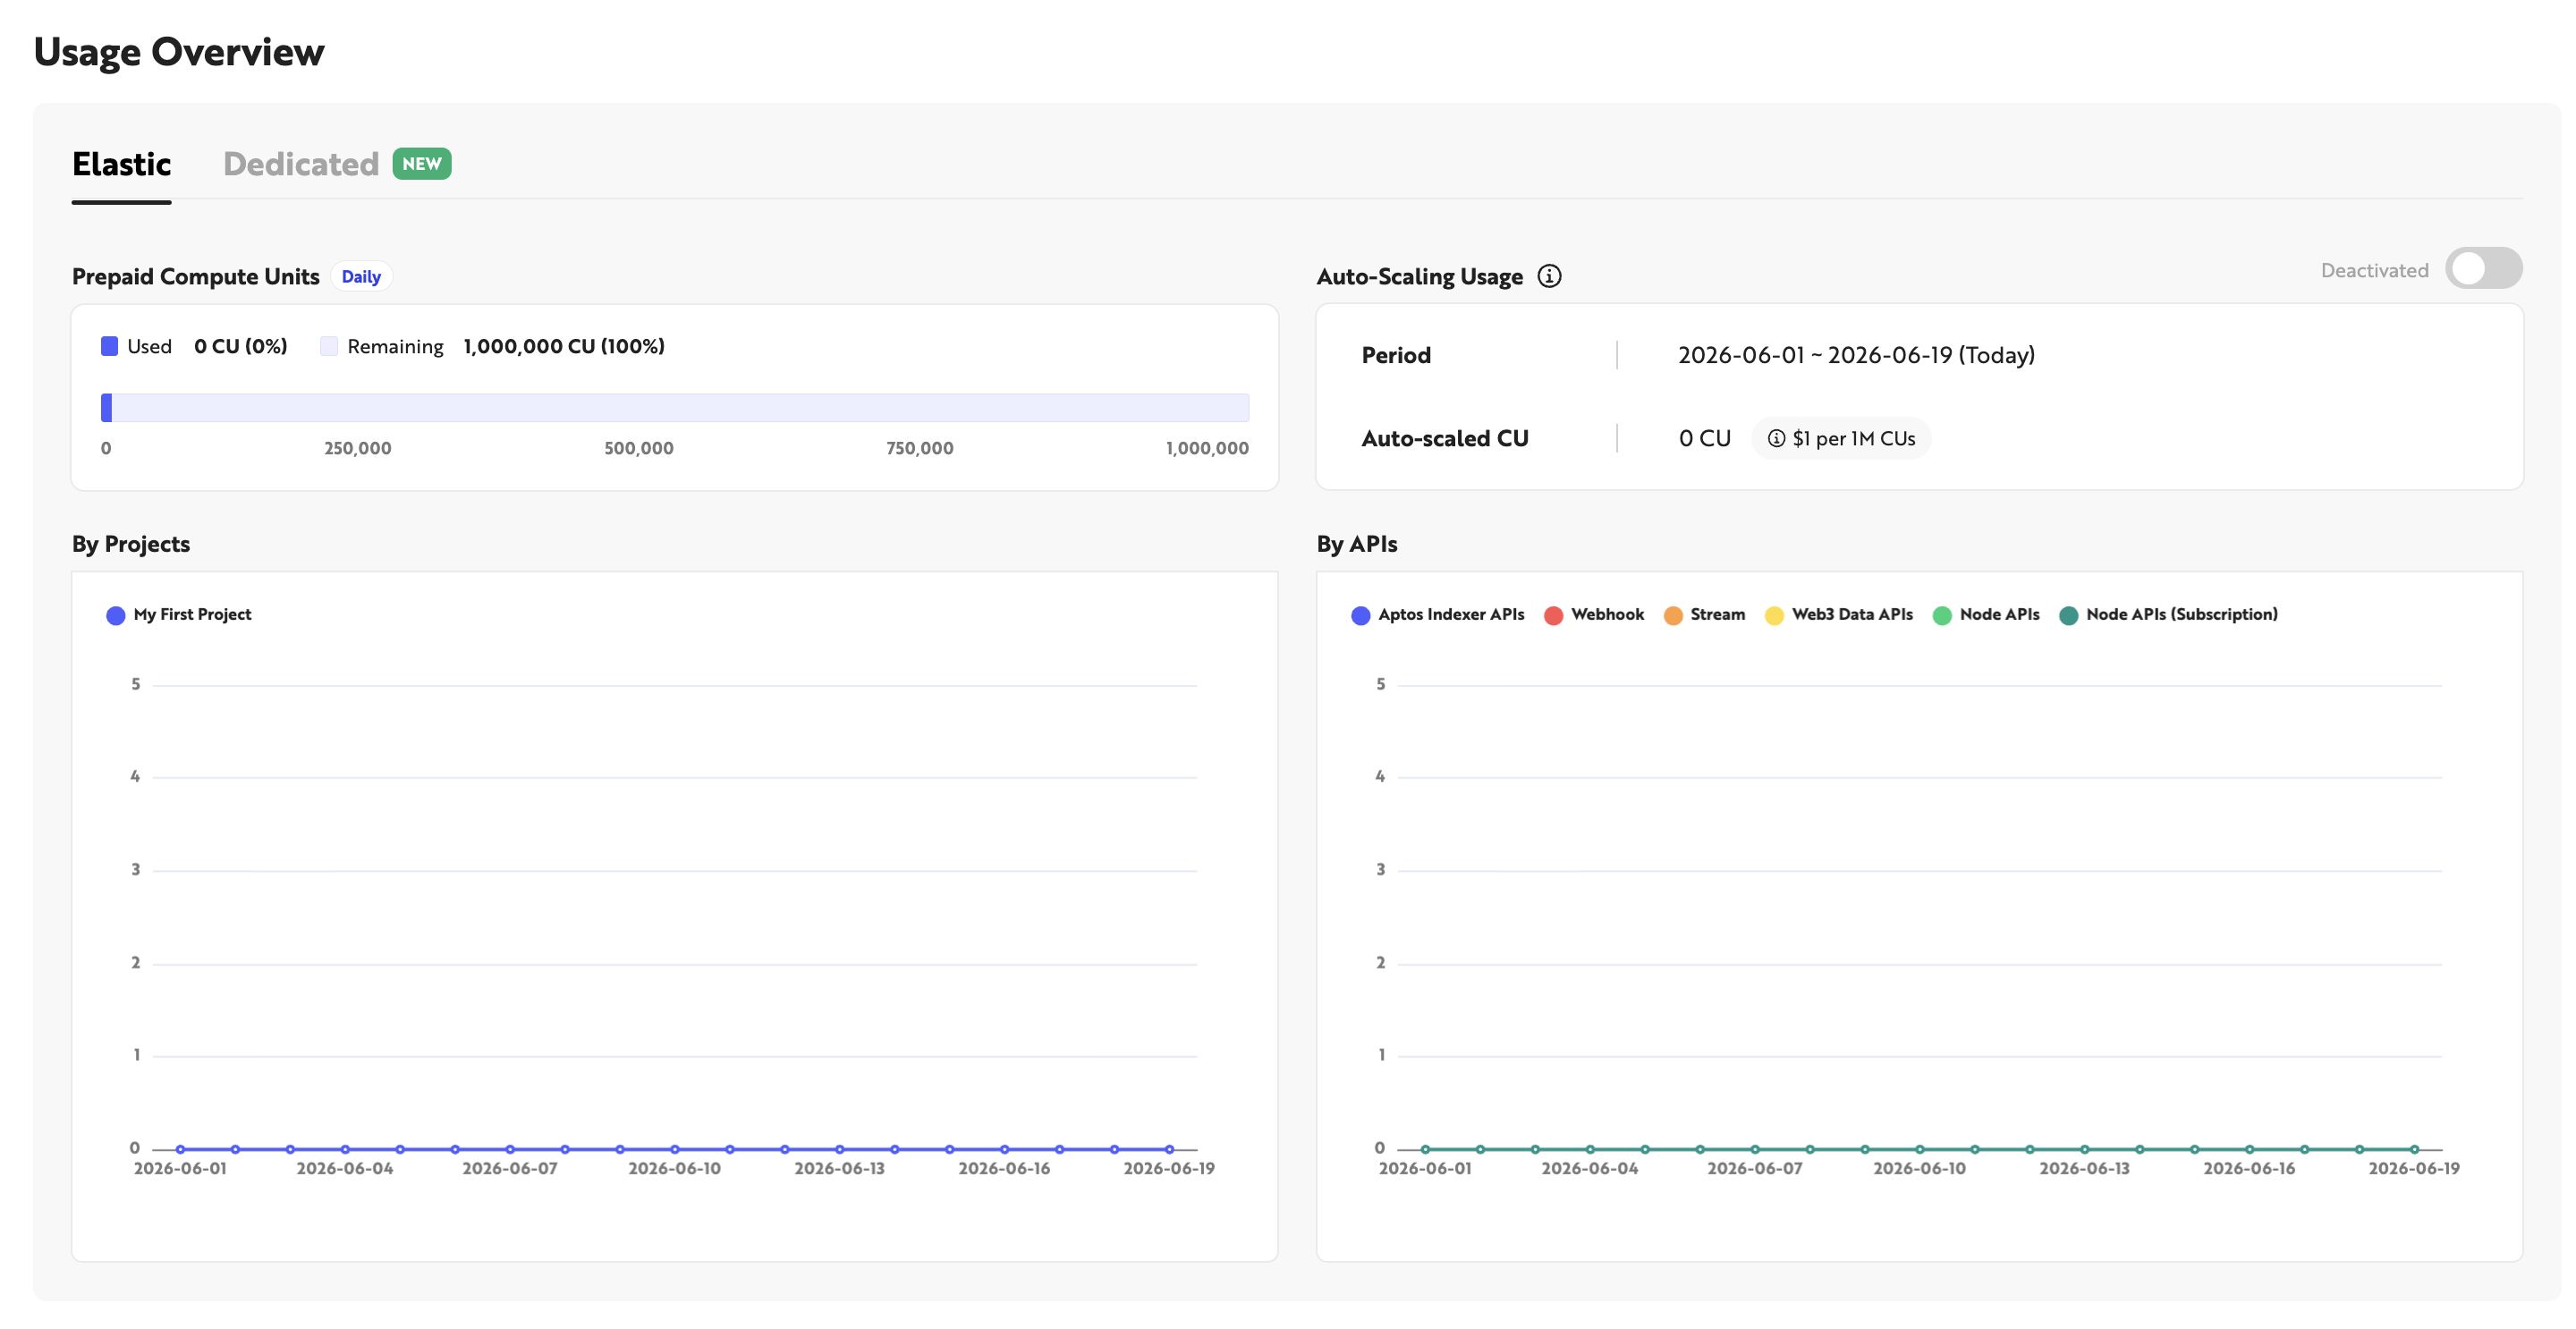
Log in to the Nodit console and navigate to the Overview page.
-
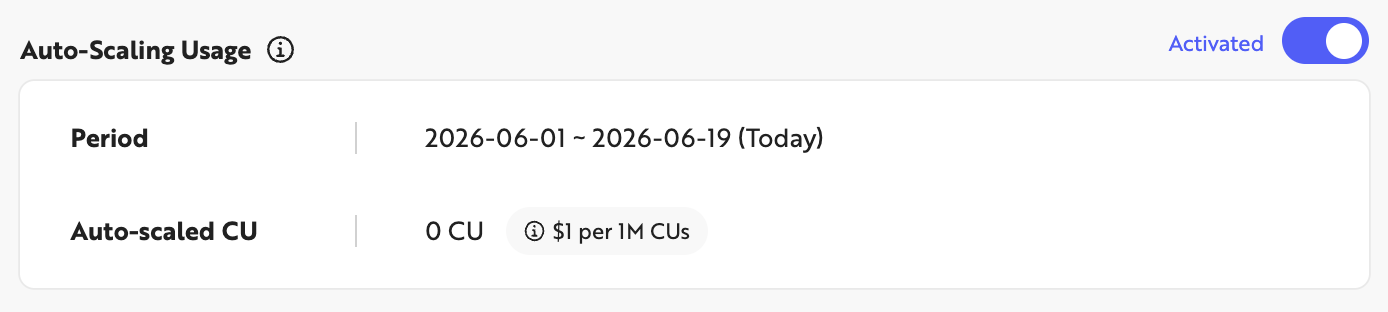
Click the toggle to the right of Auto-scaling Usage to enable or disable the feature.
-
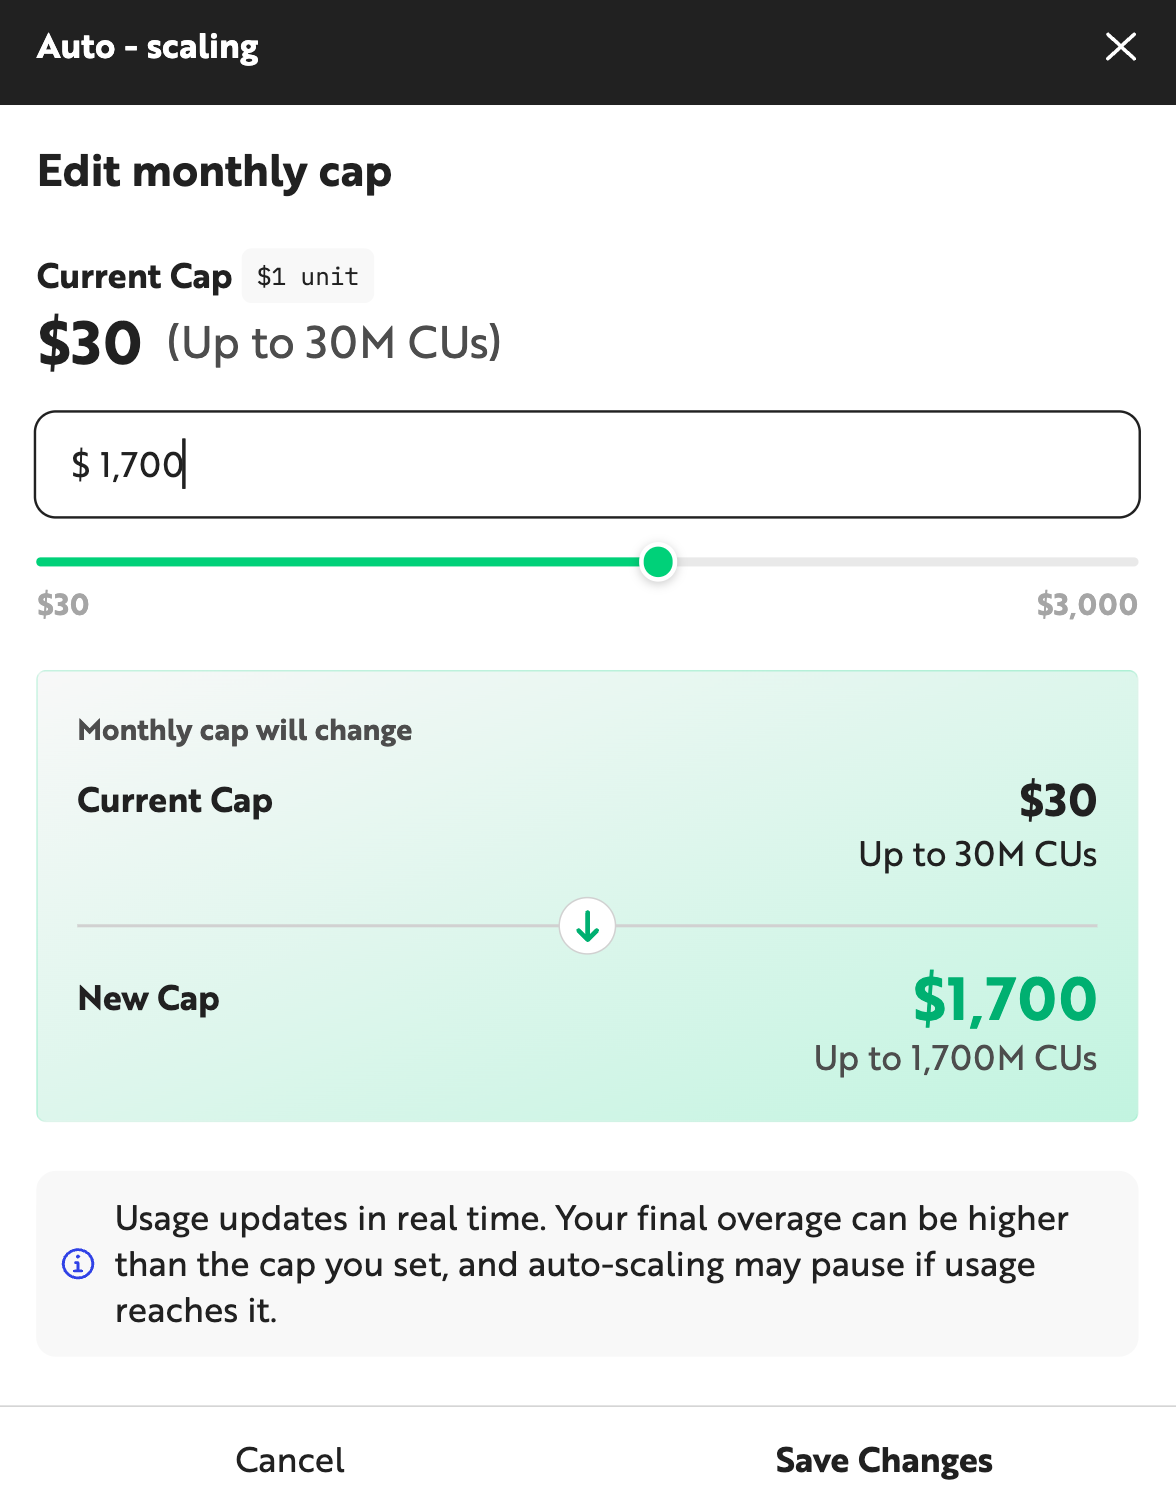
To enable Auto-scaling, set a monthly cap of up to $3,000. Click [Save Changes] to enable Auto-scaling.
-
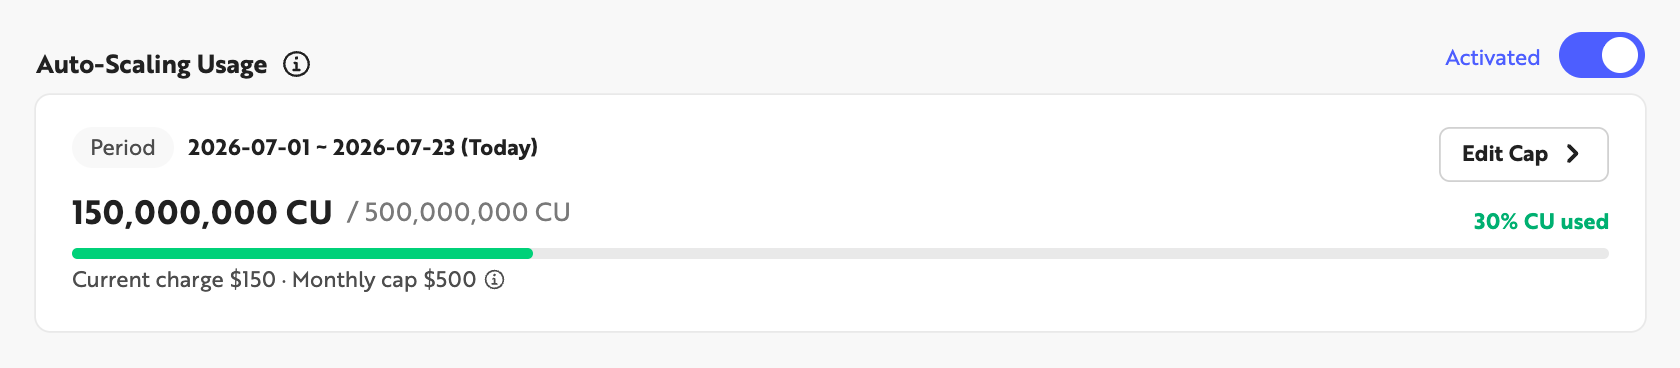
Once enabled, the Auto-scaling Usage section shows that the feature is active for the amount you configured. Click [Edit Cap] to change the monthly cap.
Register a Payment Method
Paid plans are billed automatically each month using the registered payment method. Register a payment method before subscribing to a paid plan.
Step 1. Go to Billing
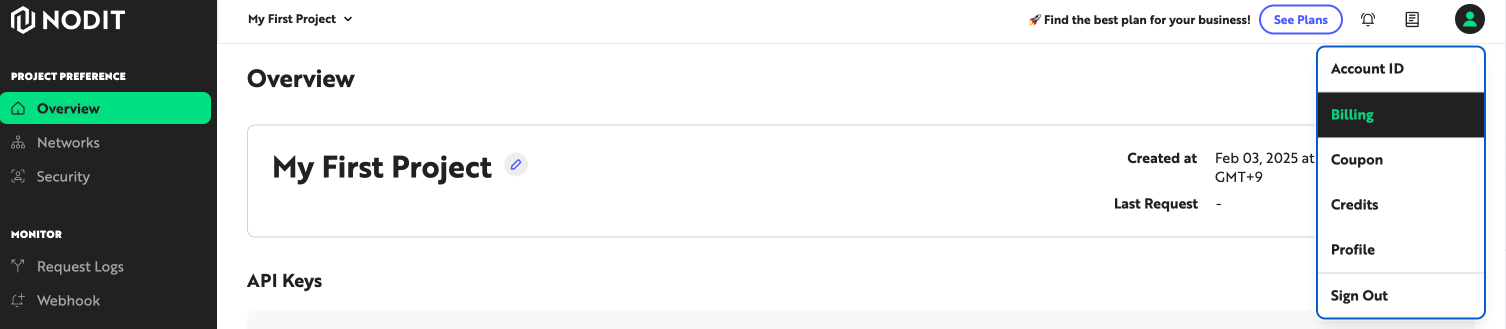
Click the profile icon in the top-right corner of the Nodit console, then click [Billing] to open the account settings screen.
Step 2. Add a Payment Method
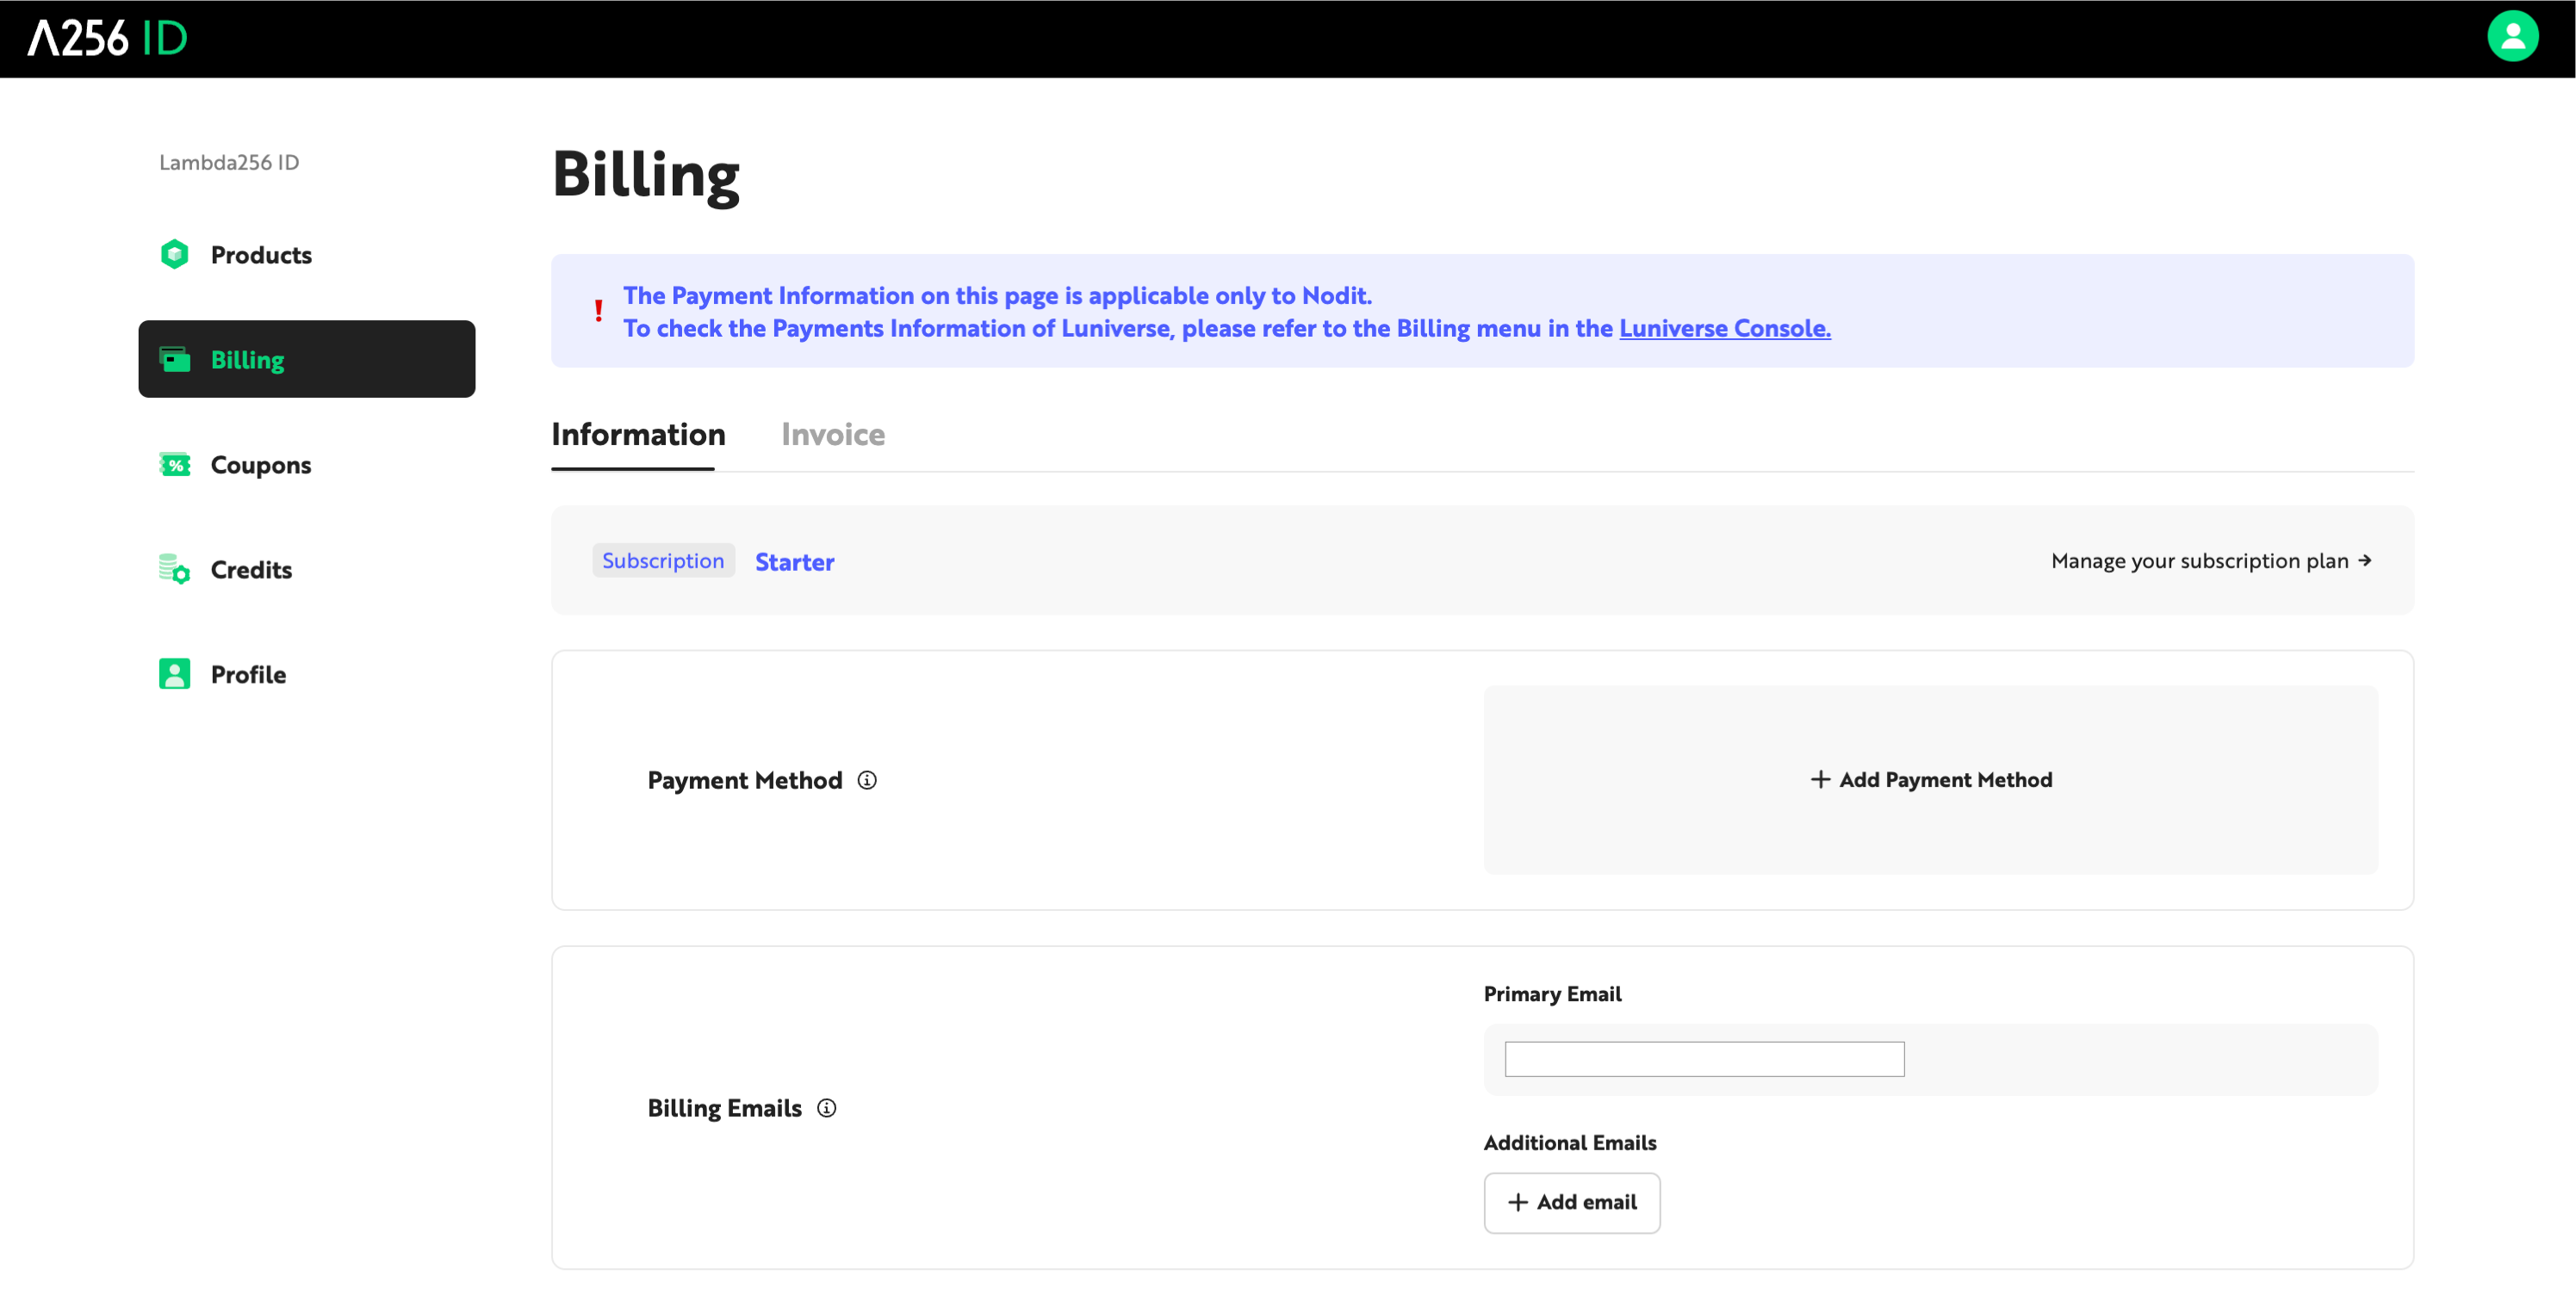
Click the [+ Add Payment Method] box.
Step 3. Select a Payment Method
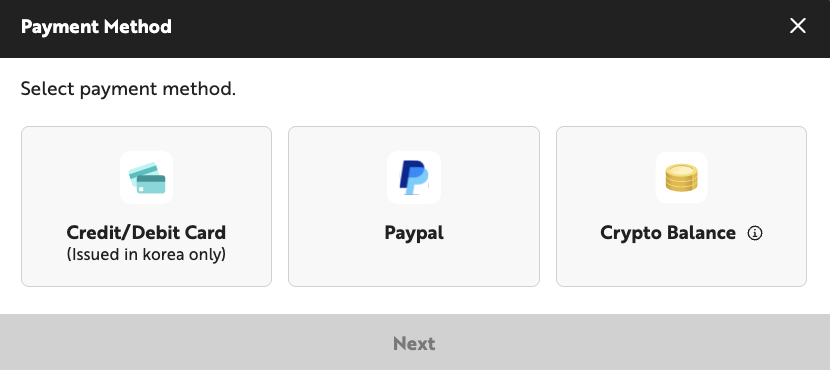
In the [Select Payment Method] popup, select the payment method to use for subscription billing. Nodit currently supports the following payment methods:
- Credit/Debit Card — Register a credit or debit card issued in South Korea as a recurring payment method. Charges are billed in Korean Won (KRW).
- PayPal — Link a PayPal account with a registered credit card, debit card, or other payment method. Charges are billed in US Dollars (USD).
- Crypto Balance — Top up your Nodit account's Crypto Balance with cryptocurrency, then have subscription charges deducted from that balance. Charges are billed in US Dollars (USD).
Complete registration by following the procedure for the selected payment method.
Register a Credit/Debit Card
If you selected a credit/debit card in Step 3, you will be redirected to the payment processor's page to enter your card details. Only cards issued in South Korea are accepted. A minimum charge (KRW 100) is made to verify the card and immediately refunded.
Register PayPal
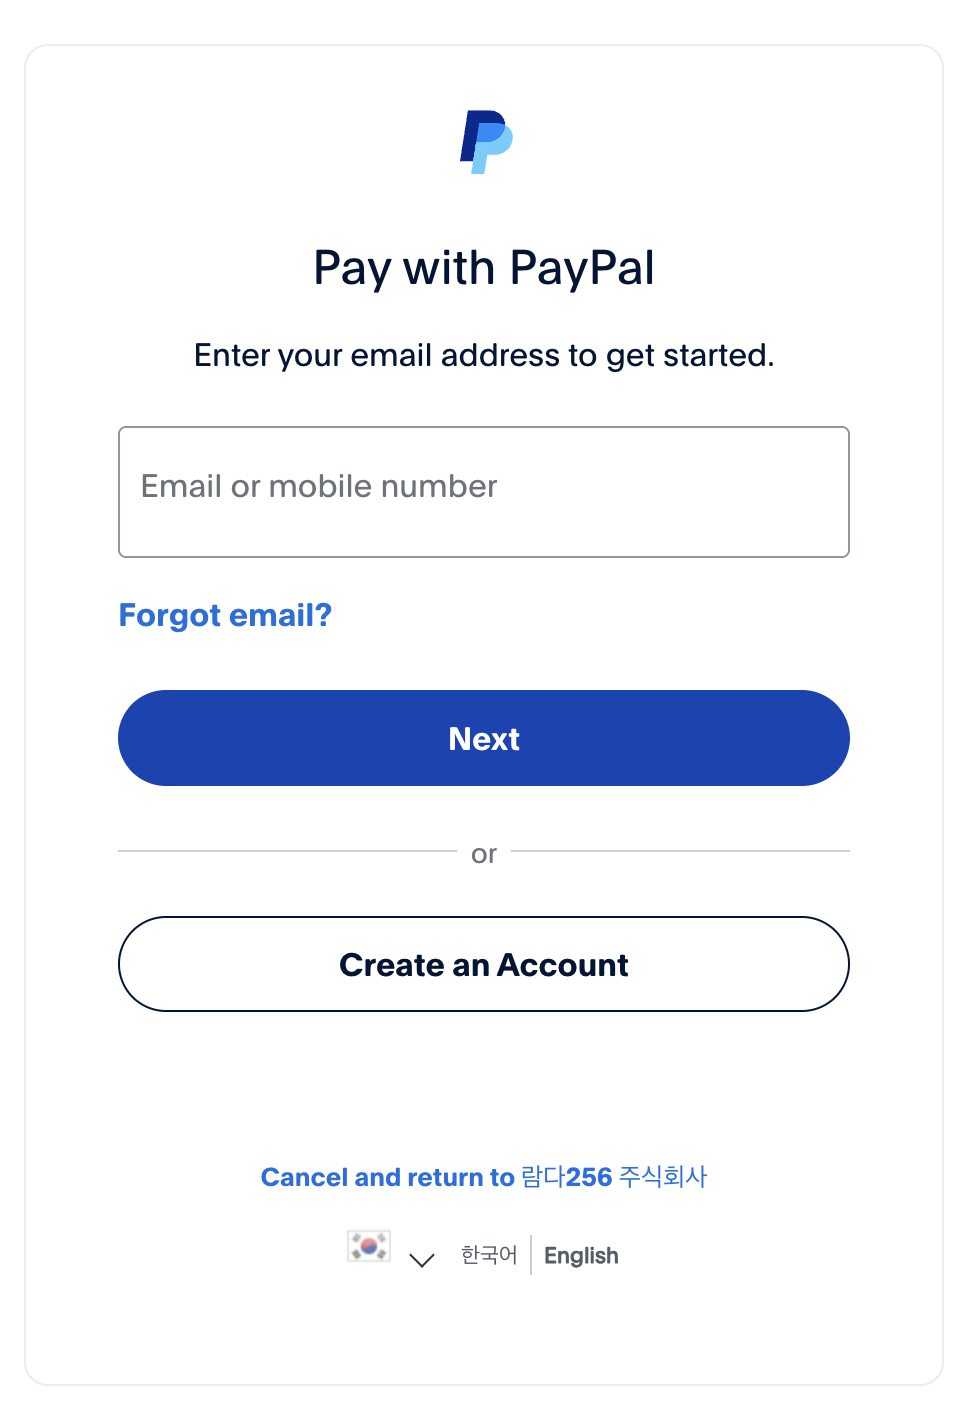
If you selected PayPal in Step 3, you will be redirected to the PayPal login screen. Link a PayPal account that has a credit card, debit card, or other payment method registered to complete the setup.
Register Crypto Balance
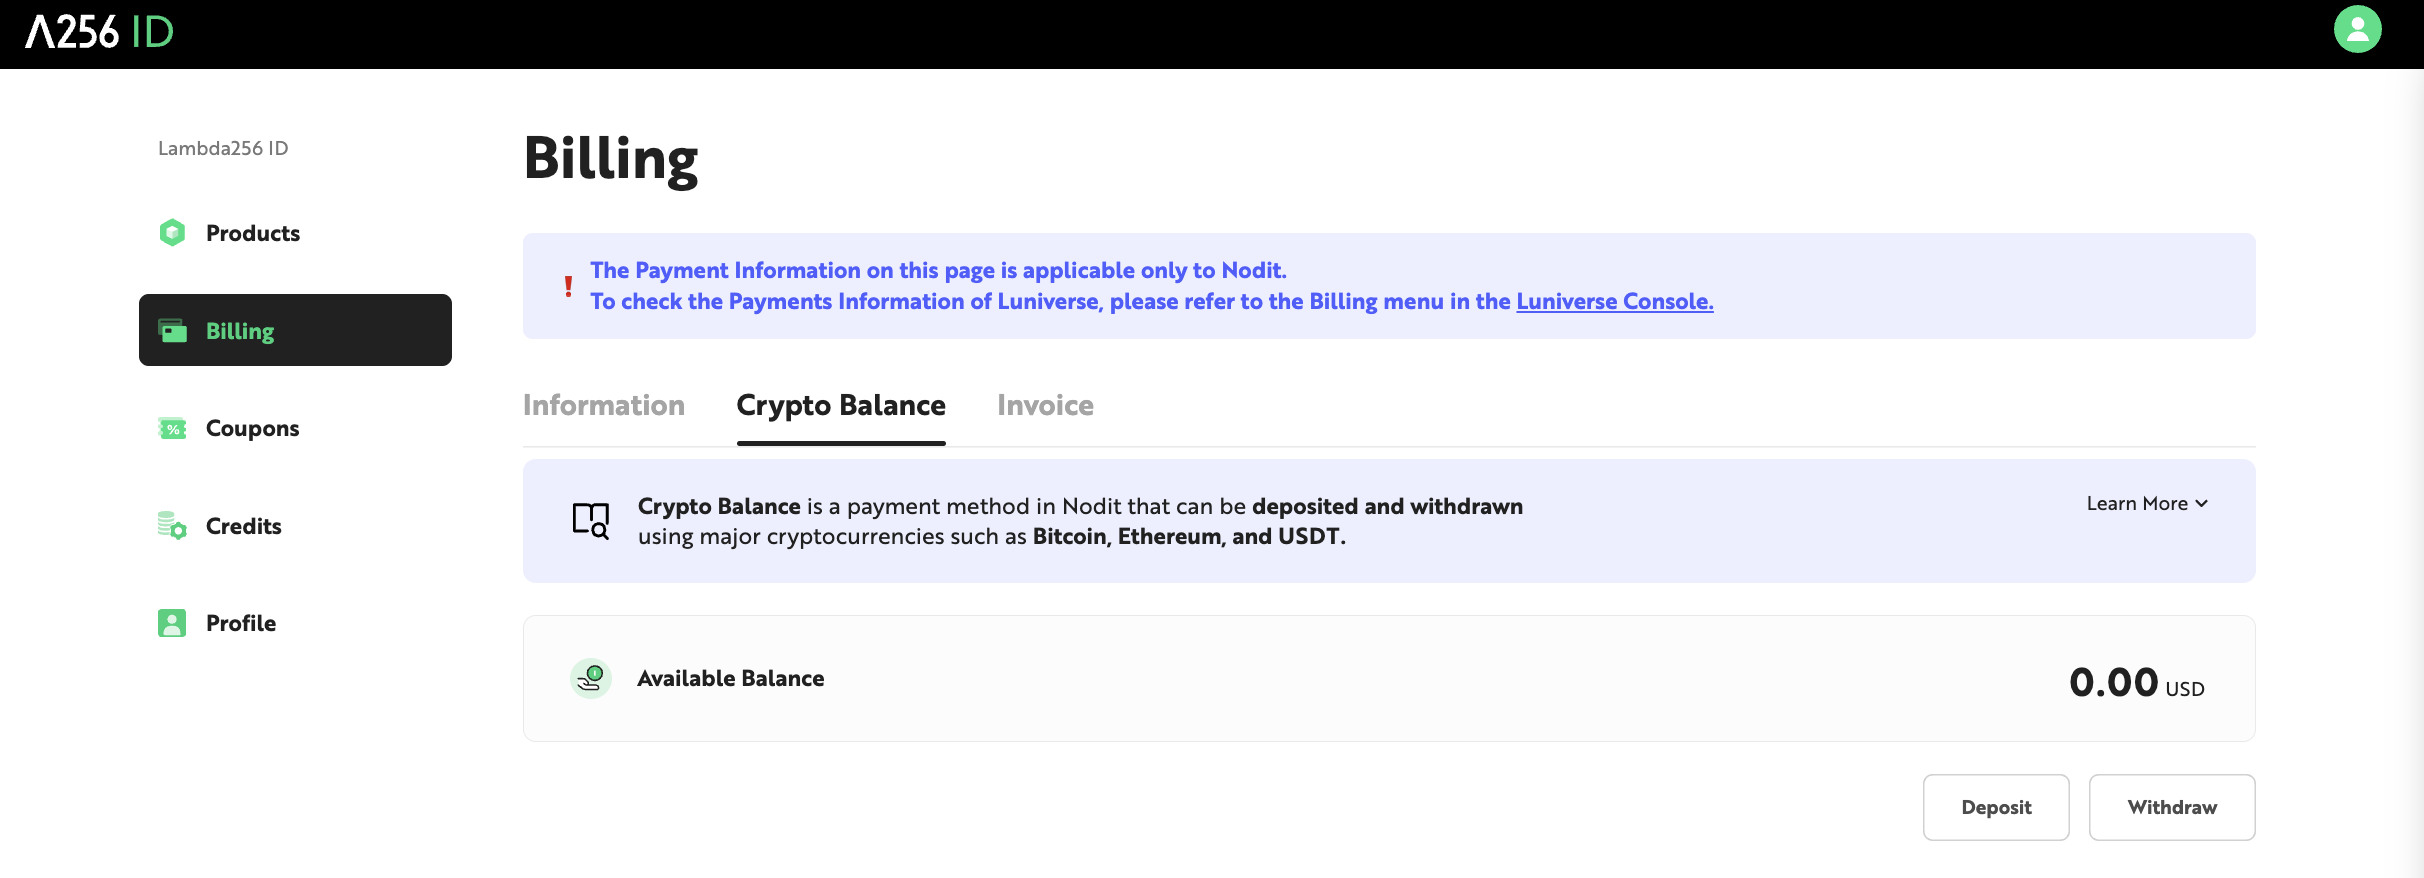
Nodit Crypto Balance is a prepaid balance that can be topped up by paying with cryptocurrencies such as BTC, ETH, and USDT. Selecting Crypto Balance in Step 3 registers it as the payment method, and subscription charges are then deducted from this balance. The balance is denominated in USD, with 1 Balance equal in value to $1.
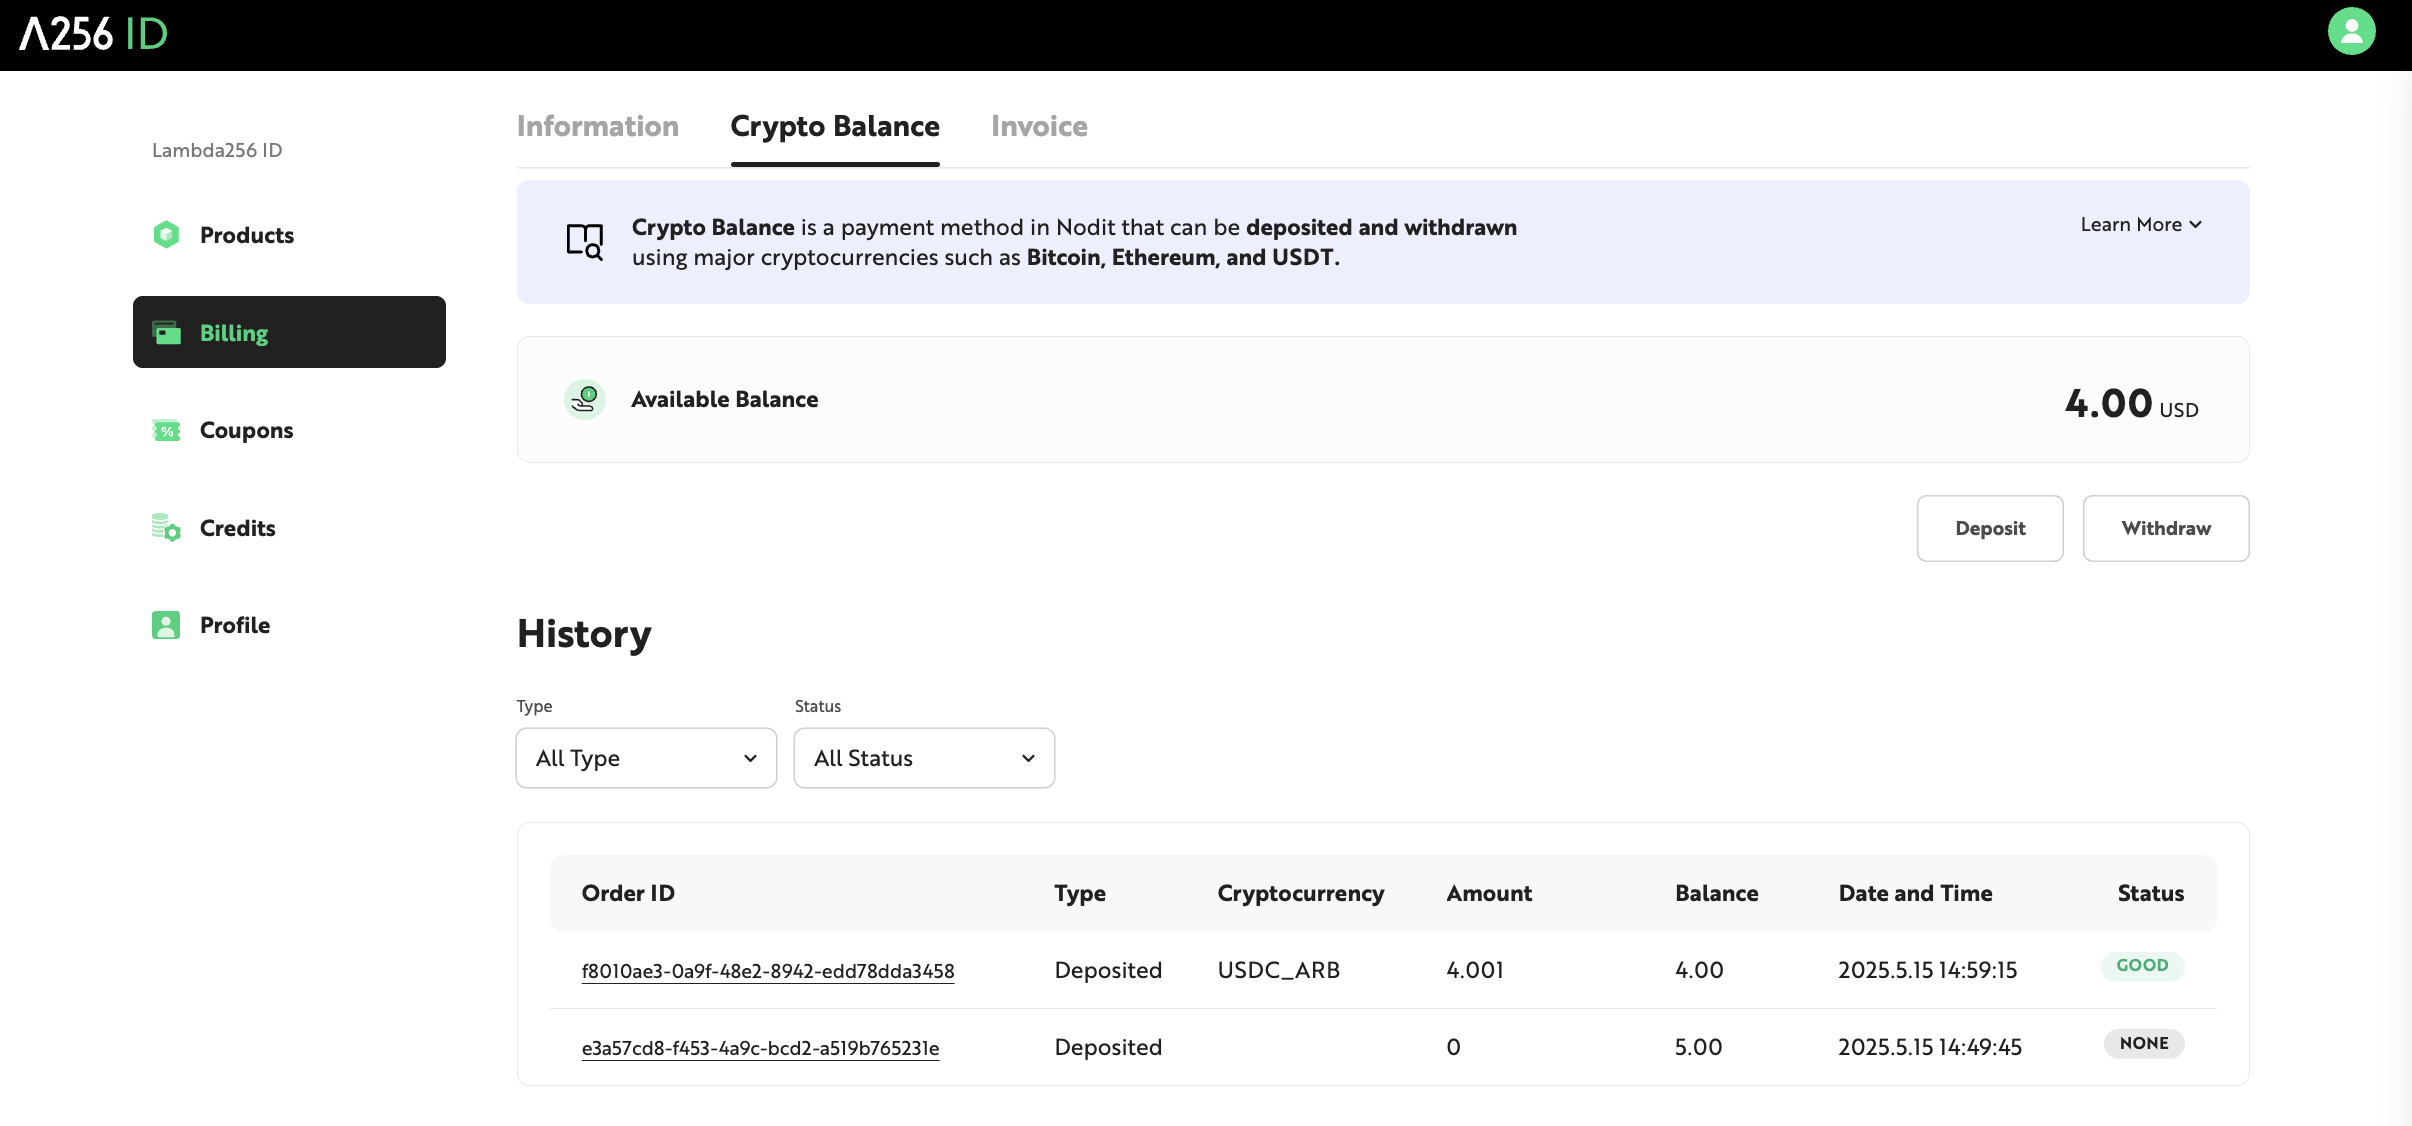
Check your balance, make deposits, and request withdrawals from the [Crypto Balance] tab under the Billing menu. The current available balance is displayed in the Available Balance section.
Depositing Crypto Balance
-
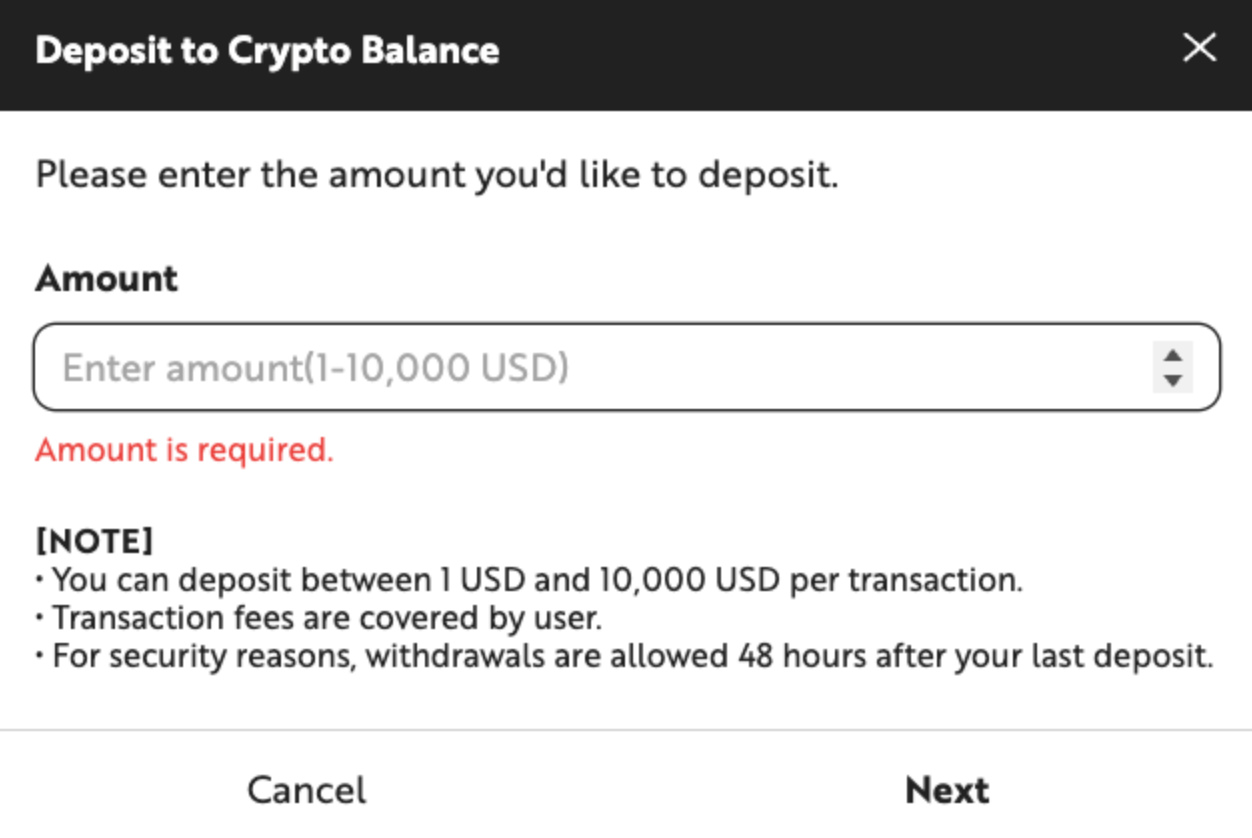
In the Crypto Balance tab, click the [Deposit] button at the bottom of the page. In the popup that appears, enter the amount to deposit in USD. The minimum deposit is $1 and the maximum is $100,000.
-
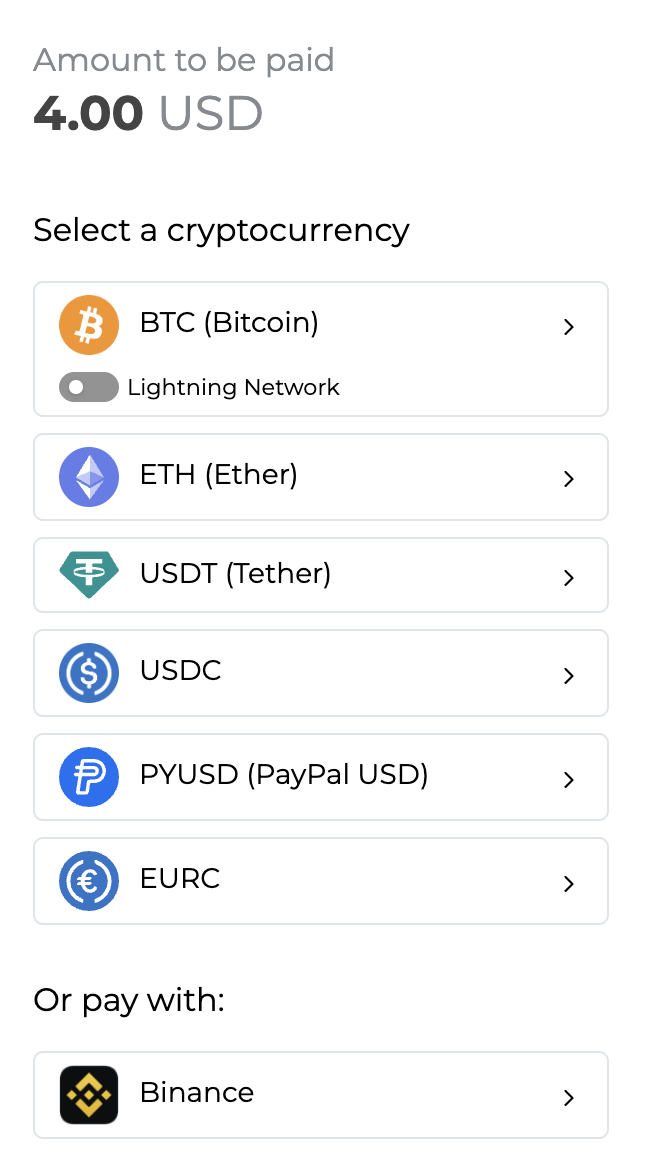
Click [Next] to proceed to the crypto payment popup. Select the cryptocurrency to use for the deposit.
-
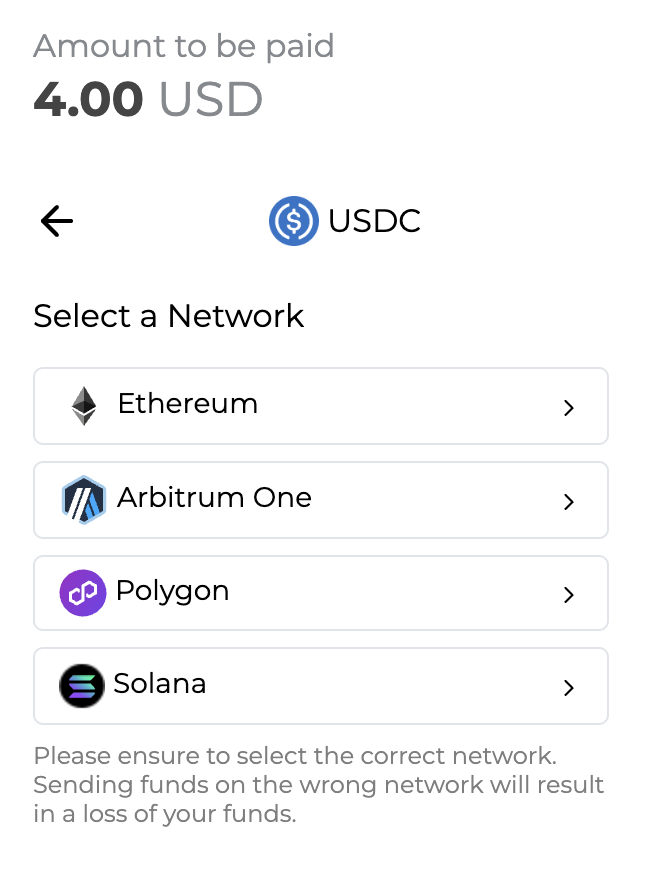
From the list under Select a Network, choose the network on which you will send the payment. For example, if you select USDC as the payment currency and Ethereum as the network, complete the payment using a wallet that holds USDC on the Ethereum Mainnet.
-
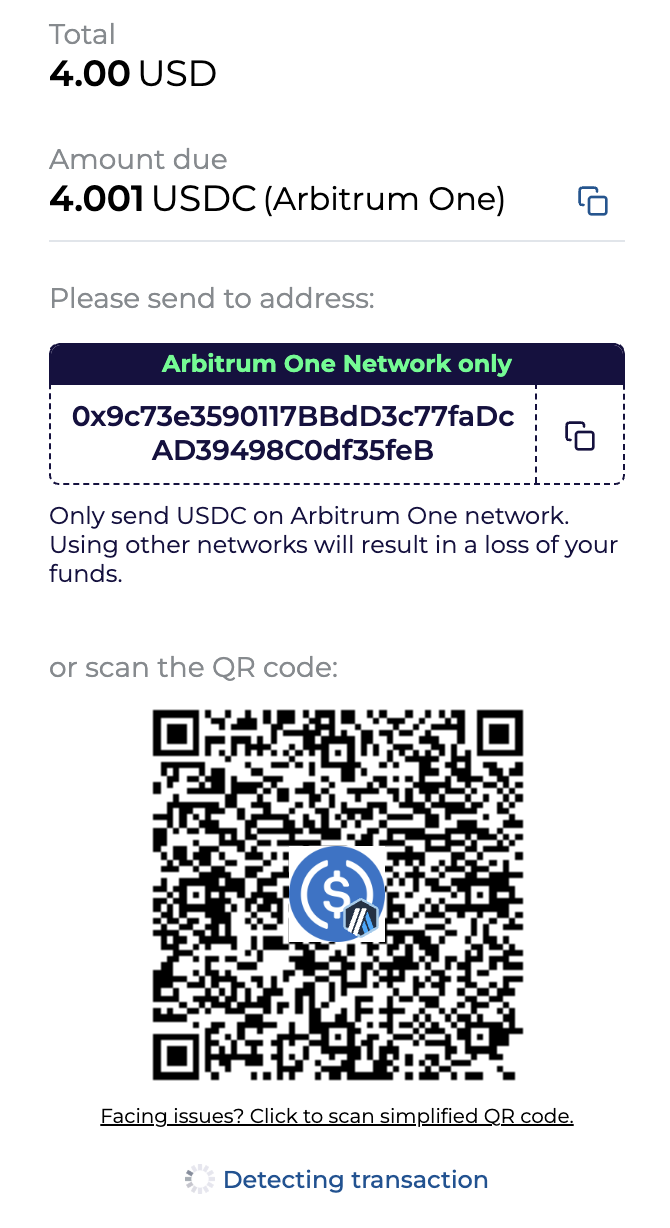
The final payment amount, calculated at the current exchange rate, is displayed in the selected cryptocurrency. Review the total amount including fees, then copy the wallet address shown on screen or scan the QR code with a mobile wallet application and send the full amount. The payment amount and deposit address are valid for 25 minutes because of exchange rate fluctuations. Once the window expires, refresh the page to generate a new deposit address with the latest exchange rate.
-
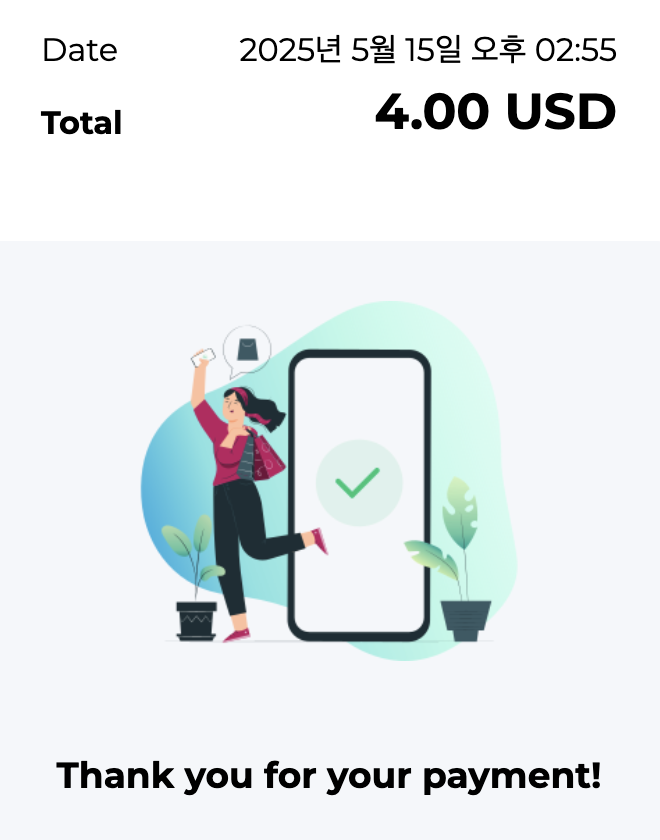
Once the transfer is confirmed on the network, a payment completion screen appears and a confirmation email is sent to your account. Payment is typically processed immediately, but may take several minutes depending on network conditions. Do not close or refresh the browser window before the payment is confirmed. After the completion screen appears, refresh the Crypto Balance tab to see the updated balance.
-
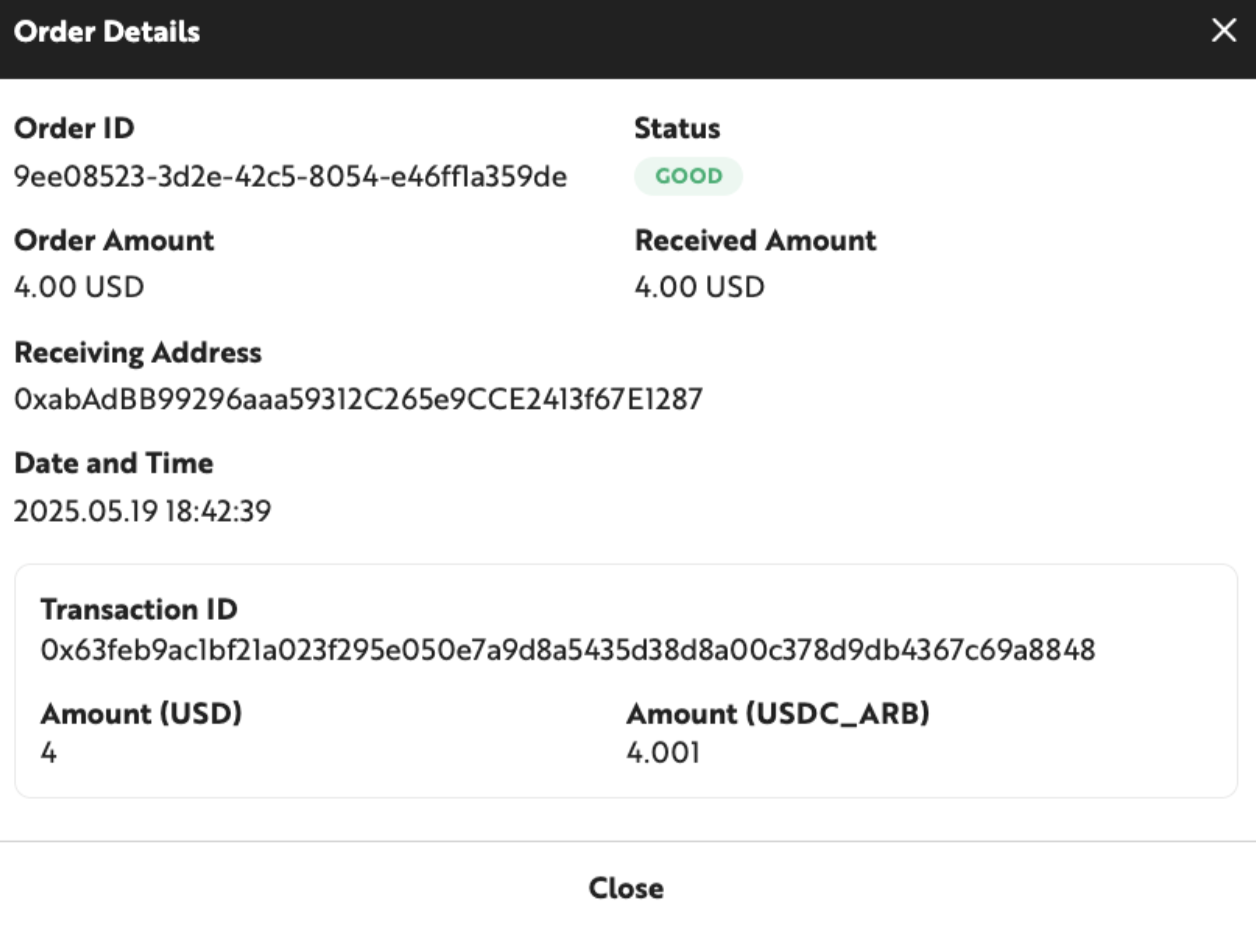
In the History section at the bottom of the page, click any Order ID to view the details of that deposit.
Withdrawing Crypto Balance
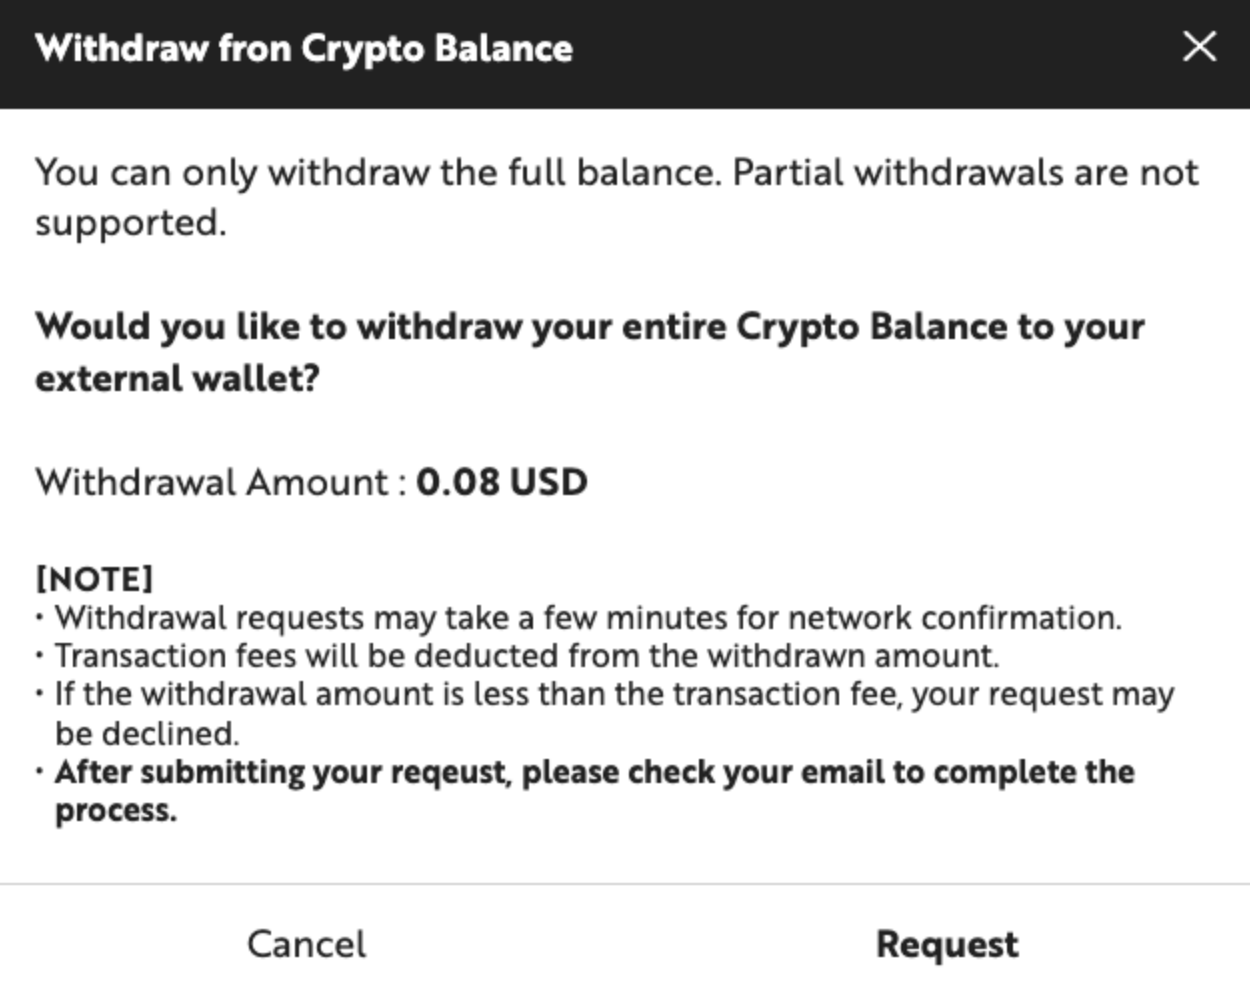
The remaining Crypto Balance can be withdrawn to a personal wallet address. The following restrictions apply to withdrawals.
- Only full-balance withdrawals are supported. Partial withdrawals are not available.
- Withdrawal requests can be submitted no earlier than 48 hours after the most recent deposit.
- Withdrawal requests may take several minutes to process, depending on network conditions (up to 40 minutes).
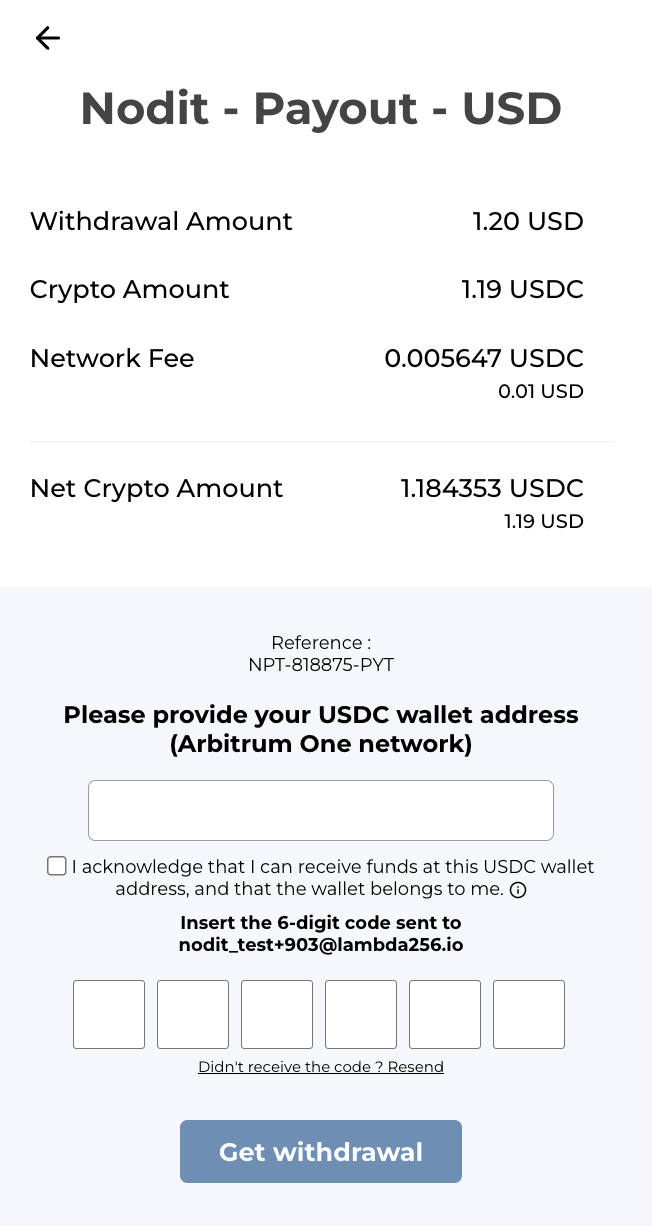
- The network transaction fee required for the withdrawal is deducted from the withdrawal amount, and the net amount after the fee is credited to your wallet. If the available balance is less than the transaction fee, a withdrawal cannot be requested.
- A withdrawal request is valid for 25 minutes from the time of submission. The balance is deducted immediately upon request and credited to the specified wallet after the withdrawal transaction is confirmed. If the transaction is not completed within 25 minutes, the deducted balance is restored.
Follow the steps below to withdraw your Crypto Balance.
-
In the Crypto Balance tab, click the [Withdraw] button to request a full withdrawal of the current balance.
-
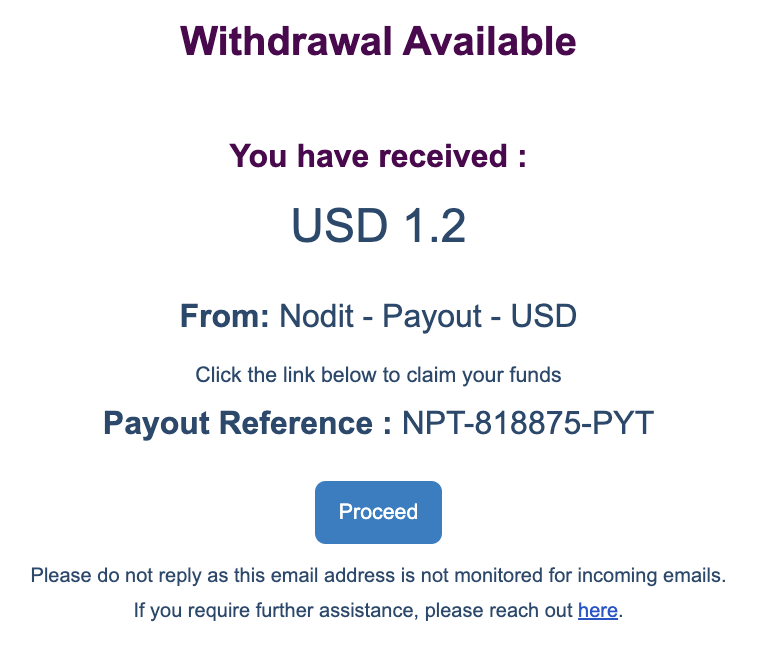
A withdrawal link is sent to the email address associated with your Nodit account. Review the withdrawal amount and details, then click [Proceed].
-
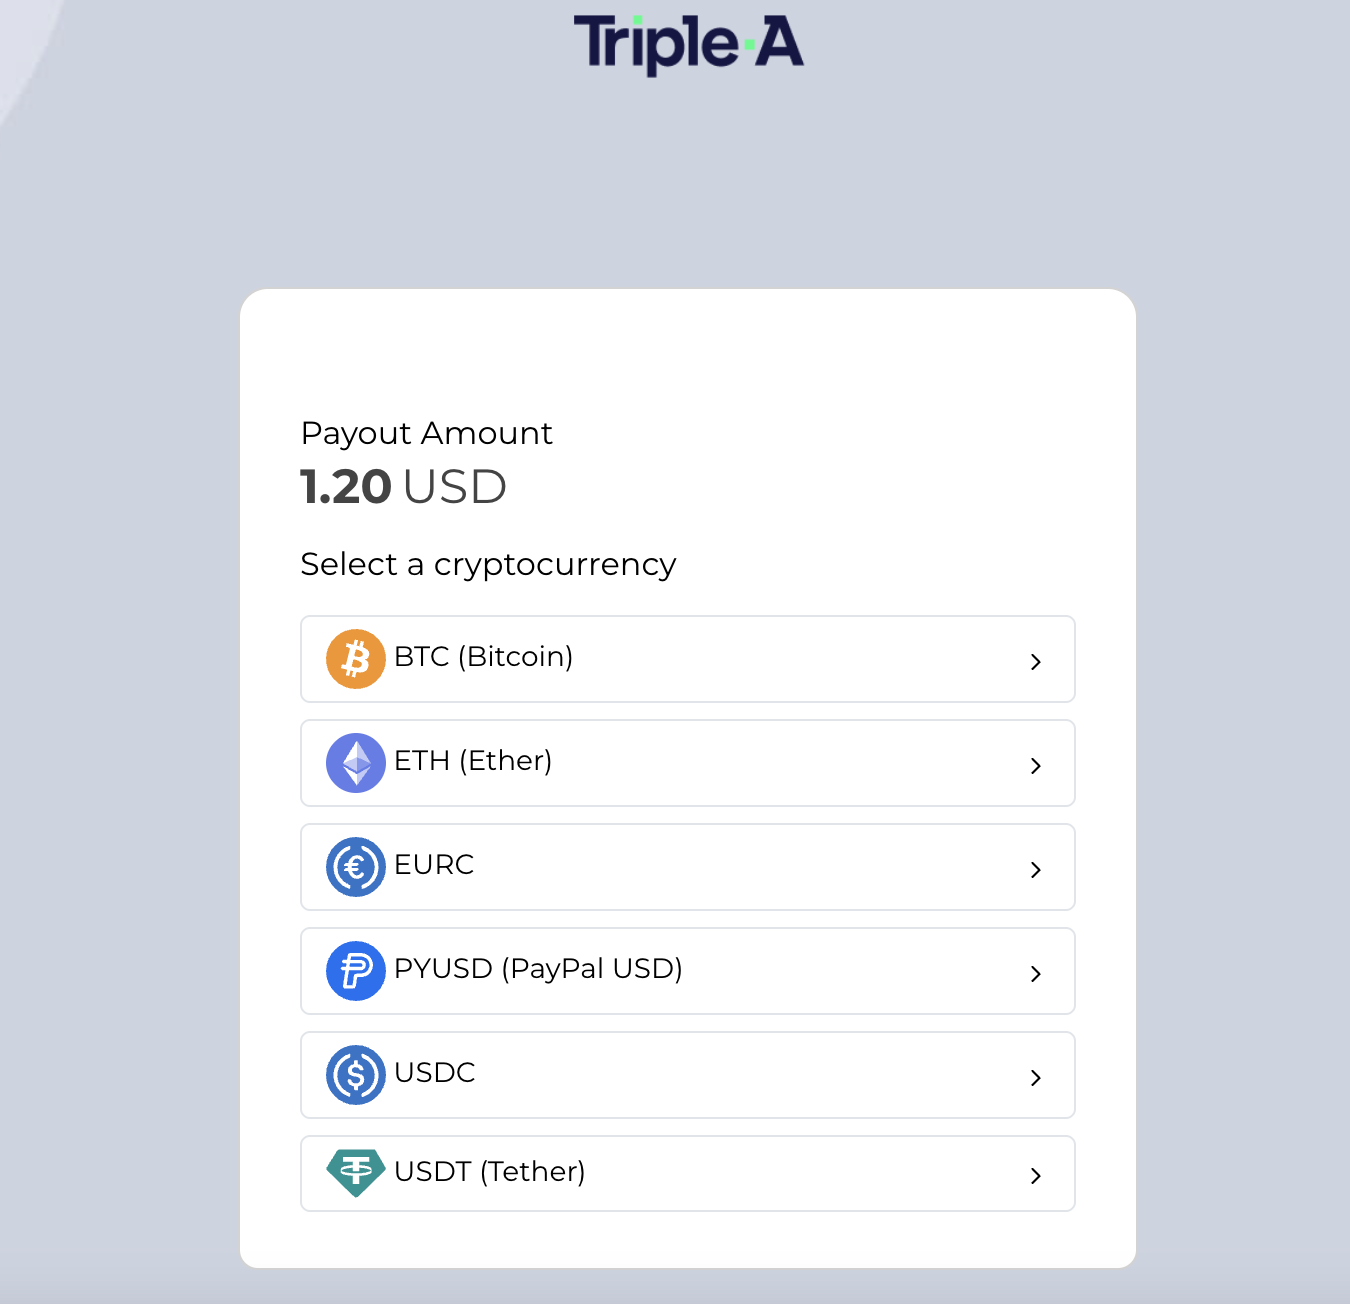
In the popup, select the cryptocurrency in which you want to receive the withdrawal. The applied exchange rate is valid for 25 minutes and is locked in only if verification is completed within this window. The link expires after 25 minutes.
-
Review the withdrawal details, then enter the destination wallet address and the 6-digit code sent to your account email. Click [Get Withdrawal] to transfer the balance minus fees to the specified wallet address. Verify all entered information carefully, as incorrect entries may result in loss of funds.
-
Once the withdrawal transaction is completed, a success message appears in the popup. A summary of the withdrawal request and its result is also sent to your Nodit account email.
(Optional) Add Invoice Recipient Emails
Billing invoices are sent to the account's primary email address. To add additional recipients, click [+Add email] in the Billing Emails section. Up to 10 additional email addresses can be registered.
Change a Payment Method
The registered payment method can be changed before or during an active subscription.
Step 1. Go to Billing
Click the profile icon in the top-right corner of the Nodit console, then click [Billing].
Step 2. Select a New Payment Method
Click [Update] in the payment method section, then select the new payment method to register.

Step 3. Register the New Payment Method
Follow the per-method procedure (credit/debit card, PayPal, Crypto Balance) in Register a Payment Method to complete registration.
Subscribe to a Plan
After registering a payment method, select a plan to start your subscription. For a comparison of plan specifications, see the Plans page.
Step 1. Go to the Plan Subscription Page
Click [See Plans] in the Nodit console GNB.

Step 2. Select a Plan
Choose a paid plan — Basic, Developer, Business, or Enterprise — and select a billing cycle (monthly or annual).
Step 3. Complete Payment
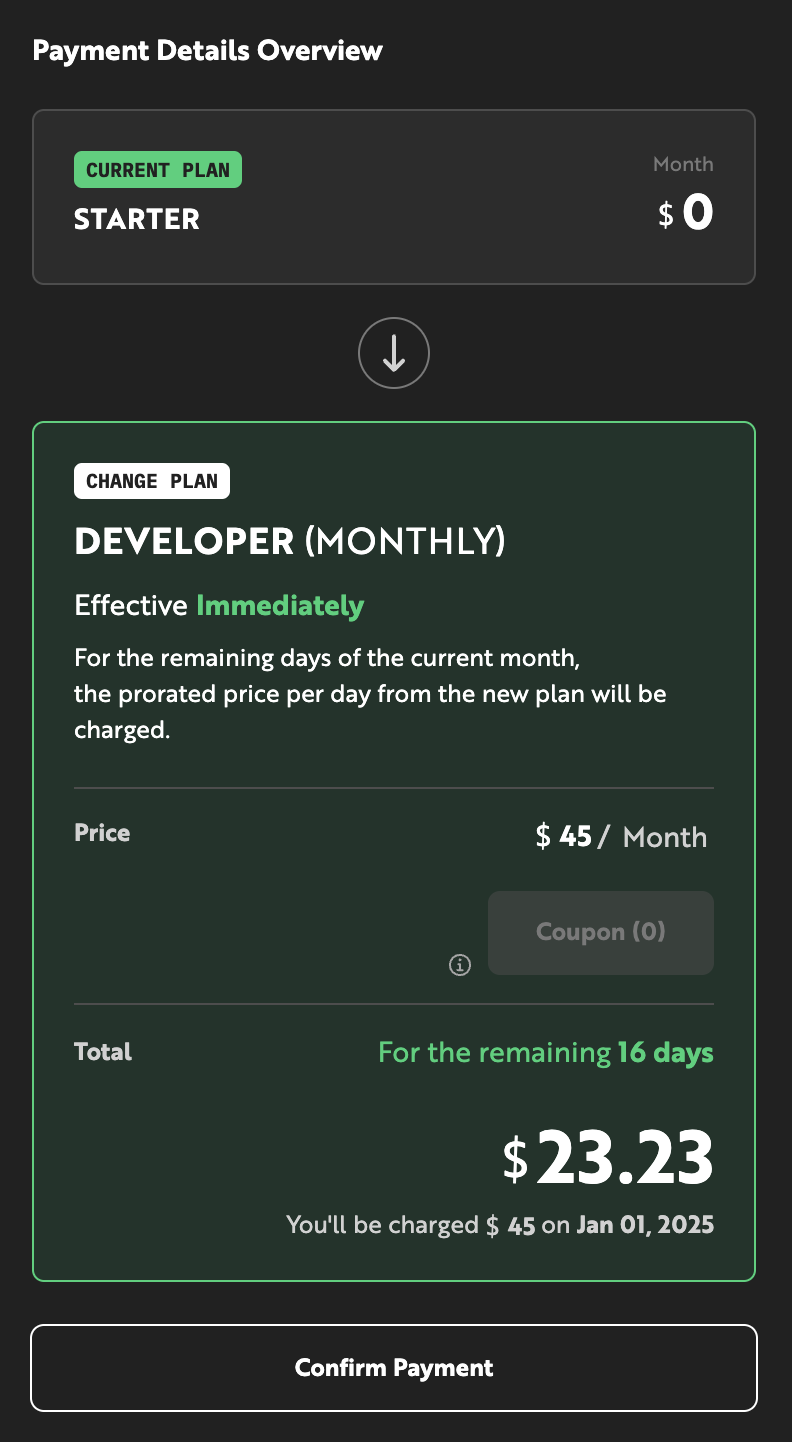
After selecting a plan and billing cycle, review the billing details in the [Payment Details Overview] box. Click [Confirm Payment] to process the payment using the registered payment method. The plan becomes active immediately upon successful payment.
Applying a Coupon (Immediate)
When subscribing to a new plan or upgrading to a higher-tier plan, the coupon is applied immediately. If an applicable coupon is available, the [Coupon] button is activated in the Payment Details Overview.
-
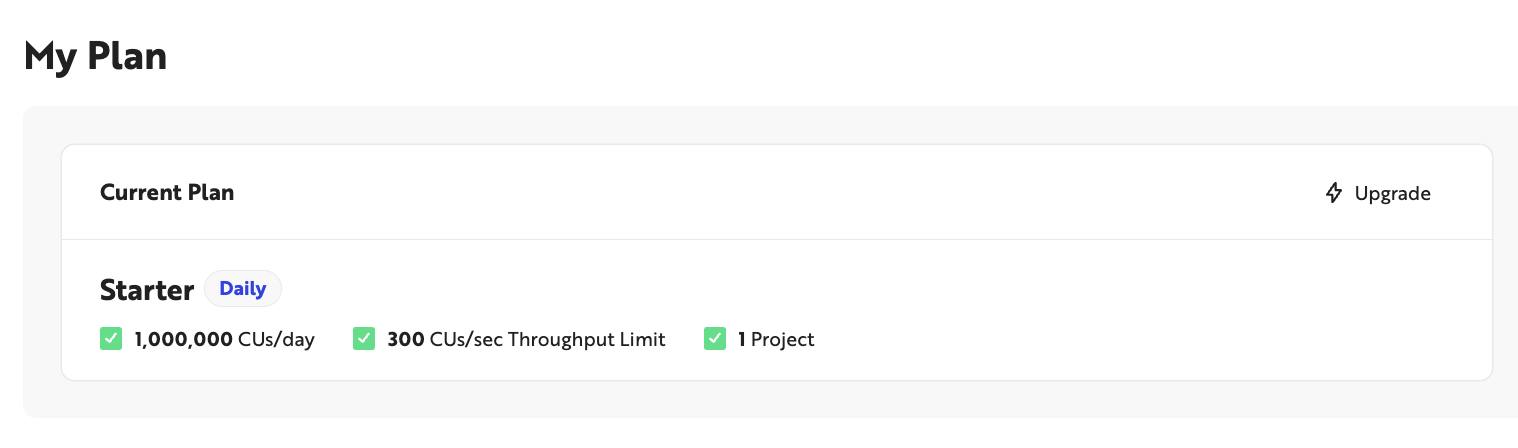
In the Nodit console Overview, click [Upgrade] in the My Plan section, or click [See Plans] in the top menu.

-
Select the plan to subscribe to. If an applicable coupon is available, the [Coupon] button is activated in the Payment Details Overview.
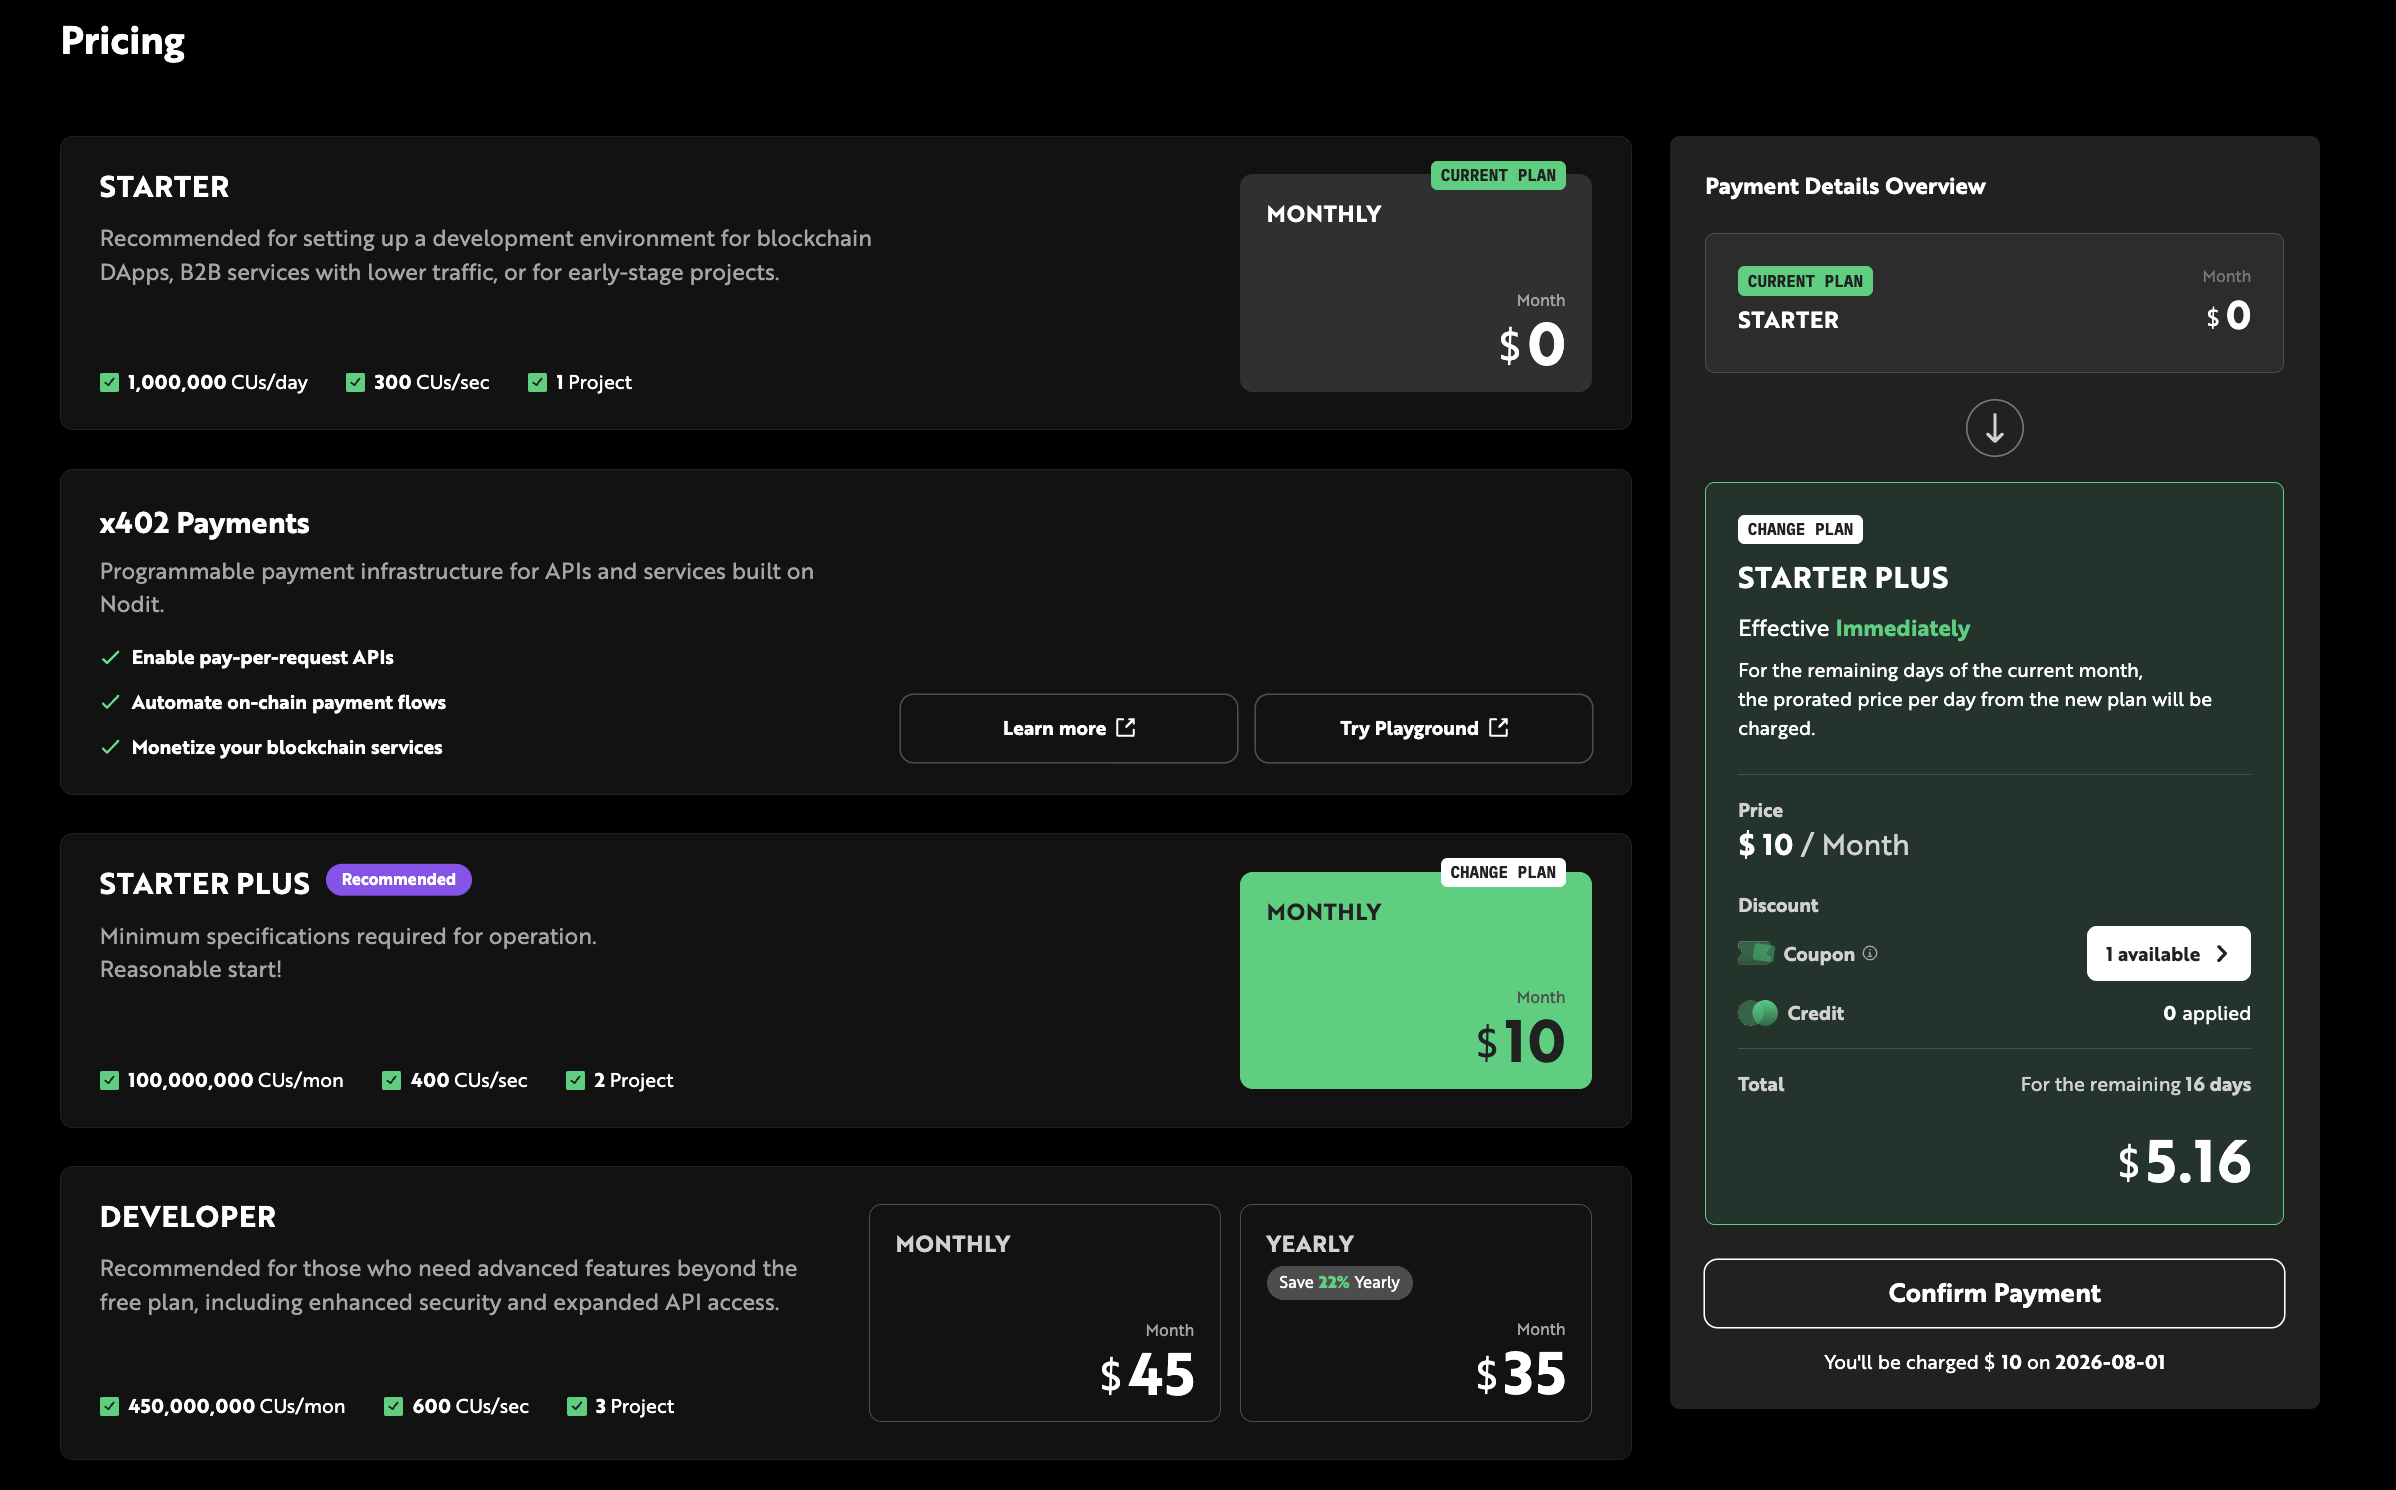
-
Click [Coupon], select the desired coupon, and click [Apply].
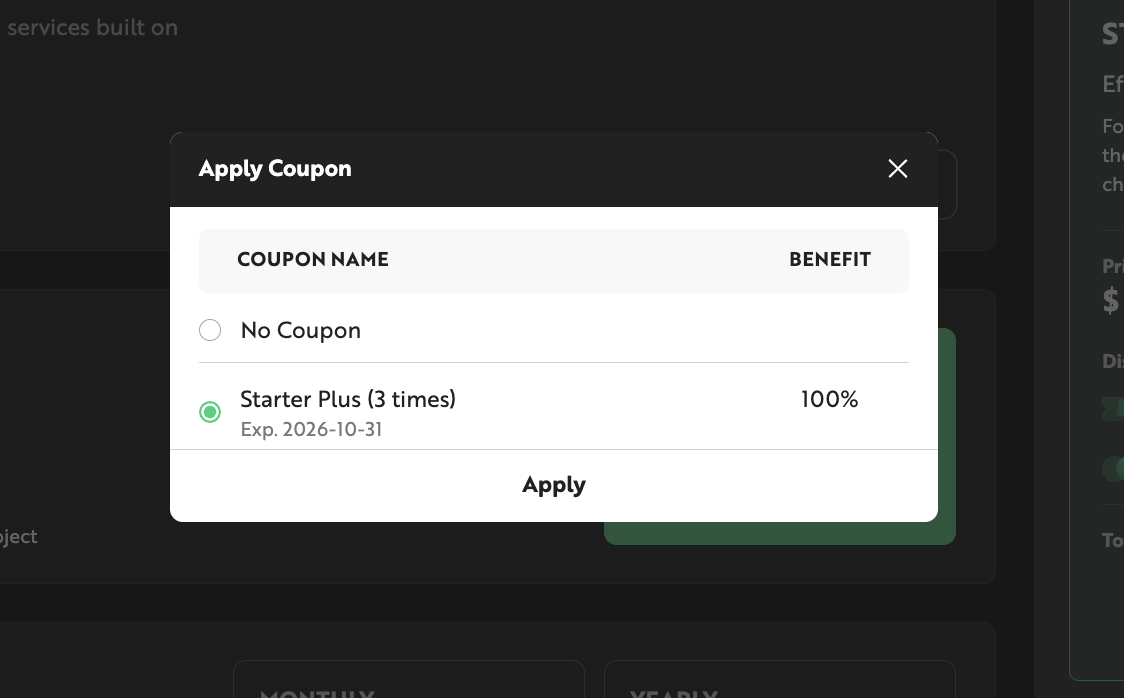
-
Review the estimated amount with the discount applied, then click [Confirm Payment]. Once payment is complete, the plan is updated and a receipt is sent to the email address registered at sign-up.
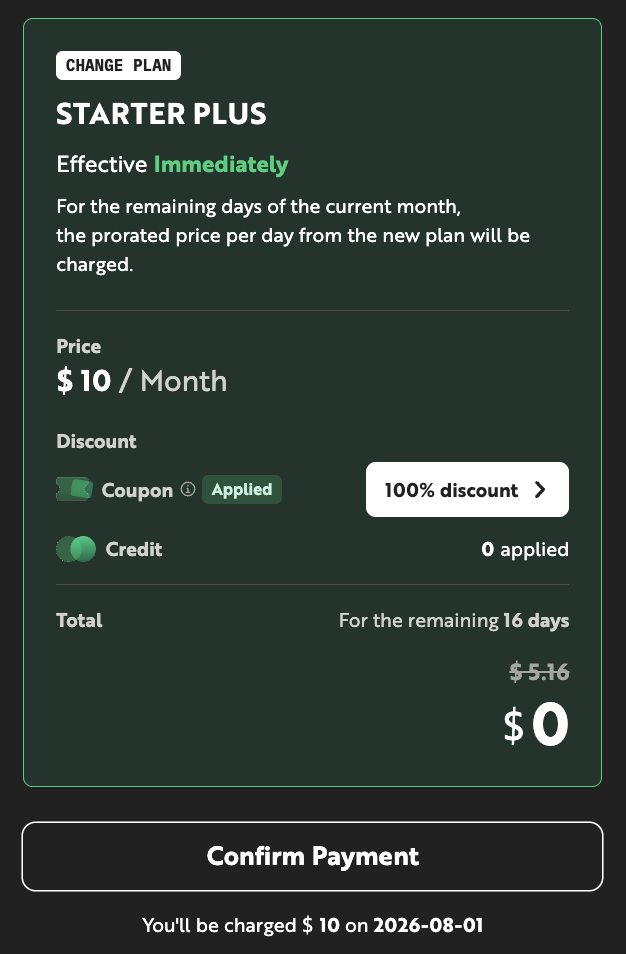
Change a Plan
During an active subscription, you can upgrade or downgrade to a different plan as needed. Upgrades take effect immediately; downgrades take effect on the first day of the following month.
Plan Upgrade
Upgrade to a higher plan when you need more monthly CUs or higher throughput. The upgrade process follows the same steps as Subscribe to a Plan. Higher-plan resources become available immediately upon successful payment, and coupons are applied immediately at checkout.
Plan Downgrade
Downgrade to a lower plan when your current CU and throughput no longer require the current tier. A downgrade is processed as a scheduled change and takes effect on the first day of the month following the request date. For example, a downgrade requested on December 13 takes effect on January 1.
A scheduled downgrade can be canceled up until the day before the next billing date (the 2nd of each month at 23:59:59 UTC+09:00).
Applying a Coupon on Downgrade (Scheduled)
When downgrading to a lower-tier plan, both the coupon application and the plan change take effect from the next billing settlement date. Selecting a coupon on the checkout screen schedules it alongside the plan change.
-
In the Nodit console Overview, click [Upgrade] in the My Plan section, or click [See Plans] in the top menu.
-
Select the plan to change to, then click [Confirm Payment] to schedule the plan change.
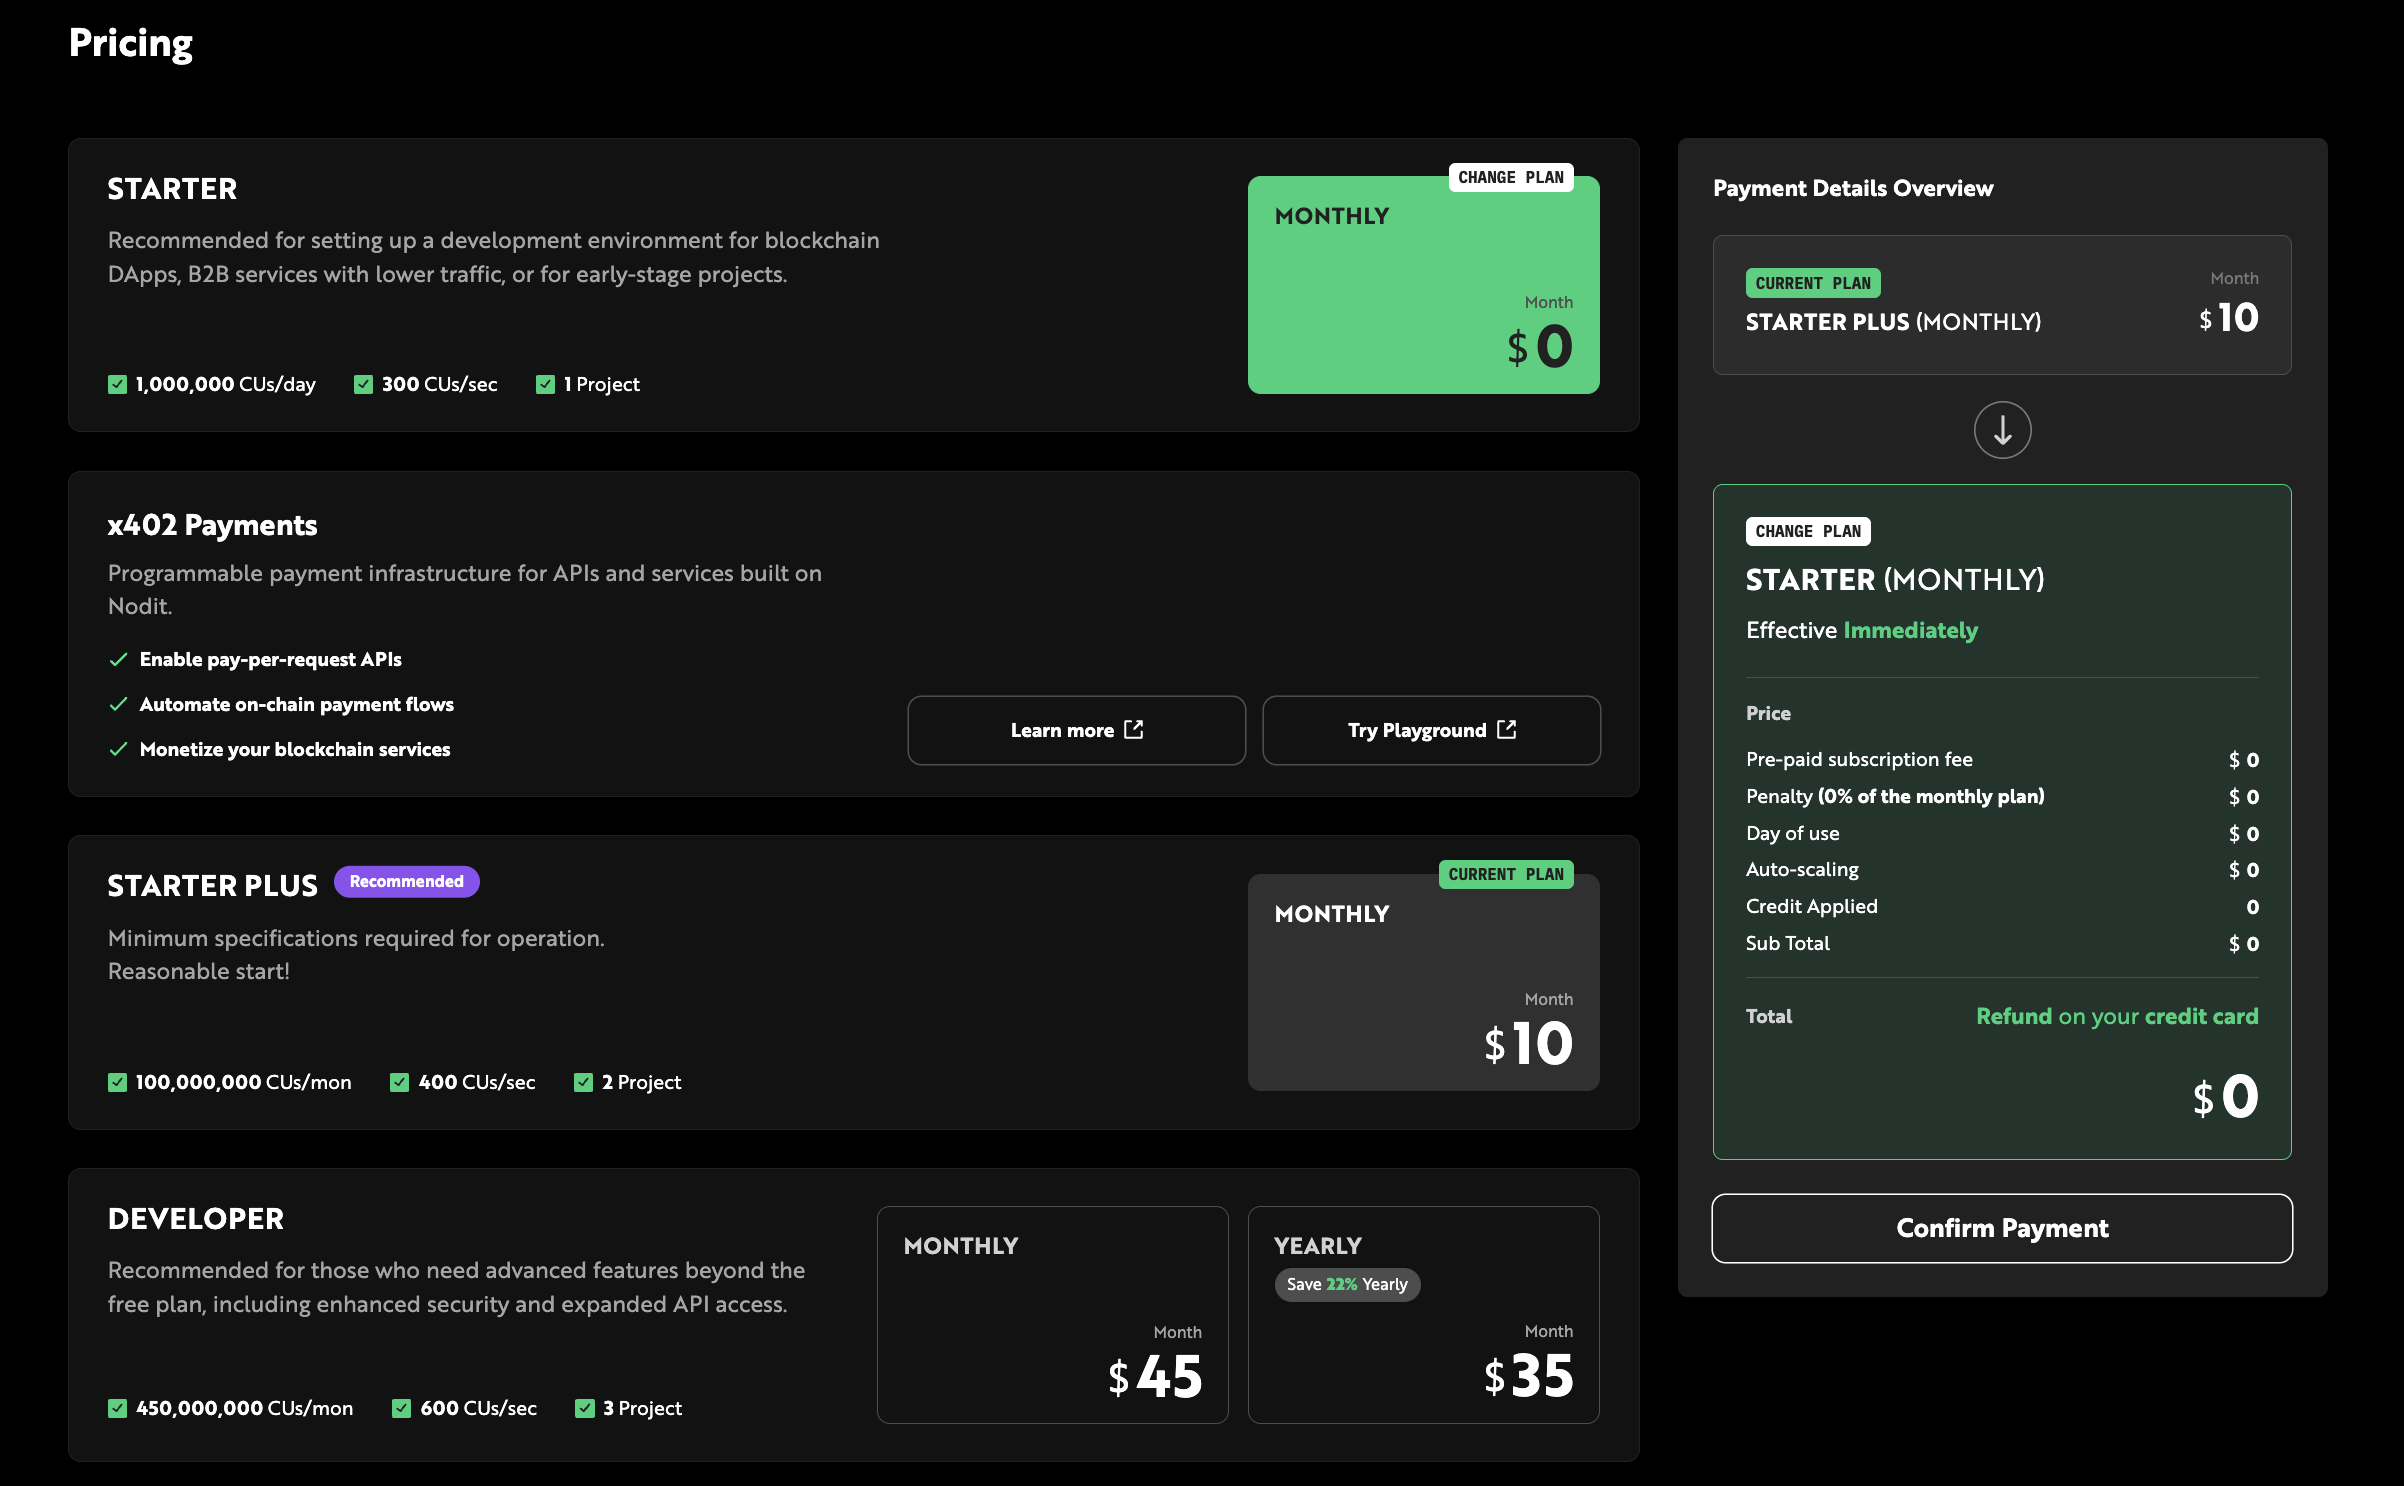
-
Once the plan change is scheduled, return to the Pricing page. If an applicable coupon is available, the [Coupon] button is activated in the Payment Details Overview.
-
Select a coupon and click [Apply].
Coupons and Credits
Coupons and Credits are discount instruments applicable to plan subscription fees and Auto-scaling charges. Coupons are issued through promotions and events, while Credits are automatically granted upon specific events. For applying them at checkout, see Applying a Coupon (Immediate) and Applying a Coupon on Downgrade (Scheduled).
Register a Coupon Code
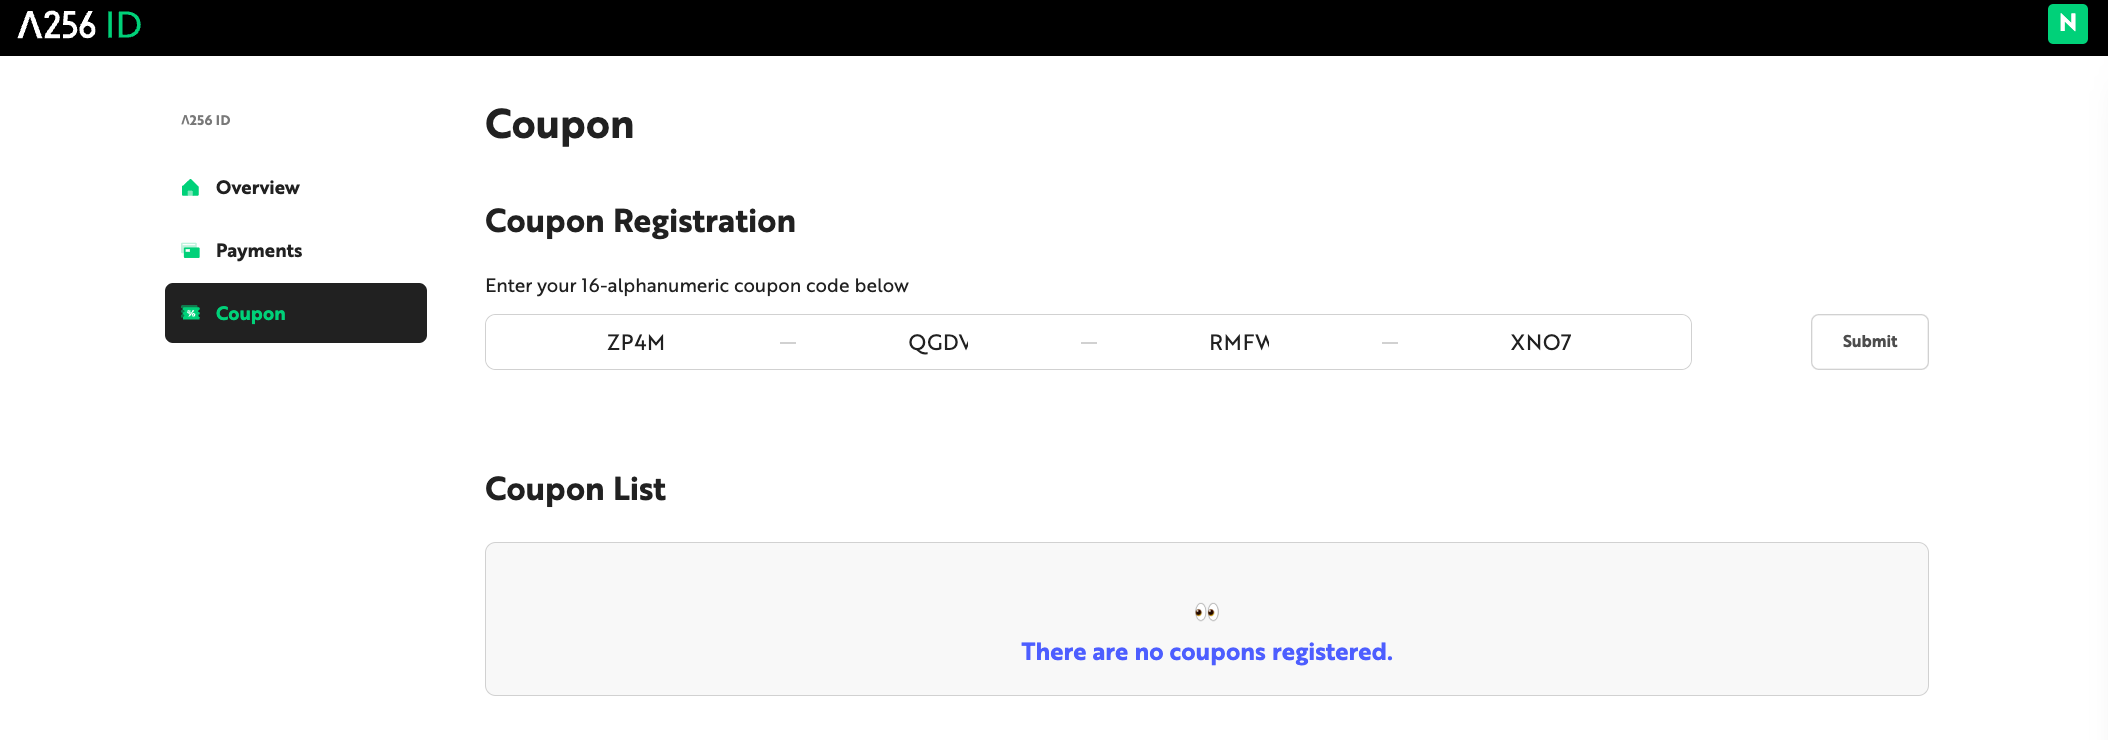
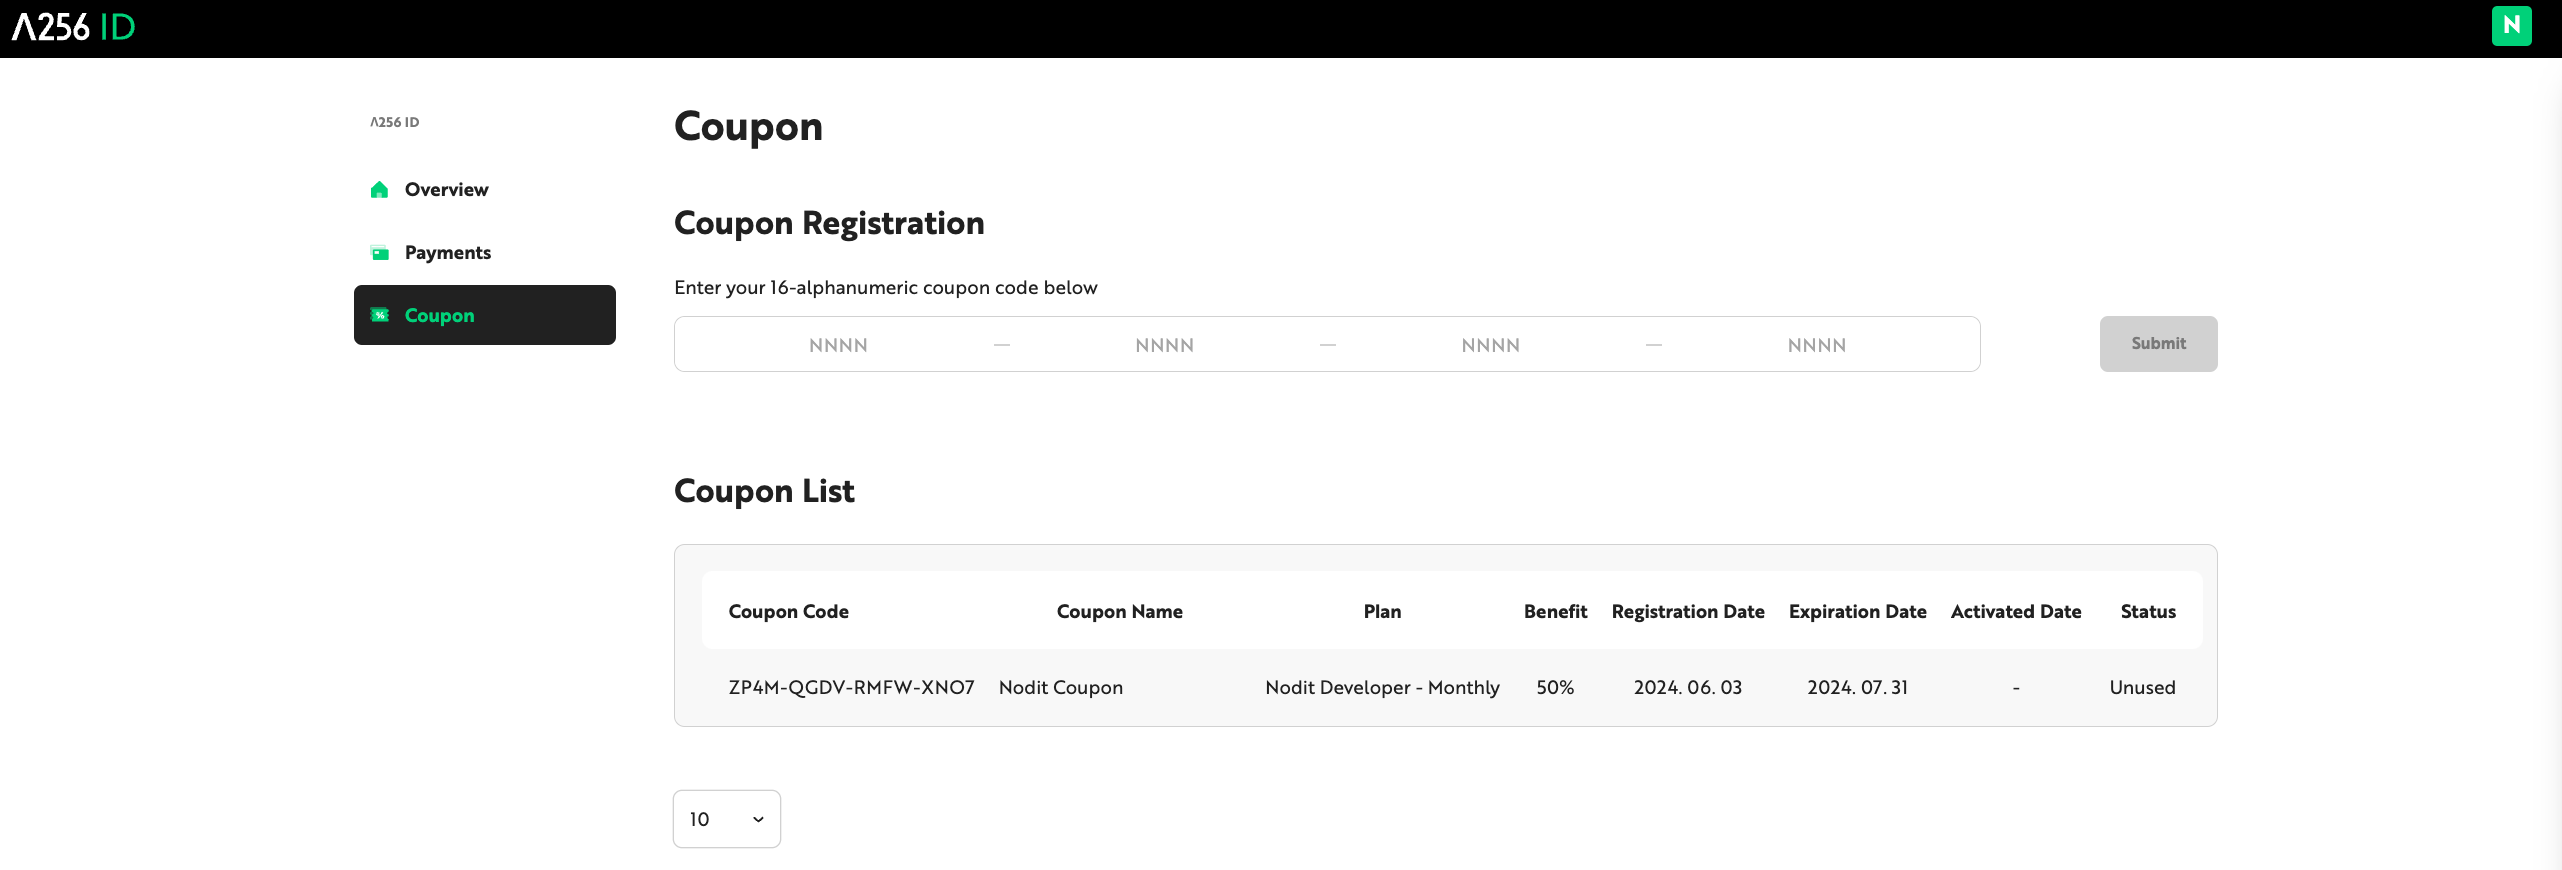
To apply a coupon to a payment, first register the coupon code in Lambda256 ID. Registered coupons appear in the [Coupon List], where you can select and apply them during checkout.
-
Log in to Lambda256 ID and navigate to the [Coupons] tab.
-
Enter the 16-digit coupon code in the Coupon Registration field and click [Submit].
-
Verify the registered coupon details and usage history in the [Coupon List].
Credit
Credits are a point-based currency used for Nodit service charges, applicable to all billing items including plan subscriptions and Auto-scaling overage fees. Credits are automatically granted through events such as the Referral program and cannot be purchased separately.
| Item | Details |
|---|---|
| Exchange rate | $1 = 100 Credits |
| Minimum usage unit | 1 Credit |
Credit Balance
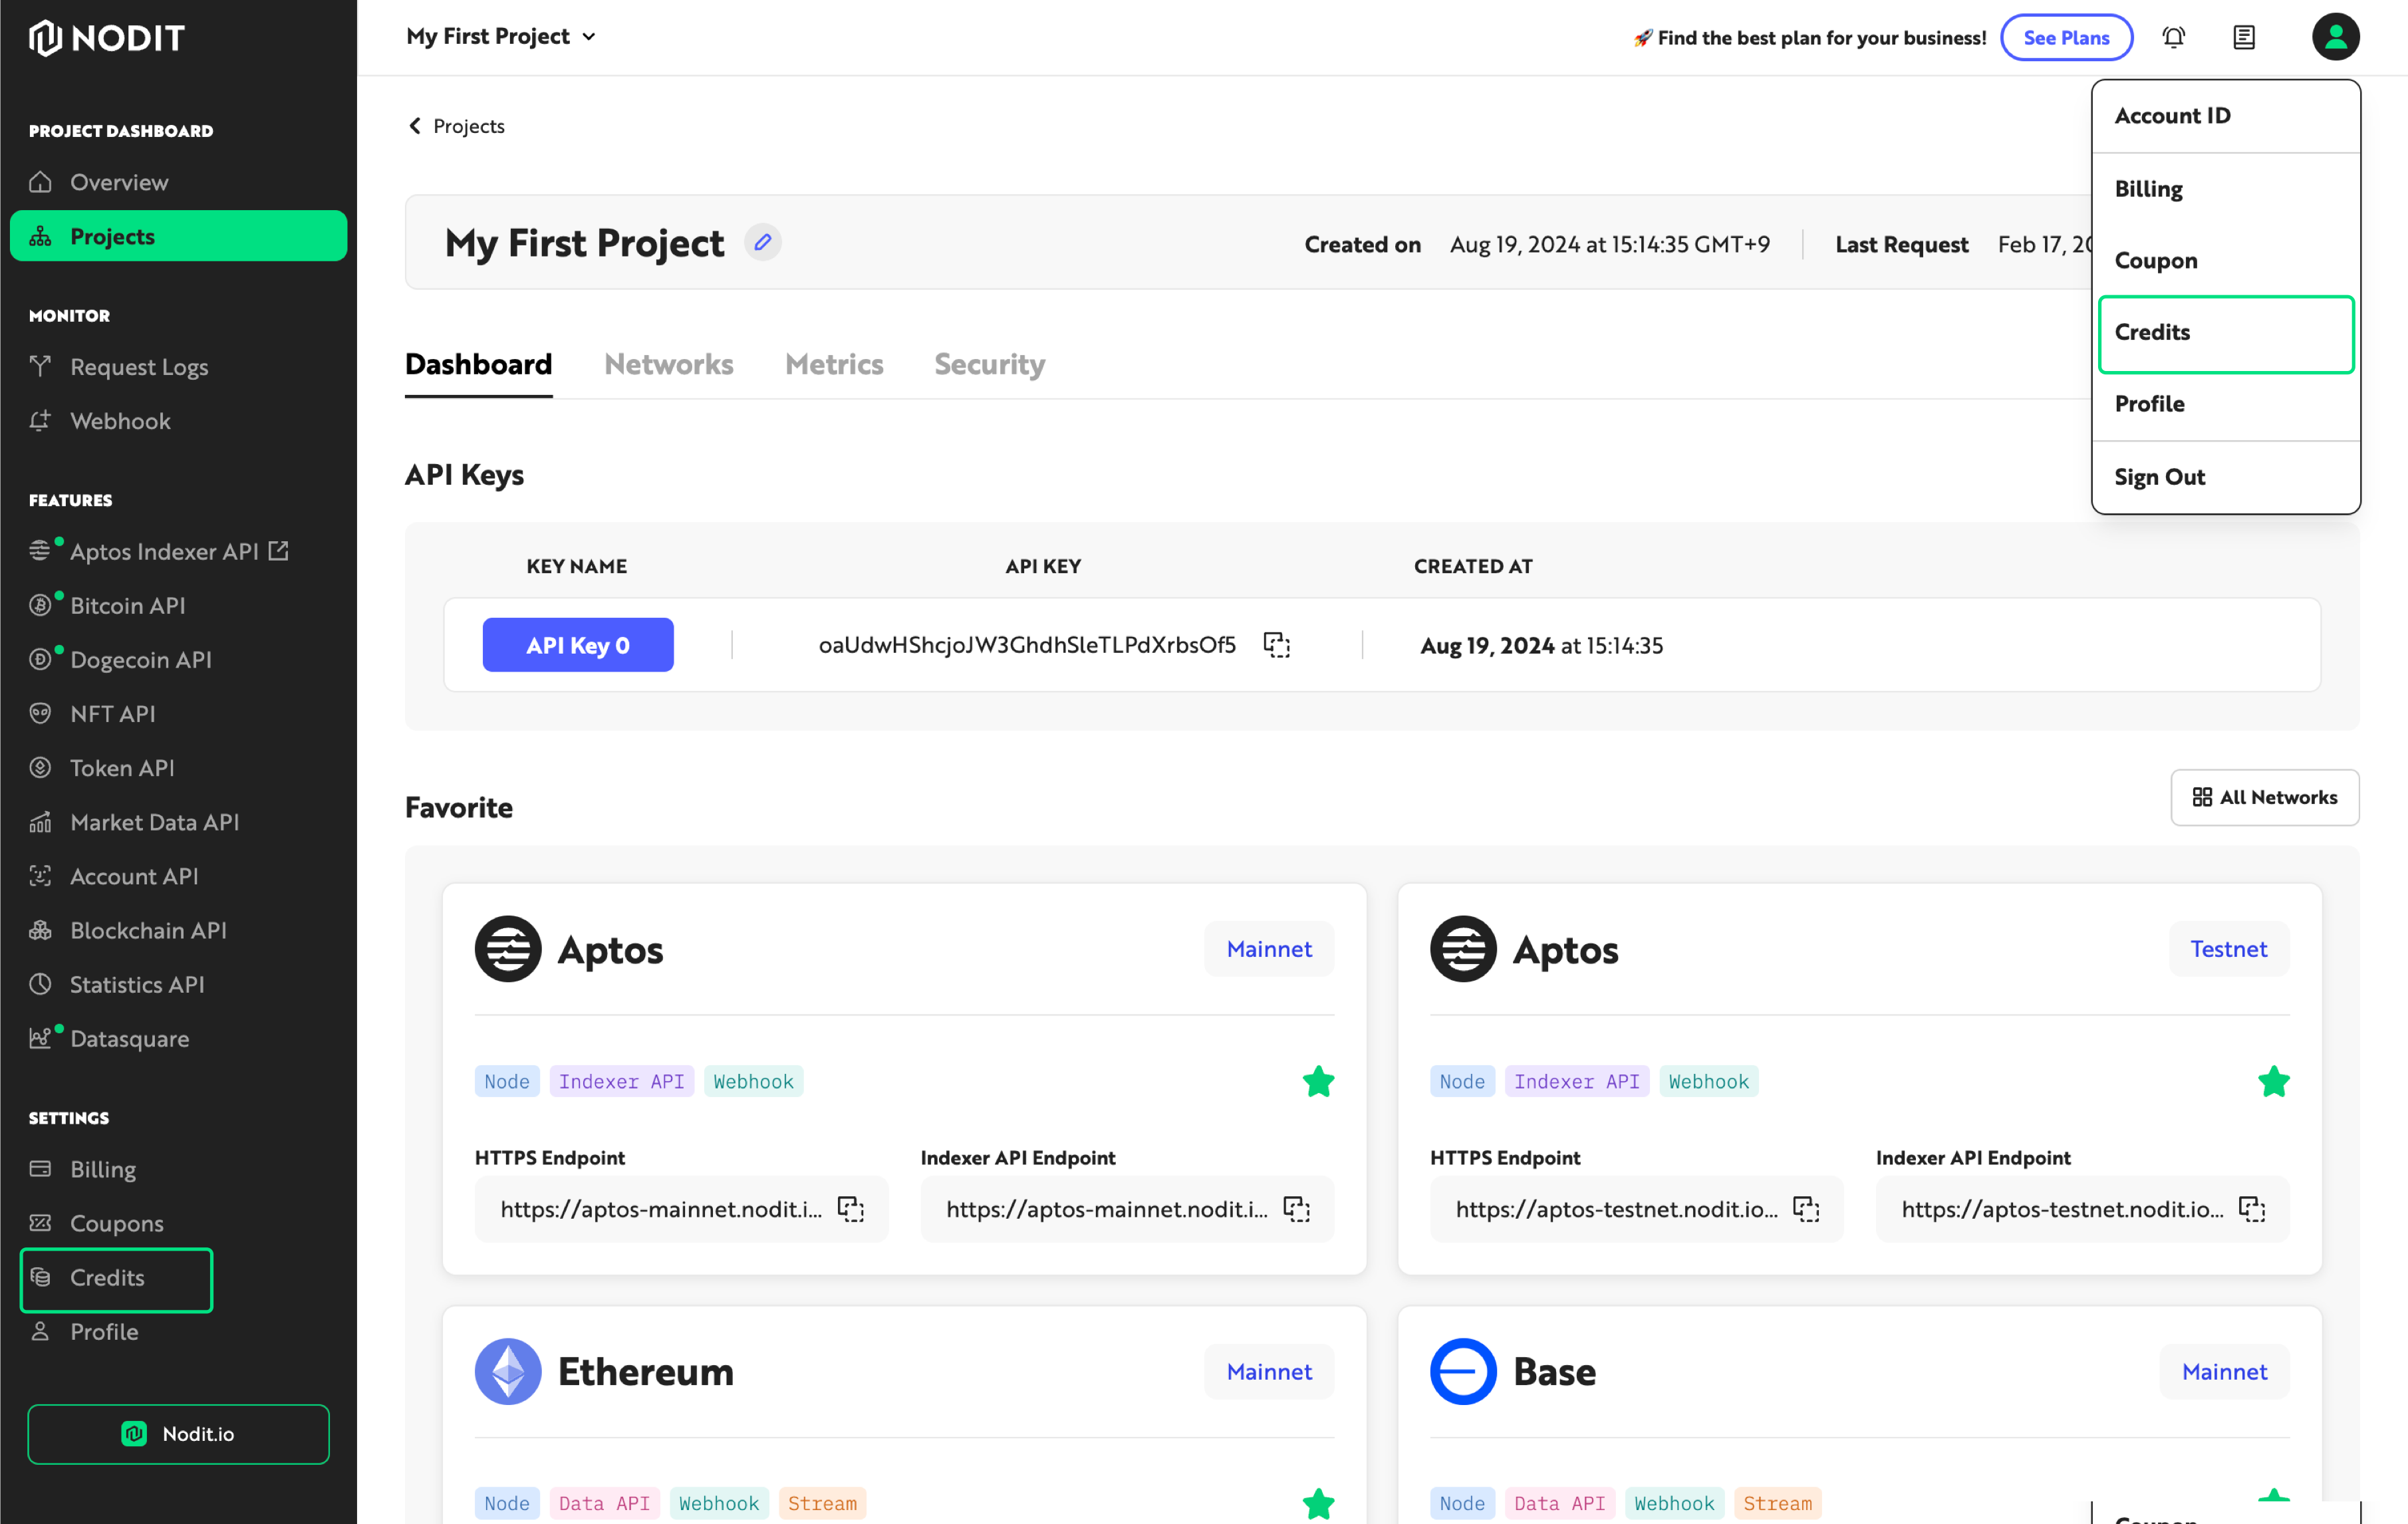
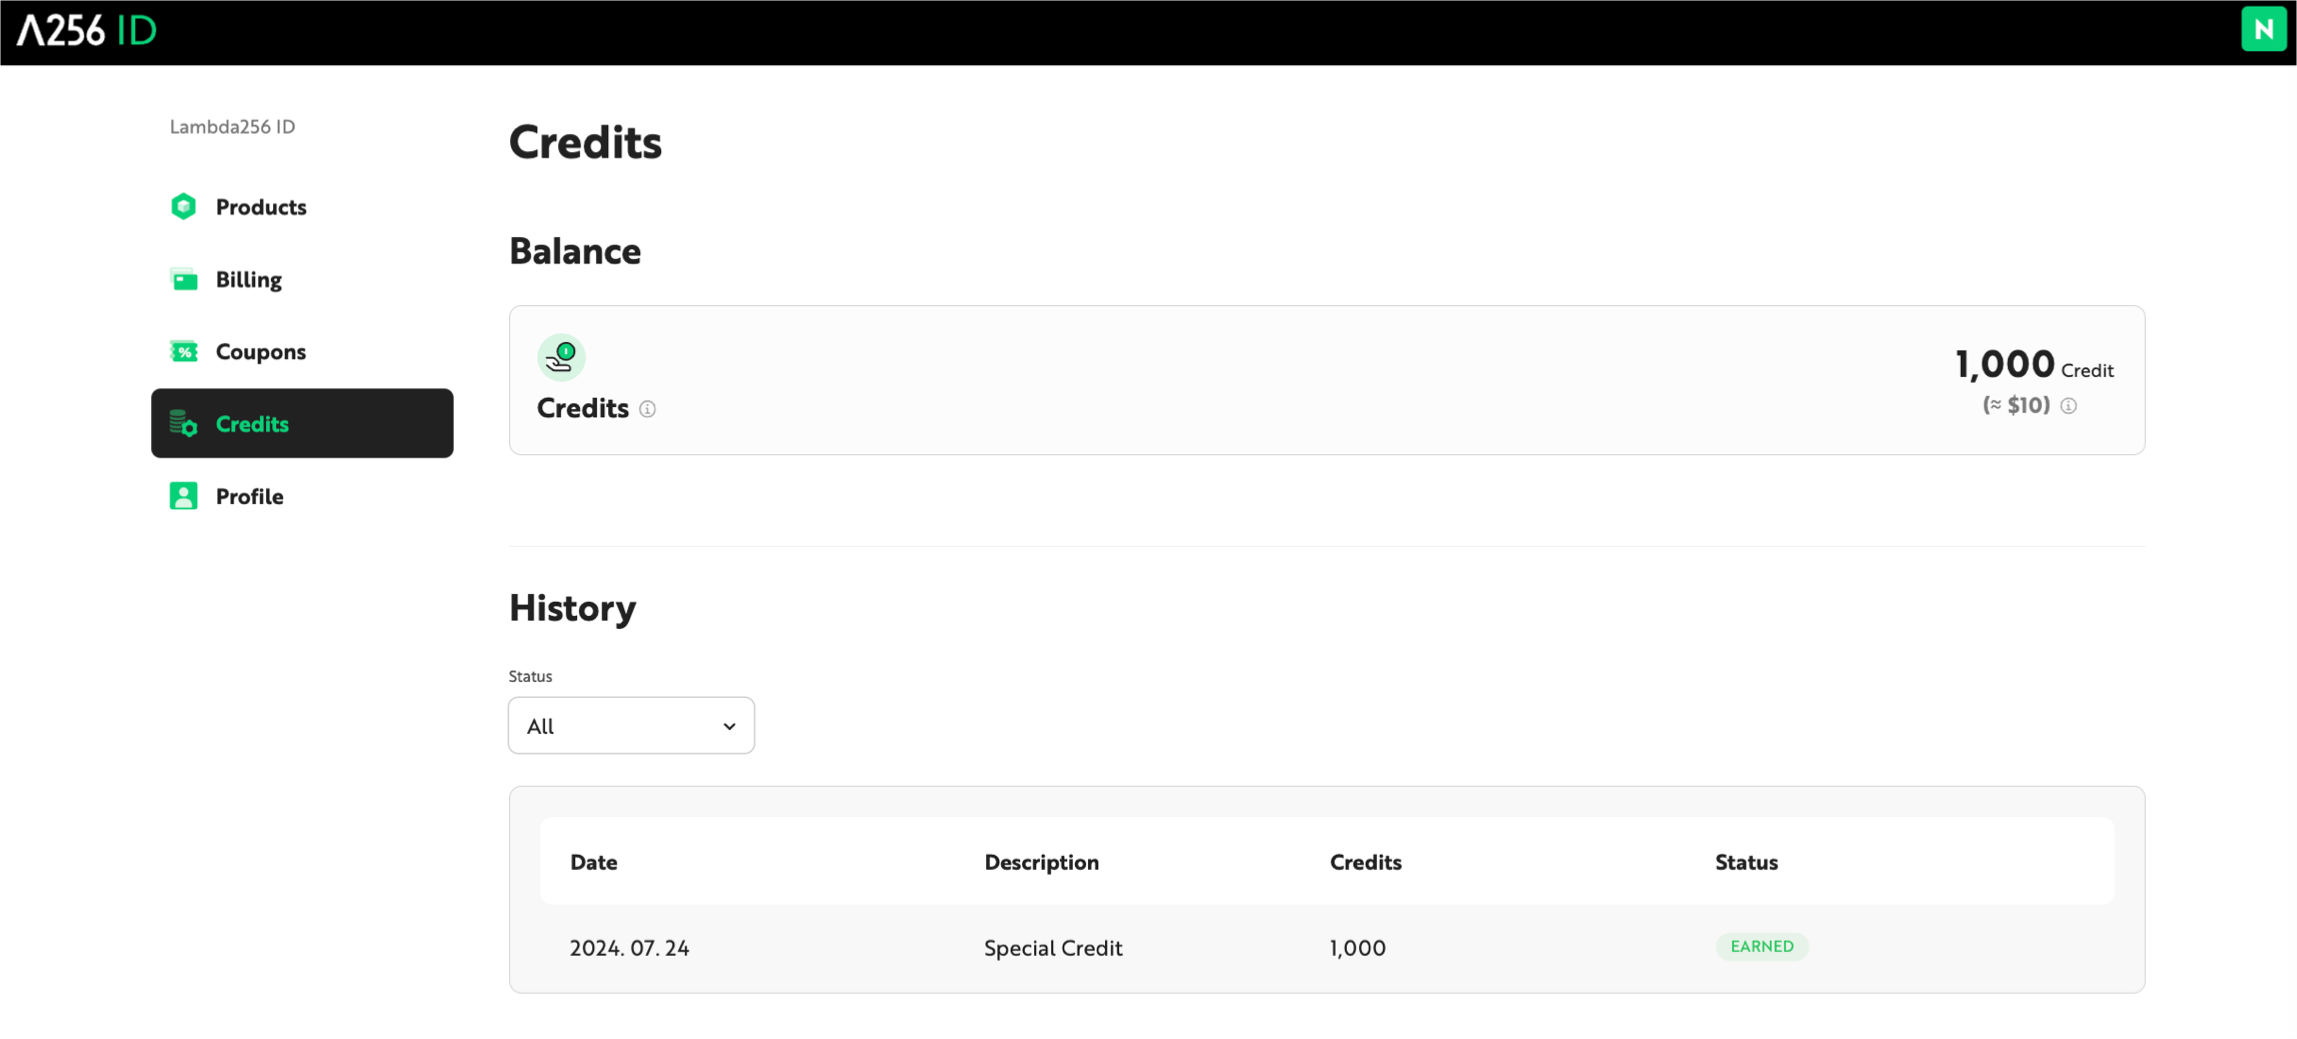
The current Credit balance and usage history are available on the Credit page in the Nodit console.
-
Click the profile area in the upper-right corner of the console and select [Credits], or click [Credits] at the bottom of the left-side menu.
-
On the Credit page, view the current Credit balance and usage history.
x402 Payments (No Subscription Required)
x402 is a payment protocol based on the HTTP 402 Payment Required status code. It is a separate payment path that lets you call Nodit's Data API and RPC API with only a blockchain wallet and USDC — no account sign-up, payment method registration, or plan subscription. It is not a payment method for plan subscriptions but an alternative to subscribing, with two modes: Pay-Per-Use (per-request on-chain payment) and Credit (prepaid USDC).
- x402 Overview — Protocol overview and comparison with plan subscriptions
- How to use Pay-Per-Use — On-chain payment per request
- How to use Credit — Prepaid USDC with off-chain deduction
- Supported APIs & Pricing — Supported chains and per-method pricing
- X402 Logs — Payment and usage history
Cancel a Subscription
Canceling a subscription refunds the unused portion of the billing period and stops the service immediately. Your account does not return to the Free Trial plan. Existing resources are retained for 90 days from the cancellation date and then deleted. To restore them within the retention period, resubscribe to the plan you were on right before cancellation or a higher plan.
Follow these steps to cancel your subscription:
- Click the ID box on the right side of the Nodit console GNB, then click [Payments] in the dropdown.
- Click [Manage Subscription] in the [Payment Details Overview] section.
- In the cancellation confirmation modal, review the notice, then click [Cancel Subscription Now]. The subscription is canceled as soon as you click the button.