Webhook
Key Features
✅ Real-time On-chain Notification
You can subscribe to on-chain events needed by your application in real-time, including blocks, transactions, events, and smart contract state changes. If you need data queries through asynchronous API calls without requesting data queries each time or maintaining a Stream channel, effective monitoring is possible using Webhooks.
✅ Endpoint Registration
You can directly specify the Endpoint URL to receive related data when defined events occur, allowing you to design customized application workflows.
✅ Filter Support
You can effectively monitor targets using various filters such as transactions, blocks, and events, and easily implement complex business logic through applications such as registering and receiving data with various conditions to different Endpoints.
Real-time On-chain Event Notification, Webhook
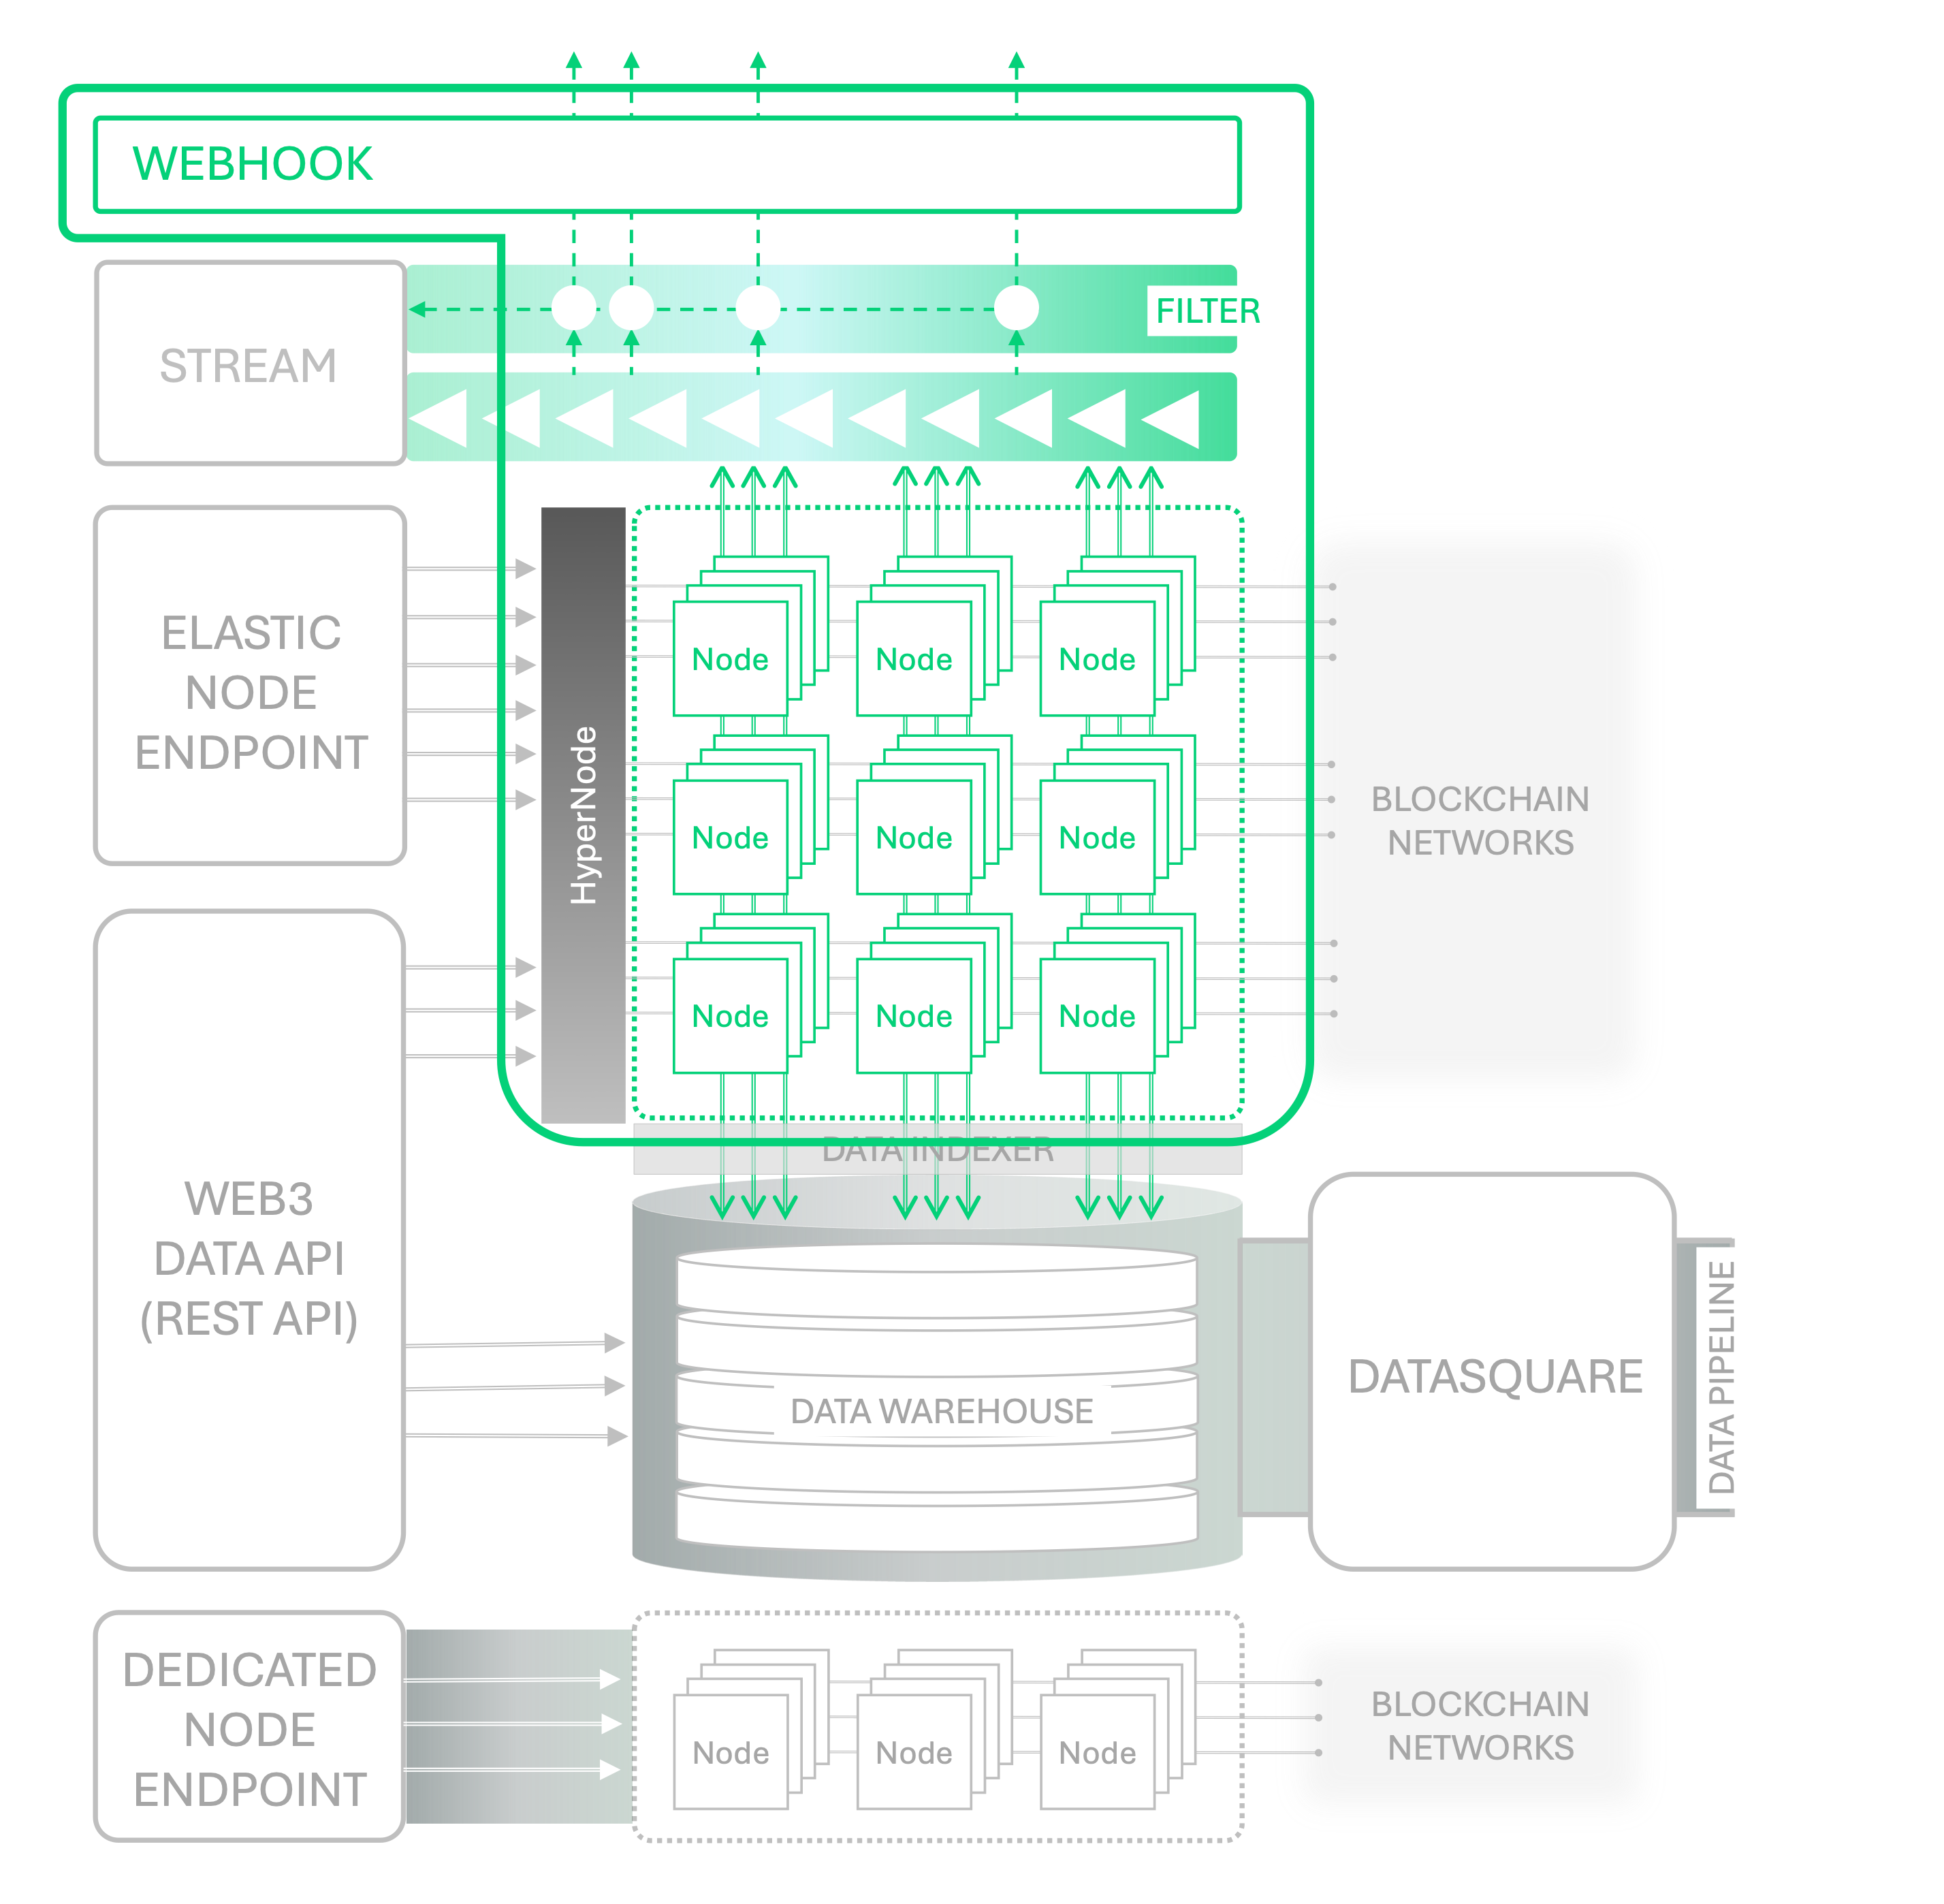
Nodit Webhook is a development tool that helps implement reactive applications for real-time events by delivering event occurrence information to the URL registered in the Webhook when a defined on-chain event occurs. You can receive information in real-time when important events occur on the blockchain, such as new transactions or changes in smart contract states.
Webhook automatically sends HTTP POST requests to a specified URL (user Endpoint) when specific events occur. These requests contain the type of event, related data, and other necessary information. The basic workflow of Webhook is as follows:
- Event Occurrence: Events such as new transactions, block creation, or smart contract interactions occur on the blockchain.
- Trigger: The Webhook is triggered by that event.
- Data Transmission: The Webhook automatically sends an HTTP POST request containing the occurred event data to the user-specified Endpoint.
Webhook Quickstart
Shall we define the events to subscribe to and create a Webhook by registering the Endpoint to receive Webhooks? Webhooks can be created through the Webhook menu in the Nodit console or through the API as follows.
Creating and Managing Webhooks through Nodit Console
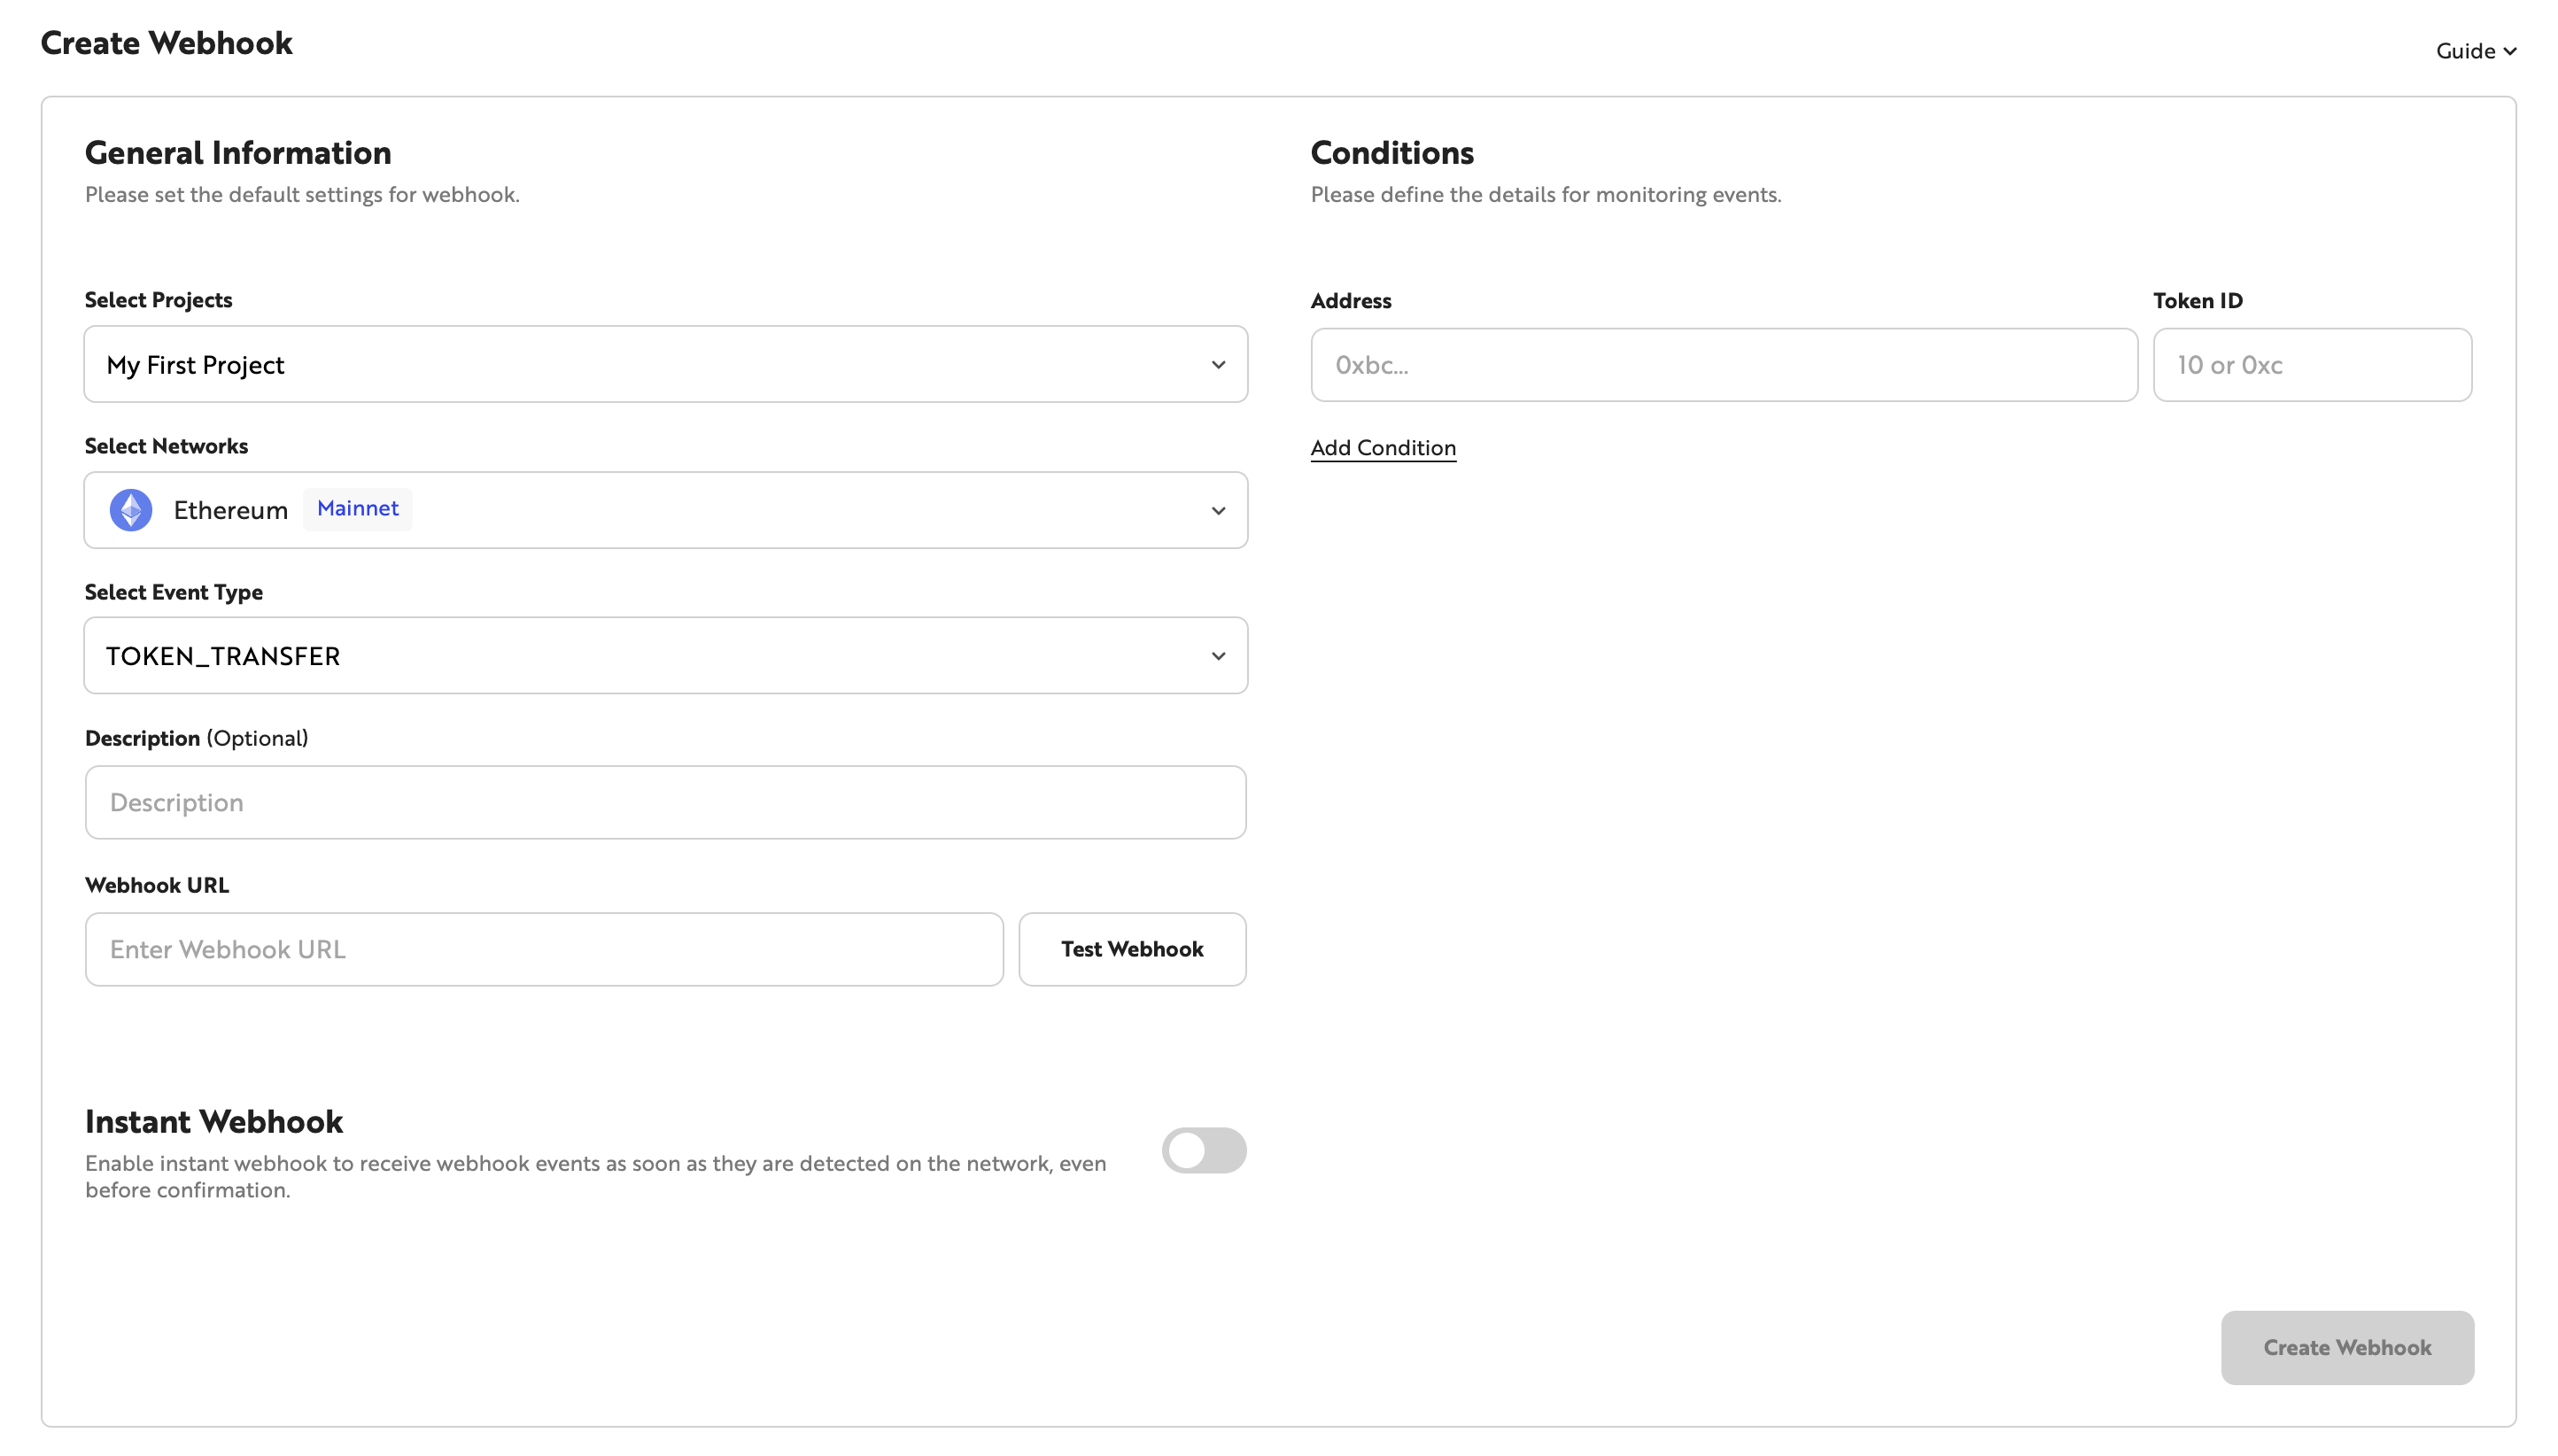
Creating a Webhook
You can create a new Webhook in the Webhook menu of the Nodit console. Select the target chain for events in the Select Networks area and select the event type you want to subscribe to in the Select Event Type area. After entering the Webhook URL to receive data when an event occurs, you can click the [Test Webhook] button to test whether the URL can receive messages normally. Then you can complete Webhook creation by setting the necessary data in the Conditions area on the right according to the selected Event Type.
The Instant Webhook option, newly supported from May 30, 2025, is an option that allows you to receive Webhook messages immediately when the event is detected by Nodit nodes, regardless of whether the block containing the monitored event is confirmed. It is suitable for projects that need immediate response to event occurrence and rapid notifications rather than event confirmation. It can be effectively utilized in applications where fast feedback is important, such as user action tracking, UI response improvement, and proactive risk detection.
If you disable the Instant Webhook option, messages are sent only after the block containing the event transaction is confirmed, just like existing Webhooks. Since events may not have finally occurred if blocks are rolled back or reorganized, it is recommended to use existing Webhooks by disabling the option when data finality is important.
💡 When creating or querying Webhooks using the API, you can enable/disable the option by setting the isInstant field to true or false.
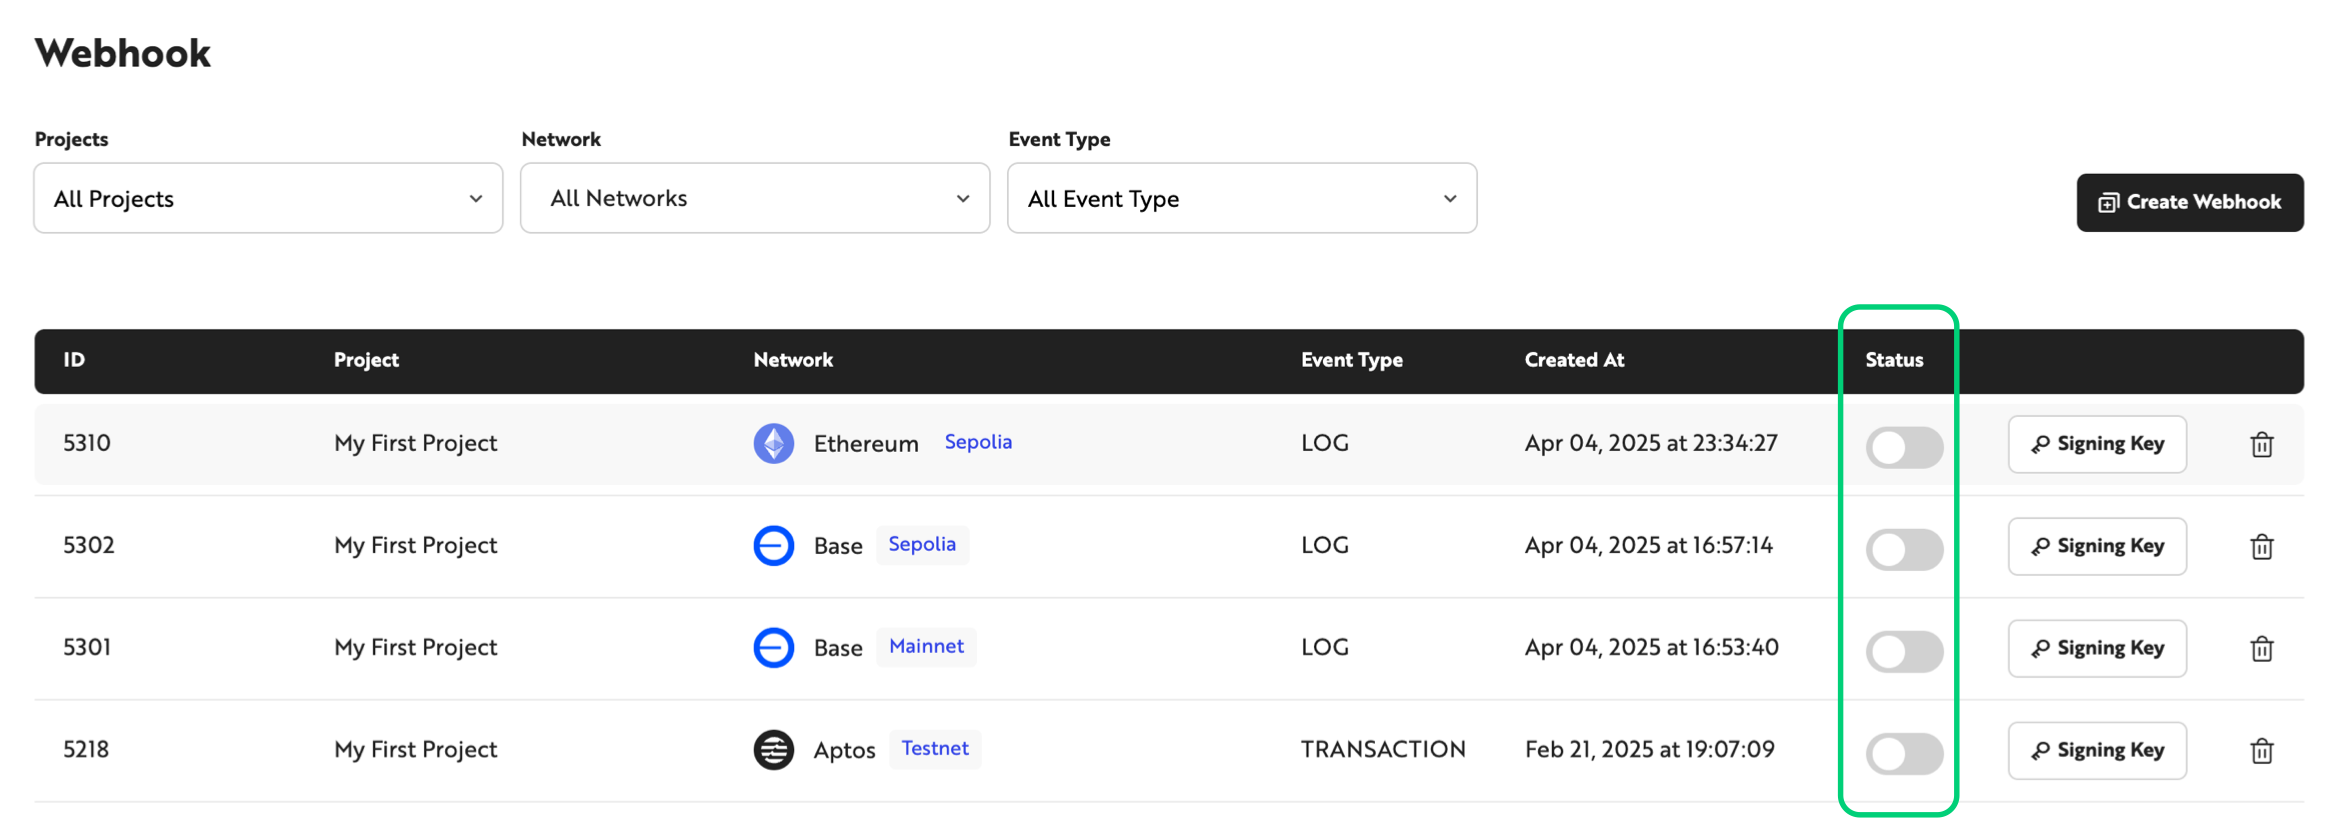
Checking and Managing Webhook List
Once Webhook creation is complete, you can check the ID, network, Event Type, creation date, status, and Signing Key information of the created Webhook in the Webhook list. Webhook status is classified as follows:
- Enabled status: Event monitoring defined in the Webhook is operating and can receive Webhook messages.
- Disabled status: Webhook event monitoring is disabled and cannot receive Webhook messages.
You can pause or resume Webhook message reception by clicking the toggle button to change the Webhook status. You can also delete unnecessary Webhooks by clicking the trash icon for each item. Since deleted Webhooks cannot be restored, please delete them carefully.
As of May 20, 2025, Nodit's plan policy has been partially changed, and now for Starter plan users, created Webhooks remain enabled for a maximum of 9 days. Webhooks for Starter plan accounts are automatically disabled at UTC 00:00:00 9 days after creation or reactivation, and a notice email is sent to the Nodit account email 2 days before deactivation. Disabled Webhooks can be reactivated directly through the Webhook menu in the console or through the API, and when reactivated, they can be used for up to 9 days again.
To continuously use Webhooks, please regularly check the status and reactivate them directly if necessary, or we recommend upgrading your plan if you want longer usage.
Creating and Managing Webhooks Using API
If you need to create and delete Webhooks in real-time depending on application implementation, management using APIs is possible. Refer to the Webhook API Reference to call APIs and check if Webhooks were created normally.
Visit the Nodit Console to create an account and try out the features in a free project.